
Table of Contents >> Show >> Hide
- Why Egg Carton Flowers Are Such a Great Upcycled Craft
- Supplies You Need
- Before You Start: A Few Smart Prep Tips
- How to Make Egg Carton Flowers Step by Step
- Easy Flower Variations to Try
- Common Mistakes and How to Avoid Them
- Creative Ways to Use Egg Carton Flowers Around the House
- Are Egg Carton Flowers Good for Kids?
- Lessons, Little Wins, and Real-Life Crafting Experiences
- Final Thoughts
Fresh flowers are lovely. Fresh flowers that never wilt, never complain about the weather, and happen to come from your recycling bin? Honestly, that is peak efficiency. If you have an empty paper egg carton sitting in the kitchen, you already have the main ingredient for one of the easiest spring crafts around. Upcycled egg carton flowers are charming, budget-friendly, and surprisingly pretty once you add paint, a little shaping, and your own creative flair.
This project works for kids, teens, adults, classrooms, rainy Saturdays, and anyone who enjoys turning ordinary household scraps into something that looks far more expensive than it should. The best part is that you do not need fancy tools or a studio that smells like artisanal ambition. A paper egg carton, paint, scissors, and glue can go a long way.
In this step-by-step guide, you will learn how to make egg carton flowers, how to shape different petal styles, what materials work best, how to avoid the usual craft fails, and several fun ways to display your finished blooms. By the end, you may start looking at breakfast packaging like it is a luxury craft supply. That is the upcycling life.
Why Egg Carton Flowers Are Such a Great Upcycled Craft
Egg carton flowers check nearly every box for a satisfying DIY project. They are inexpensive, eco-friendly, beginner-friendly, and easy to customize. You can make them soft and realistic, bright and playful, or bold enough to look like modern wall art. Because the carton material already has rounded cup shapes and pointed center peaks, it naturally lends itself to petals, blossoms, flower centers, and layered blooms.
Another reason this craft is so popular is flexibility. You can turn individual cups into simple daisies, use the center cones as trumpet-style blooms, or combine both parts into more dimensional flowers. Some crafters glue them onto branches, some create wreaths, some attach stems, and others arrange them on canvas for floral wall decor. In other words, you are not locked into one final look. The carton gives you a shape. Your imagination does the rest.
Supplies You Need
Basic Materials
- 1 paper egg carton
- Scissors
- Craft paint, acrylic paint, or washable tempera paint
- Paintbrushes
- Craft glue or glue stick for light pieces
- Hot glue for stronger assembly, with adult supervision
- A pencil for sketching cuts if needed
Optional Supplies for Decorating
- Buttons, beads, pom-poms, or paper circles for flower centers
- Pipe cleaners, floral wire, paper straws, or craft sticks for stems
- Green paper or cardstock for leaves
- Glitter, sealer, or decoupage medium for extra shine
- Canvas, cardboard base, wreath ring, or mason jar for display
Use a paper egg carton rather than foam if possible. Paper cartons are easier to cut, paint, and shape, and they give the finished flowers a handmade texture that looks more natural. Foam can work in a pinch, but paper usually gives the nicest result.
Before You Start: A Few Smart Prep Tips
First, make sure the egg carton is clean and dry. Nobody wants mystery omelet energy in a flower bouquet. If there are crumbs, dust, or bits of shell, brush them away. Then protect your work surface with newspaper, kraft paper, or an old placemat, especially if you are using thinned paint.
If younger kids are joining in, keep the shapes simple and let an adult handle any hot glue or craft knife work. Rounded-tip safety scissors are a good option for little hands, while older crafters can use regular scissors for more detailed petal shaping.
How to Make Egg Carton Flowers Step by Step
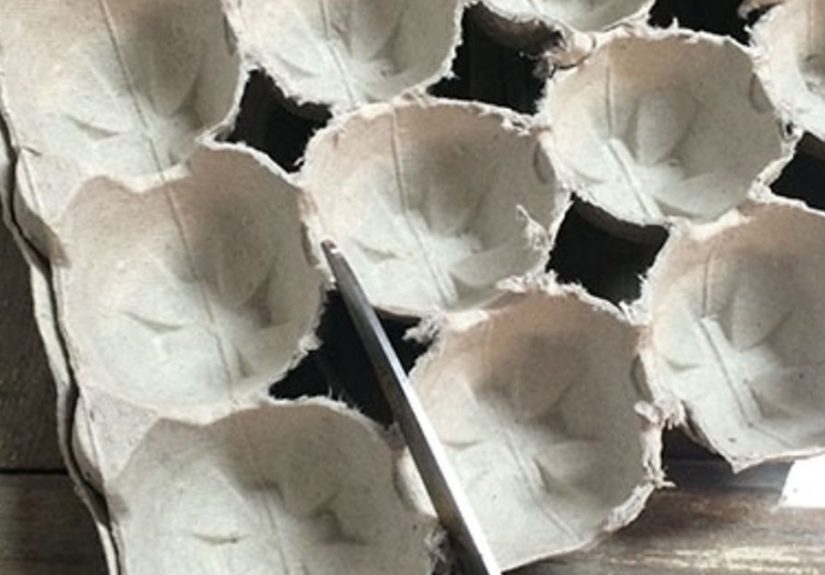
Step 1: Separate the Carton Parts
Open your egg carton and study the shapes. You will usually see two parts you can use:
- The egg cups, which make great flower bases
- The center peaks or cones, which work beautifully as flower centers or smaller blossoms
Cut the lid and extra flat flaps away first so you are left with the usable cup section. Then cut out individual egg cups. If your carton has tall center cones between the cups, trim those out separately. These pieces are pure crafting gold, so do not toss them.
Step 2: Shape the Petals
Now comes the fun part. Turn each cup into a flower by cutting downward from the rim toward the bottom to create petals. Four cuts give you a simple flower shape, but you can make five or six narrower petals if you want something more delicate.
Round the tips for a daisy-style flower, point them for a more dramatic bloom, or leave the edges slightly uneven for a rustic garden look. You can even gently tear parts of the edge with your fingers if you like extra texture. No two flowers have to match. Nature itself is not out here using copy-paste.
Step 3: Trim the Center Cones
The cone-shaped dividers in the middle of the carton can become small blossoms, tulip-like centers, or layered floral details. Trim around the base, then snip the top into four petals. These pieces are perfect for stacking inside larger flower cups to create more dimension.
If you want a fuller flower, glue one smaller cone piece inside a larger cup flower. That layered look makes the bloom feel more finished and less like it came from a carton that spent Tuesday holding eggs.
Step 4: Paint the Flowers
Once your pieces are cut, paint them inside and out. Acrylic paint works well for rich color, while washable tempera is great for easy cleanup. For a softer, more vintage look, thin the paint slightly with water. This helps the carton texture show through and gives the flowers a hand-painted, airy finish.
Try color combinations like these:
- Pink petals with yellow centers
- White petals with coral or peach interiors
- Lavender flowers with dark purple centers
- Bold mixed colors for a playful spring bouquet
Let everything dry completely before assembling. If the first coat looks patchy, add a second coat. Cardboard and paper fibers love to drink paint like they have been wandering the desert.
Step 5: Add Flower Centers
After the paint dries, glue a button, bead, pom-pom, paper circle, or mini cone into the middle of each flower. This little detail makes a huge difference. It adds contrast, polish, and the illusion of a more complex design without much extra work.
For a natural look, choose centers in yellow, brown, or orange. For something whimsical, go wild with metallic beads, glittery pom-poms, or mismatched buttons from your craft drawer.
Step 6: Attach Stems
If you want a bouquet, glue the flowers to stems. Green pipe cleaners are the easiest option because they are flexible and already stem-colored. Floral wire also works well, especially if you want to bend and arrange the flowers more precisely. Paper straws and painted craft sticks are great for a sturdier, kid-friendly version.
Attach the stem to the back of the flower with strong craft glue or hot glue. Hold it in place until secure, then let it set fully before moving the flower around. If you want leaves, cut simple leaf shapes from green cardstock and glue them onto the stem.
Step 7: Arrange and Display
Now decide what your flowers are becoming. You have options, and all of them are cute enough to earn shelf space.
- Bouquet: Place several finished flowers in a jar, tin can, or vase.
- Wreath: Glue flowers onto a cardboard or craft-ring base with paper leaves.
- Wall art: Arrange them on a painted canvas or recycled cardboard panel.
- Centerpiece: Group blossoms around candles, branches, or moss for a spring table display.
- Gift topper: Add one flower to wrapped presents for an extra handmade touch.
Easy Flower Variations to Try
Simple Daisy
Use one egg cup, cut five rounded petals, paint it white or yellow, and glue a contrasting button in the center. This is the easiest style and perfect for beginners.
Layered Blossom
Combine a large flower cup with a smaller cone flower inside it. Paint the layers in two different colors for depth. This one looks more detailed but is still very easy to make.
Tulip-Style Bloom
Use a center cone and cut only a few long petals. Keep the shape more upright rather than fully open. Attach to a longer stem and pair with large leaves.
Rustic Wildflower
Cut uneven petals and use lighter, washed paint for a soft, slightly shabby-chic finish. This style looks especially nice in neutral home decor.
Common Mistakes and How to Avoid Them
Using Too Much Paint
If the carton gets soaked, it can become floppy or warped. Use light coats and let them dry in between. Thin paint is helpful, but drenching the material is not.
Cutting Petals Too Deep
If you cut all the way to the bottom, the flower may fall apart. Leave enough material at the base so the shape stays intact.
Skipping Dry Time
Yes, patience is annoying. Yes, it matters. If you glue wet petals together, the colors may smear and the pieces may not stick well.
Making Every Flower Identical
The beauty of handmade flowers is variation. Mix shapes, colors, and petal sizes for a bouquet that feels lively and natural.
Creative Ways to Use Egg Carton Flowers Around the House
Once you start making these, you will quickly realize they can do more than sit in a jar looking adorable. Try using them as party decor for spring birthdays, baby showers, or Easter tables. Make mini blooms for gift wrapping or scrapbooking. Glue a few onto a picture frame. Add them to a wreath for your front door. Make a floral name sign for a child’s room. Or create a whole wall panel if you suddenly feel like your home needs more cheerful cardboard flowers, which is a sentence you probably did not expect to agree with today.
These flowers also make thoughtful handmade gifts. A small bouquet in a recycled jar feels personal without being expensive, and a floral canvas can be a sweet Mother’s Day, teacher, or thank-you gift. It is one of those projects that looks lovingly handmade rather than “I panicked and attacked the recycling bin,” even though that may be exactly what happened.
Are Egg Carton Flowers Good for Kids?
Yes, especially when the project is adapted to the child’s age. Younger kids can help paint and glue pre-cut pieces. Older kids can cut simple petals and design their own flowers. Adults should handle hot glue, sharp tools, or detailed trimming when needed.
This craft is also great for teaching resourcefulness. It shows kids that creative projects do not always start with store-bought kits. Sometimes the best art supplies are the things you nearly threw away after breakfast.
Lessons, Little Wins, and Real-Life Crafting Experiences
The first time I made upcycled egg carton flowers, I expected them to look charming in a “homemade and emotionally supportive” sort of way. What I did not expect was how genuinely pretty they could be with a little patience. My first few flowers were wonky. One looked less like a blossom and more like a suspicious sea creature. Another had petals so uneven it seemed personally offended by symmetry. But after a handful of tries, something clicked. The carton shapes began to make sense, and I started seeing the design potential in every cup and cone.
One of the biggest lessons I learned is that imperfect flowers almost always look better together than perfect flowers lined up like soldiers. When I stopped trying to make every bloom identical, the bouquet suddenly looked more natural and much more interesting. A slightly bent petal here, a rough edge there, a center painted in a contrasting color instead of the “correct” one, all of that gave the arrangement character. Real flowers are not machine-made, and your carton blooms do not need to be either.
I also learned that color does most of the heavy lifting. Even a basic flower shape can look surprisingly polished with a smart paint palette. Soft pink and cream make the flowers feel delicate and vintage. Bright orange, teal, and yellow make them playful and kid-friendly. White petals with darker painted centers give them a modern farmhouse look. A second coat of paint often transforms a flower from “cute craft” to “wait, did you actually buy that?” which is one of the nicest compliments a recycled project can receive.
Another experience worth sharing: display matters more than people think. The same egg carton flowers can look totally different depending on how you use them. In a mason jar with paper straw stems, they feel cheerful and casual. On a wreath, they look intentional and decorative. On a painted canvas, they start reading like textured wall art. I once glued a few onto a gift package with kraft paper and twine, and the wrapping nearly stole the show from the gift itself. That is both delightful and mildly inconvenient.
These flowers are also the kind of project that improves with leftovers. A single carton may not seem like much, but after saving a few, you can build full arrangements, layered wreaths, or oversized floral boards. That makes the craft feel less like a one-off afternoon activity and more like a small creative habit. You cut a few shapes one day, paint a few more the next, and before long you have a whole collection of blooms made from something most people would never notice twice.
Most of all, egg carton flowers remind me that crafting does not have to be expensive, perfect, or overly serious to be satisfying. Sometimes the joy comes from turning humble materials into something unexpectedly lovely. Sometimes it comes from making a mess with paint and ending up with a bouquet that lasts longer than any grocery-store flowers ever could. And sometimes it comes from proudly saying, “Yes, that started as an egg carton,” while acting only slightly smug about your recycling-bin brilliance.
Final Thoughts
If you want an easy recycled craft that feels creative, practical, and genuinely fun, upcycled egg carton flowers are hard to beat. They use simple supplies, offer lots of room for personalization, and can become everything from a quick kid project to pretty home decor. Whether you make one daisy or a whole blooming wreath, the process is approachable and the results are delightfully cheerful.
So the next time you finish a carton of eggs, do not toss it too quickly. It might be one coat of paint away from becoming your next favorite DIY project. Breakfast leftovers have never looked so botanical.


