
Table of Contents >> Show >> Hide
- Why Remove Audio from an iPhone Video?
- Method 1: Remove Sound from an iPhone Video Using the Photos App
- Method 2: Remove Sound from an iPhone Video Using iMovie
- Photos vs. iMovie: Which Method Is Better?
- Will Removing Audio Reduce Video Quality?
- Can You Remove Only Background Noise but Keep Voices?
- Tips Before Sharing a Muted iPhone Video
- Common Problems and Quick Fixes
- My Practical Experience Removing Sound from iPhone Videos
- Conclusion
Sometimes a video looks perfect but sounds like a raccoon joined a marching band inside a wind tunnel. Maybe your iPhone captured a private conversation, loud traffic, background music you cannot use, or your enthusiastic breathing while filming your dog doing absolutely nothing for 47 seconds. Good news: you do not need advanced editing software to fix it. You can remove sound from an iPhone video using tools already available on your device.
This guide explains how to remove sound from an iPhone video with two easy methods: the built-in Photos app and Apple’s iMovie app. The Photos app is fastest when you simply want a silent version of a clip. iMovie is better when you want more control, such as lowering volume, removing sound from one clip in a project, replacing audio with music, or exporting a fresh edited video.
Both methods are beginner-friendly, free, and useful for everyday video cleanup. Whether you are preparing a clip for Instagram, TikTok, YouTube Shorts, a school presentation, a work message, or a family group chat where chaos already has enough volume, these steps will help you create a clean silent video in minutes.
Why Remove Audio from an iPhone Video?
Removing audio from a video may sound like a tiny edit, but it can make a big difference. A clip with distracting sound can feel messy, unprofessional, or even risky to share. A silent video, on the other hand, gives you more control over what viewers notice.
Here are common reasons to mute an iPhone video:
- Privacy: You may have recorded names, addresses, conversations, or personal details in the background.
- Background noise: Wind, traffic, fans, barking dogs, and crowd noise can ruin an otherwise useful video.
- Social media polish: Many creators mute original audio before adding music, captions, or voiceover.
- Professional use: Silent product demos, screen recordings, and visual explainers often look cleaner without raw audio.
- Copyright concerns: If copyrighted music is playing in the background, muting the clip can help avoid platform issues.
- Better storytelling: Sometimes the video itself says enough. Not every sunset needs Uncle Bob discussing parking fees.
The best method depends on what you want to do next. If you only need to remove sound from one saved video, use Photos. If you want to combine clips, add music, trim sections, or create a finished project, use iMovie.
Method 1: Remove Sound from an iPhone Video Using the Photos App
The Photos app is the easiest way to mute a video on iPhone. It is already installed, works quickly, and does not require a separate video editing app. This method is ideal when you have one video in your library and simply want to turn off its original sound.
When to Use the Photos App
Use this method if you want to:
- Mute a single iPhone video fast
- Remove background noise before sharing
- Keep the visual part of the video unchanged
- Avoid downloading another app
- Create a silent clip for social media or messaging
The Photos method is the “I need this fixed before I send it” option. It is quick, simple, and surprisingly handy.
Steps to Remove Audio in the Photos App
- Open the Photos app on your iPhone.
- Find and tap the video you want to mute.
- Tap Edit.
- Look for the speaker icon. On many iPhone models and iOS versions, it appears near the top-left area of the editing screen.
- Tap the speaker icon so it changes from active sound to muted sound.
- Tap Done to save the change.
That is it. Your video should now play without sound. The picture remains the same, but the original audio is disabled. It is like putting noise-canceling headphones on the video itself.
Can You Restore the Sound Later?
In many cases, edits made in the iPhone Photos app are reversible. If you decide later that you miss the sound of wind attacking your microphone, you can open the video, tap Edit, and check whether the audio can be turned back on or the video can be reverted. Apple often allows non-destructive edits in Photos, but options can vary depending on the iOS version, file type, and how the video was saved or shared.
For extra safety, make a duplicate before editing. Open the video, tap the share button, and choose Duplicate if available. Then mute the copy. This gives you one silent version and one original version with audio. Future you will appreciate this tiny act of organization.
Important Limitations of the Photos Method
The Photos app is great for simple muting, but it is not a full audio editing studio. It generally works best when you want to remove sound from the whole video. It is not the best choice if you need to mute only three seconds in the middle, remove a single voice while keeping background music, or separate audio tracks like a professional editor.
Also, if your goal is to replace the original sound with music, a voiceover, or multiple clips, use iMovie instead. Photos is excellent for a fast mute. iMovie is better for creative editing.
Method 2: Remove Sound from an iPhone Video Using iMovie
Apple’s iMovie is a free video editing app for iPhone that offers more control than Photos. It lets you create movie projects, arrange clips on a timeline, adjust audio, mute clips, detach audio, delete audio, add music, and export a new video. In short, it is the better choice when you want to do more than press one mute button and call it a day.
When to Use iMovie
Choose iMovie if you want to:
- Mute one clip inside a larger project
- Lower the volume instead of removing it completely
- Detach audio from video and delete it separately
- Add background music or narration
- Combine several videos into one silent or edited movie
- Export a new copy while keeping the original video untouched
iMovie takes a little longer than Photos, but it gives you more editing power. It is like upgrading from a butter knife to a kitchen knife. Still friendly, just sharper.
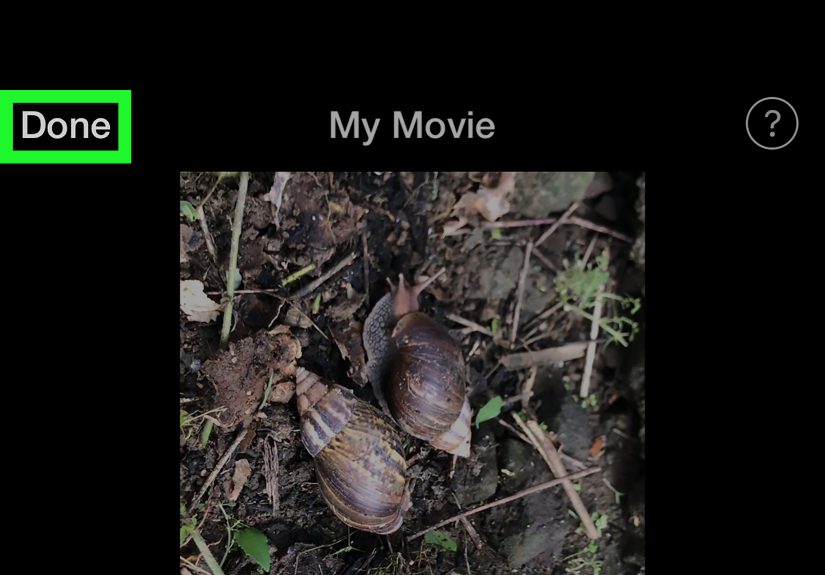
Steps to Mute a Video in iMovie
- Open iMovie on your iPhone. If it is not installed, download it from the App Store.
- Start a new project and choose Movie.
- Select the video you want to edit, then add it to the project.
- Tap the video clip in the timeline to reveal editing controls.
- Tap the Audio button.
- Use the volume slider to reduce the volume to zero, or tap the mute button if available.
- Preview the video to make sure the sound is gone.
- Tap Done.
- Use the share/export option to save the edited video to your Photos library.
This creates a new exported video without the original sound. The original clip in Photos should remain available unless you delete it yourself.
How to Detach and Delete Audio in iMovie
If you want a more precise workflow, you can detach the audio from the video clip. When audio is detached, iMovie separates it into its own audio layer beneath the video. You can then delete the audio layer, trim it, move it, or edit it independently.
Here is the general process:
- Open your video project in iMovie.
- Tap the video clip in the timeline.
- Tap the Actions option.
- Choose Detach.
- A separate audio clip appears below the video.
- Select that detached audio clip and delete it, or lower its volume to zero.
- Export the project as a new video.
This method is especially useful when you want to keep the video but remove or replace the original audio. For example, you may want to delete noisy camera audio and add a calm voiceover, soft music, or no sound at all.
Photos vs. iMovie: Which Method Is Better?
Both methods work, but they serve slightly different needs. Think of Photos as the fast fix and iMovie as the flexible editor.
Use Photos If You Want Speed
The Photos app is best for quick edits. If you recorded a video and need to mute the whole clip before sending it to someone, Photos is the easiest option. You do not need to build a project, export a timeline, or learn editing tools. Open, edit, tap the speaker icon, done.
Use iMovie If You Want Control
iMovie is better when you are creating content. If you are editing a vlog, tutorial, product demo, travel montage, or school project, you may need more than silence. You might want to add transitions, combine clips, lower volume, detach audio, add music, or export a polished final version. That is where iMovie earns its spot.
Will Removing Audio Reduce Video Quality?
Muting a video in Photos usually does not change the visual content in a noticeable way. With iMovie, the video is exported as a new file, so quality can depend on the export settings, original resolution, and compression. For everyday sharing, the difference is usually minor. For professional use, keep the original video and export at the highest quality available.
A smart habit is to save a backup before making changes. This is especially important if the video is important, rare, or emotionally valuable. You can always re-edit a backup. You cannot re-record your toddler’s first steps, your pet’s one heroic leap, or that perfect vacation clip where nobody blinked.
Can You Remove Only Background Noise but Keep Voices?
Removing all sound is easy. Removing only certain sounds is harder. The Photos app and iMovie can mute or reduce audio, but they are not designed to magically remove one specific noise while keeping everything else perfect. If your video has wind noise, traffic, or echo, you may be able to improve it with more advanced audio tools, but results vary.
Some newer iPhone models and iOS features offer improved audio recording and editing options, such as Spatial Audio and Audio Mix on supported devices. These tools can help adjust how voices and background sounds are emphasized, but they are not the same as completely deleting one unwanted sound from a mixed recording.
If you need professional audio cleanup, consider using desktop editing software or a specialized audio enhancement tool. But if your goal is simply to remove sound from an iPhone video before sharing, Photos and iMovie are more than enough.
Tips Before Sharing a Muted iPhone Video
Preview the Video First
Always play the full video after muting it. Make sure the sound is actually gone and the video still looks right. A five-second check can save you from accidentally sharing the wrong version.
Add Captions When Needed
If your video contains important spoken information, removing the audio may make it confusing. Add captions, text overlays, or a short description so viewers understand what is happening. Silent videos perform well online when the message is still clear without sound.
Keep the Original File
Do not delete the original immediately unless you are absolutely sure. Keep it in your library, iCloud, Files, or another backup location. Original footage is useful if you later want to make a different edit.
Check Platform Requirements
Some platforms autoplay videos without sound, while others may show a muted icon. If you are posting to social media, preview the upload before publishing. Make sure the video looks intentional, not accidentally silent.
Common Problems and Quick Fixes
The Speaker Icon Is Missing in Photos
If you cannot find the speaker icon, make sure you tapped Edit first. Also check whether your iPhone is running a recent version of iOS. Interface details can change slightly between updates, so the icon may appear in a different area of the editing screen.
The Video Still Has Sound After Sharing
Make sure you saved the edited version before sharing. If you are using iMovie, export the finished project and share the exported video, not the original clip.
iMovie Feels Too Complicated
Use Photos instead. If all you need is silence, there is no reason to turn a two-tap task into a mini film school assignment.
I Want to Add Music After Removing Sound
Use iMovie. Mute or detach the original audio, then add a music track or voiceover. Just make sure you have the right to use any music you add, especially for public posts.
My Practical Experience Removing Sound from iPhone Videos
In real life, removing audio from an iPhone video is one of those small edits that suddenly feels essential once you know how to do it. The first time many people need it, the reason is not artistic. It is usually something very human: a loud sneeze, a private comment, a TV playing in the background, a child yelling “I need snacks,” or someone giving directions with the confidence of a broken GPS. The video itself may be perfect, but the audio makes it unshareable.
For quick personal clips, the Photos app is usually the best experience. It is fast enough that you can mute a video while standing in line for coffee. Open the clip, tap Edit, tap the speaker icon, and save. That simplicity matters. Most people do not want to open a full video editor just to remove three seconds of awkward background noise. Photos keeps the process calm and easy, which is exactly what you want when you are trying to send a clean video quickly.
One useful habit is to duplicate important videos before muting them. This is especially helpful for family clips, event footage, travel videos, or anything you may want to reuse later. A silent version is great for posting, but the original audio may still matter someday. Maybe the background sound captures laughter, music, or a voice you want to keep. Duplicating the video gives you both options without turning your camera roll into a regret museum.
For content creation, iMovie feels more practical. If you are making a short tutorial, a product video, a recipe clip, or a travel montage, removing the original sound is often only step one. After that, you may want background music, a voiceover, smoother cuts, or text. iMovie handles that better than Photos because it treats the video as part of a project. You can mute one clip, keep sound in another, detach audio, or adjust volume levels. That control makes the final video feel more intentional.
Another lesson: silent videos often need visual support. If you remove someone speaking, add captions. If you mute a how-to video, add text instructions. If you post a silent product demo, use close-up shots and clear labels. Without audio, viewers rely on the visuals to understand the message. A muted video can look polished, but only if the story still makes sense.
It is also worth thinking about privacy before posting. iPhone microphones can pick up more than you realize: names, addresses, jokes, conversations, music, background announcements, and random household sounds. Muting a video before uploading can protect other people as well as yourself. It is a tiny step, but it can prevent awkward moments.
Finally, do not overcomplicate the task. If you need a silent copy, use Photos. If you need a finished edited video, use iMovie. Those two methods cover most everyday situations. The best editing tool is not always the most powerful one; it is the one that gets the job done without making you question your life choices. In this case, your iPhone already has everything you need to remove sound and share a cleaner, quieter, more professional-looking video.
Conclusion
Learning how to remove sound from an iPhone video is simple, useful, and surprisingly powerful. The Photos app gives you the fastest way to mute a saved video with just a few taps. iMovie gives you more control when you want to edit a project, detach audio, lower volume, or add new sound. For most users, these two methods are enough to handle everyday video cleanup without paid software or complicated editing skills.
If you are sharing a casual clip, use Photos. If you are creating polished content, use iMovie. Either way, preview your final video, keep a backup of important originals, and add captions or text when silence might make the video unclear. A great video does not always need sound. Sometimes silence is exactly what saves the clip.
Note: Menu names and icon placement may vary slightly depending on your iPhone model and iOS version, but the Photos and iMovie workflows remain the easiest built-in ways to remove sound from an iPhone video.


