Table of Contents >> Show >> Hide
- Why a Tiny Door Gap Can Feel Like a Giant Money Leak
- The Under-$5 Fix: Door Corner Seals
- Why Draft-Proofing Doors Is Worth Doing
- How to Find the Draft Before Buying Anything
- Best Low-Cost Products for Stopping Door Drafts
- How to Install Door Corner Seals
- When a Door Sweep Makes More Sense
- Weatherstripping the Sides and Top
- DIY vs. Professional Weatherstripping
- Common Mistakes to Avoid
- Who Should Buy the Under-$5 Door Corner Seals?
- My Real-World Experience: The $5 Fix That Made the Hallway Less Miserable
- Final Verdict: Small Seal, Big Comfort Potential
Note: This article is written for web publishing and is based on real home-improvement and energy-efficiency guidance. Product prices mentioned are deal-based and may change, because online prices enjoy sprinting around like a caffeinated squirrel.
Why a Tiny Door Gap Can Feel Like a Giant Money Leak
A drafty door is one of those small household problems that behaves like it pays rent. It whistles, chills your toes, annoys your thermostat, invites dust, and makes your heating or cooling system work harder than it should. The good news? You do not need a contractor, a toolbox the size of a refrigerator, or a dramatic home-renovation montage to fix it.
The idea behind “Stopping Drafts at the Door Costs Less Than $5 Right Now – Bob Vila” is simple: one of the cheapest weatherization upgrades can make a noticeable comfort difference. Bob Vila highlighted low-cost door corner seals priced under $5 during a seasonal deal, along with other practical draft-fighting products like door sweeps, EPDM weatherseal tape, under-door seals, and draft stoppers.
That matters because doors are one of the most common places where conditioned indoor air escapes. Cold air sneaks in during winter. Hot, humid air creeps in during summer. Your HVAC system responds by running longer, your energy bill climbs, and suddenly that innocent little gap under the door starts acting like a subscription service you never signed up for.
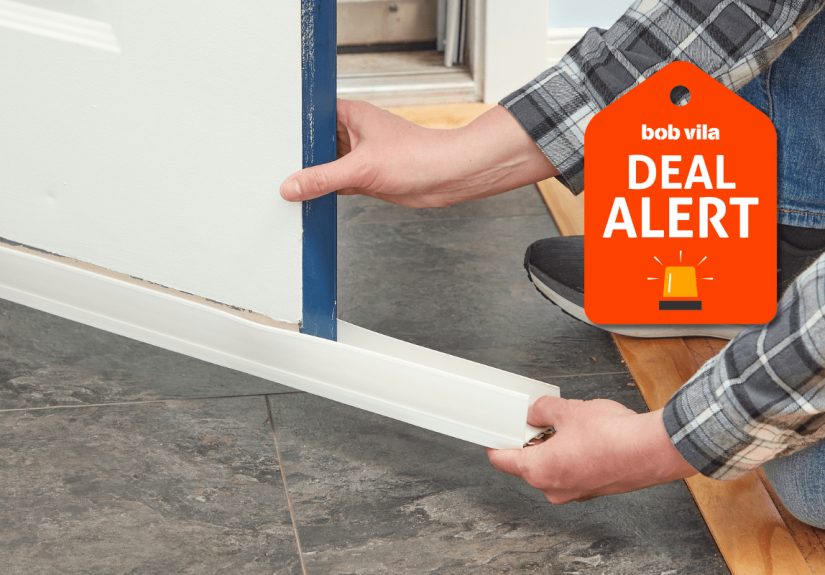
The Under-$5 Fix: Door Corner Seals
The headline-worthy bargain is a pack of door corner seals. These small adhesive pads are designed for the lower corners of a door frame, especially near the hinge side and latch side. Those areas are easy to overlook because most people focus on the long strip under the door. But corners are sneaky. They are the home-improvement equivalent of the last French fry at the bottom of the bag: small, but important.
Door corner seals help fill little triangular spaces where air can leak even after a door sweep or weatherstripping has been installed. They are usually peel-and-stick, quick to apply, and renter-friendly if removed carefully. For less than the cost of a fancy coffee, they can improve the seal around a door that otherwise feels mysteriously chilly.
What Door Corner Seals Do Best
Door corner seals are not meant to replace a full weatherstripping system. Think of them as the final puzzle piece. They work best when the door already closes properly but still has tiny leaks near the bottom corners. They can help reduce drafts, light leaks, dust, and small insect entry points. They may also help a door sweep perform better by covering the tiny gaps the sweep cannot reach.
If your door has a massive gap, cracked frame, warped slab, or threshold damage, corner seals alone will not perform miracles. They are helpful, not magical. Sadly, they will not fix your utility bill, your squeaky hinge, and your habit of leaving the door open while yelling, “I’m just grabbing the mail!”
Why Draft-Proofing Doors Is Worth Doing
The U.S. Department of Energy recommends weatherstripping around movable building components like doors and operable windows, while caulk is better for stationary cracks and gaps. ENERGY STAR also notes that sealing air leaks and improving insulation can make a home more comfortable and more energy efficient, with potential annual energy savings depending on the condition of the home.
In plain English: when your house leaks air, your HVAC system has to replace that lost comfort. In winter, heated air escapes. In summer, cooled air escapes. Either way, your system keeps running, and your wallet quietly starts writing a complaint letter.
Draft-proofing a door can also improve everyday comfort in ways you notice immediately. Floors near the entry may feel less icy. Rooms may hold temperature better. You may hear less outdoor noise. Dust and pollen may have fewer entry points. The house may simply feel less “old cabin in a survival movie” and more “comfortable place where socks are optional.”
How to Find the Draft Before Buying Anything
Before adding seals, sweeps, or tape, inspect the door. You want to identify exactly where the air is entering. A quick visual check can reveal daylight under the door, cracked weatherstripping, loose thresholds, or flattened rubber seals.
Try the Hand Test
On a windy day, slowly move your hand around the door frame, especially the bottom, latch side, hinge side, and top corners. If you feel moving air, you have found the culprit. Congratulations: your hand is now a highly advanced diagnostic tool.
Try the Dollar Bill Test
Close the door on a dollar bill. If it slides out too easily, the seal may be loose in that area. Repeat along the sides and top of the door. You do not need to use an actual dollar if you are emotionally attached to it. A strip of paper works, too.
Look for Daylight
Turn off indoor lights during the day and inspect the door edges. If you see daylight, air can likely pass through as well. This is especially common near thresholds and corners.
Best Low-Cost Products for Stopping Door Drafts
There is no single perfect product for every drafty door. The right fix depends on where the leak is located. The under-$5 corner seal is a smart budget win, but many homes benefit from combining two or three small upgrades.
1. Door Corner Seals
Best for: lower hinge-side and latch-side corner leaks.
Door corner seals are ideal when the door almost seals well but still allows air at the bottom corners. They are easy to install and inexpensive, making them a great first step for homeowners and renters who want a fast comfort improvement.
2. Door Sweeps
Best for: gaps under exterior doors.
A door sweep attaches to the bottom of the door and blocks air from passing underneath. Some models screw on, while others use adhesive. Slide-on U-shaped sweeps can be especially useful because they cover both sides of the door bottom and require no drilling. For exterior doors, a sweep should lightly contact the threshold without making the door hard to open or close.
3. Self-Adhesive Weatherstripping Tape
Best for: side and top frame gaps.
Foam, rubber, vinyl, and EPDM weatherstripping tapes compress when the door closes, filling uneven gaps around the jamb. EPDM rubber is often valued for durability and rebound, meaning it can compress and spring back repeatedly without flattening too quickly.
4. V-Seal or Tension-Seal Weatherstripping
Best for: narrow, consistent gaps around the door frame.
V-seal weatherstripping folds into a V shape and expands slightly to block air. It can be a good option where foam tape is too bulky or where the door needs a slimmer seal.
5. Draft Stoppers or Door Snakes
Best for: renters, interior doors, temporary fixes, and “I need this fixed before dinner guests arrive.”
A draft stopper sits along the bottom of a door. It does not require installation, and some versions are weighted or washable. It is not as permanent as a door sweep, but it is simple, portable, and excellent for blocking drafts under bedroom doors, basement doors, or apartment entries.
How to Install Door Corner Seals
Most door corner seals are simple peel-and-stick products, but installation still matters. Adhesive products fail quickly when applied to dirty, damp, dusty, or cold surfaces. A few minutes of prep can save you from finding the seal stuck to your sock two days later.
Step 1: Clean the Surface
Wipe the lower corners of the door frame with mild soap and water, then dry the area completely. If there is old adhesive, paint buildup, or grit, remove it carefully.
Step 2: Test the Door
Open and close the door to make sure it moves freely. If the door rubs badly or the threshold is misaligned, fix that first. A seal should improve the fit, not start a wrestling match every time you leave the house.
Step 3: Place the Seal
Position the corner seal where the door meets the lower jamb. It should cover the small gap without preventing the door from closing. Once the placement looks right, peel off the backing and press firmly.
Step 4: Check the Seal
Close the door and inspect the edges. The seal should compress slightly. If the door will not latch, the seal may be too thick or placed too far inward.
When a Door Sweep Makes More Sense
If the main draft comes from the bottom of the door, a corner seal alone is not enough. A door sweep is the better fix. Lowe’s and other home-improvement guides recommend measuring and trimming the sweep to fit, aligning it so it touches the threshold, and securing it with screws or adhesive depending on the product type.
For adhesive door sweeps, draw a level placement line before removing the backing. For screw-on sweeps, drill pilot holes carefully and avoid drilling through the door. The sweep should block air while still allowing the door to open smoothly. A sweep that scrapes like a shovel across concrete is not installed correctly; it is auditioning for a sound-effects job.
Weatherstripping the Sides and Top
If air leaks around the sides or top of the door, use weatherstripping tape or compression seals. Home Depot recommends installing weatherstripping on the top, bottom, and latching side for best results, while This Old House emphasizes measuring the gaps before choosing the material. That is important because weatherstripping that is too thin will not seal, and weatherstripping that is too thick can stop the door from closing properly.
For best results, remove old, damaged weatherstripping before applying new material. Clean the surface, let it dry, cut the strip to size, and press it firmly into place. Then close the door and test the fit. You should feel resistance, but not like you are sealing a submarine hatch.
DIY vs. Professional Weatherstripping
Most door draft fixes are very DIY-friendly. Corner seals, adhesive sweeps, foam tape, and draft stoppers are affordable and simple. However, professional help may be worth considering if the door is warped, the frame is damaged, the threshold is rotten, or multiple exterior doors need repair.
Professional weatherstripping can cost far more than DIY materials, often running into the hundreds of dollars per door depending on labor, materials, and repairs. That is why starting with a small under-$5 improvement makes sense. It lets you solve the easy leaks first before spending money on bigger fixes.
Common Mistakes to Avoid
Using the Wrong Seal Thickness
Too thin, and the air still leaks. Too thick, and the door will not close. Measure the gap first and match the product to the problem.
Installing Adhesive on a Dirty Surface
Adhesive weatherstripping needs a clean, dry surface. Dust and moisture are basically eviction notices for sticky backing.
Ignoring the Door Threshold
If the threshold is damaged or badly adjusted, a sweep may not seal properly. Some thresholds can be adjusted upward or downward to improve contact with the sweep.
Expecting One Product to Fix Every Leak
A complete seal often requires a sweep for the bottom, weatherstripping for the sides and top, and corner seals for the lower gaps.
Who Should Buy the Under-$5 Door Corner Seals?
This tiny upgrade is a smart buy for anyone who sees daylight or feels air at the lower corners of an exterior door. It is especially useful for older homes, apartments, basement entries, garage access doors, and side doors that do not get much attention until winter starts doing push-ups in the hallway.
It is also a good option for renters because it is inexpensive and usually does not require tools. However, renters should check lease rules before applying adhesive products to painted trim. A removable draft stopper may be better if adhesive is not allowed.
My Real-World Experience: The $5 Fix That Made the Hallway Less Miserable
I once lived in a place where the front door had the sealing power of a screen door on a submarine. Every winter, the hallway developed its own weather system. You could walk past the entry and feel a cold breeze slide across your ankles like the house was personally offended by socks.
At first, I blamed the thermostat. Then I blamed the old door. Then I blamed “the general concept of winter,” which, while emotionally satisfying, did not solve anything. The real problem was much smaller: the bottom corners of the door had gaps. The sweep was decent, the weatherstripping looked okay, but the corners leaked air like tiny invisible vents.
The first fix was a rolled towel. It worked, technically, but it had to be moved every time someone opened the door. It also looked like the home had surrendered. Next came adhesive foam tape. That helped along the latch side but made the door harder to close because I used tape that was too thick. Lesson learned: weatherstripping is not a “more is better” situation. It is more like seasoning soup. A little in the right place is great; too much and everyone notices.
Then I tried small door corner seals. The installation took less time than finding the scissors. I cleaned the lower jambs, dry-fitted the pads, peeled the backing, and pressed them into place. The difference was not theatrical. No choir sang. The utility company did not call to congratulate me. But the cold line across the floor disappeared, and the entry felt calmer.
After that, I added a better door sweep because the old one had stiffened and cracked. That combination worked best: corner seals for the lower side gaps, a sweep for the threshold, and fresh weatherstripping on the latch side. The door closed normally, the hallway felt warmer, and outside noise dropped a little. It was one of those humble home fixes that makes you wonder why you tolerated the problem for so long.
The biggest lesson is to diagnose before buying. A draft stopper is great if the leak is under the door. Foam tape works if the leak is around the frame. Corner seals help when the leak is at the lower corners. Caulk belongs around stationary cracks, not on moving door edges unless your goal is to create a permanently closed door, which is less “energy efficient” and more “escape room.”
The second lesson is to check the door after installation. Open it. Close it. Lock it. Look for daylight. Run the paper test again. Many draft problems are solved through small adjustments, not brute force. If the door needs to be slammed after adding weatherstripping, the seal is probably too thick or misplaced.
The third lesson is that cheap fixes can be genuinely useful when they target the right problem. A sub-$5 product will not replace insulation, repair a rotten frame, or rescue a badly warped door. But for a small corner gap, it can be exactly enough. And sometimes “exactly enough” is the best kind of home improvement: affordable, fast, and free of dramatic tool noises.
Final Verdict: Small Seal, Big Comfort Potential
The Bob Vila deal is a reminder that not every energy-saving project needs to be expensive. Door corner seals, door sweeps, weatherstripping tape, and draft stoppers are practical, low-cost tools that can reduce drafts and improve comfort quickly. The key is matching the fix to the leak.
If your door leaks at the lower corners, the under-$5 corner seals are a smart first move. If air rushes under the door, add a sweep or draft stopper. If the sides or top leak, install fresh weatherstripping. Together, these small fixes can help your home feel warmer in winter, cooler in summer, quieter year-round, and less like your front door is secretly working for the outdoors.