Table of Contents >> Show >> Hide
- What “Leaded” vs. “Stained Glass” Really Means (and Why Metal Tape Works)
- Why Use Metal Tape Instead of Liquid Leading?
- Best Projects for the Metal Tape Method
- Materials Checklist
- Step-by-Step: Make Faux Leaded or Stained Glass with Metal Tape
- Design Tips That Make Faux Glass Look Expensive
- Common Mistakes (and How to Fix Them Without Crying)
- Cost, Time, and “Is This Actually Worth It?”
- Safety Notes (Quick, Important, and Not Here to Kill the Vibe)
- FAQ
- Conclusion: The Shortcut to “Custom Window Charm”
- Extra: Real-World Experiences (So You Don’t Have to Learn the Hard Way)
You know that dreamy, old-house “wow” momentsunlight hits a leaded window and suddenly your hallway looks like it has a backstory? The good news: you don’t need a kiln, a glass grinder, or a wizard apprenticeship to get a similar effect. With self-adhesive metal tape (often sold as “lead strips,” “instant lead lines,” or even copper foil tape) and the right kind of translucent color, you can fake the look convincingly enough that guests will squint and say, “Wait… is that real?”
This guide walks you through an approachable, budget-friendly method for creating faux leaded glass or faux stained glass windows using metal tapeno cutting glass, no soldering, no dramatic monologue about flux. Just clean lines, glowy color, and a window that finally has some personality.
What “Leaded” vs. “Stained Glass” Really Means (and Why Metal Tape Works)
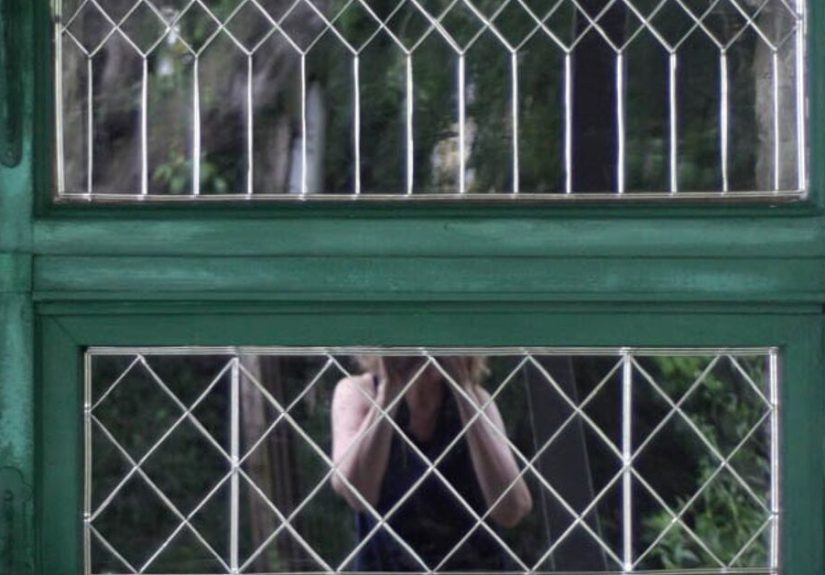
In traditional stained or leaded glass, individual pieces of glass are held together by metal channels called “cames,” and the joints are soldered. “Stained glass” can refer to colored glass, painted/enamel glass, or glass colored by staining; “leaded glass” often describes the construction method more than the color. In the faux version, the metal tape mimics those raised lead lines and visually breaks the window into “panes,” while translucent paint (or film) creates the color.
The magic is mostly optical: your eyes read the raised lines as structure and the translucent fills as glass. Your wallet reads it as “still employed.”
Why Use Metal Tape Instead of Liquid Leading?
Liquid leading (the squeeze-bottle “puffy black lines” you paint on glass) can look greatespecially for curvy, organic patterns. But metal tape has a few advantages:
- Crisper geometry: Straight lines and grids look more “architectural.”
- Instant dimension: Tape gives a raised profile immediatelyno waiting for lines to build up.
- Beginner-friendly control: If your hands shake after coffee, tape is your friend.
- Cleaner edges: Tape creates a physical “dam” that helps keep color where it belongs.
Best Projects for the Metal Tape Method
Metal tape faux glass looks most believable when the design feels like something a builder might actually install. Great candidates:
- Front door sidelights (privacy + style = two birds, one window)
- Bathroom windows (soft light without feeling like you’re on display)
- Kitchen cabinet doors (a “custom” upgrade that costs less than one cabinet pull)
- Transom windows (small area, big impact)
- Picture frames or thrifted window panes (practice before you commit to the real window)
Materials Checklist
Metal “Leaded Line” Options
- Self-adhesive lead strips / instant lead lines: Often gray, flexible, and slightly raised.
- Vinyl “lead line” tape: Lighter weight; easier to curve; usually lead-free.
- Copper foil tape: Very thin; great for detail; can be darkened for a more antique look (optional).
- Aluminum or metallic craft tape: Works in a pinch, but it’s usually flatter and less convincing.
Color Fill Options
- “Stained glass” craft paint: Translucent paints made for glass (often air-dry). Ideal for glow.
- Glass paint/enamel systems: Some are designed to cure for durability (always follow label directions).
- Budget method: Clear glue + acrylic paint (more craft-art look, less “glass” glow, but surprisingly fun).
- Decorative window film: Not paint, but an easy alternative for renters or quick privacy.
Tools + Supplies
- Glass cleaner and lint-free cloth (microfiber works well)
- Rubbing alcohol (for final degrease)
- Pattern/template (printed paper, taped behind glass)
- Sharp scissors or craft knife + ruler
- Burnishing tool/stylus (or a plastic card/wooden skewer in a pinch)
- Painters tape (for borders and “oops” moments)
- Toothpicks (bubble popping is oddly satisfying)
- Nitrile gloves (optional, but helps keep oils off glass)
Step-by-Step: Make Faux Leaded or Stained Glass with Metal Tape
Step 1: Pick a Design That Won’t Fight You
For your first run, choose something that loves straight lines: diamond grids, Craftsman-style rectangles, simple Art Deco fans, or “Prairie” geometry. Curves are doable, but they require patience and a willingness to whisper apologies to your tape.
Pro tip: If the window is meant for privacy, avoid huge clear sections. More segments = more distortion = fewer awkward eye contacts.
Step 2: Clean the Glass Like You Mean It
Adhesive tape only bonds as well as the surface allows. Clean the glass thoroughly, then do a final wipe with rubbing alcohol to remove any sneaky residue (finger oils, cleaner film, kitchen greaseaka “the tape-peeling trilogy”).
- Clean with glass cleaner.
- Dry completely with lint-free cloth.
- Degrease with rubbing alcohol and let it flash dry.
Step 3: Tape Your Pattern Behind the Glass
If you’re working on a removable pane or a picture frame panel, place the printed pattern underneath and tape it so it doesn’t shift. If you’re working directly on an installed window, tape the paper pattern to the outside (or the opposite side) so you can follow it from the inside. The goal is simple: your lines stay consistent, even if your confidence does not.
Step 4: Lay the Metal Tape (Slow is Fast)
Start with the longest straight lines first. Cut pieces slightly long, place them lightly, then trim down until the fit is clean. Press the tape into place with your fingers, then burnish firmly with a stylus or plastic tool to lock it down.
- For straight lines: Use a ruler as a placement guide (but don’t cut on the glasscut on a safe surface).
- For gentle curves: Use shorter tape segments; long curves tend to wrinkle or lift at the edges.
- For intersections: Overlap slightly and trim cleanly for a crisp joint.
Little realism trick: Many instant lead-line systems suggest “soldering” intersections visually by adding a tiny dot of leading/liner at joints. It’s optional, but it sells the illusion.
Step 5: Burnish Again (Yes, Again)
Burnishing isn’t busyworkit’s the difference between “looks amazing for two weeks” and “still looks amazing when you forget it exists.” Run your tool along both edges of the tape and down the center. Pay extra attention to corners and ends.
Step 6: Add Color (Pick Your Method)
Option A: Translucent “Stained Glass” Craft Paint
This is the classic faux stained glass glow. Stir paint gently (don’t whip air into it), squeeze or brush into each section, and guide it to the edges. Pop bubbles with a toothpick. Let it level naturallymost of these paints self-smooth if you don’t overwork them.
- Apply enough paint to cover evenlythin spots can create “light holes.”
- Work in sections so you can catch bubbles before the surface skins over.
- If working on a vertical installed window, use lighter coats to prevent runs and drips.
Option B: Glass Paint/Enamel Systems
Some glass paints are designed for extra durability and may require longer cure times or specific instructions. Follow the label like it’s a treasure map. (Because it is. The treasure is “not having it peel later.”)
Option C: The Budget Hack (Clear Glue + Acrylic)
Mix clear-drying glue with acrylic paint to create a translucent fill. This is more “craft stained glass art” than “architectural glass,” but it’s inexpensive, forgiving, and perfect for practice panels, kid-friendly projects, and sun-catchers that don’t need to survive a lifetime of window washing.
Option D: Decorative Window Film (Fastest Privacy)
If your goal is privacy with a stained-glass vibeespecially on rental windowsdecorative film can mimic artisan glass patterns and installs quickly. It’s not the same as the tape-and-paint glow, but it’s an excellent Plan B when you need results by Saturday.
Step 7: Dry and Cure (Respect the Waiting Game)
Dry times vary by product thickness, humidity, and how enthusiastic you got with the paint. In general:
- Let outlines/tape settle before filling if your system recommends it.
- Let paint dry undisturbed on a level surface when possible.
- Give it extra time before cleaning or reinstalling the pane“dry to the touch” isn’t always “cured.”
Design Tips That Make Faux Glass Look Expensive
Choose Tape Width Like a Designer
Wider tape reads as traditional leaded panels. Narrow tape reads more modern and detailed. A good rule: big window = wider lines, small projects = narrower lines.
Use Repetition (Your Brain Loves It)
Repeating shapesdiamonds, rectangles, simple arcsmakes a project look intentional. Random shapes can be charming, but they can also scream, “I panicked halfway through and started improvising.”
Limit Your Color Palette
Three to five colors usually look more “crafted” than twelve. Add texture (frosted/etched effects or slightly different transparencies) instead of more colors.
Common Mistakes (and How to Fix Them Without Crying)
Problem: Tape Lifts at the Ends
- Cause: Oils/residue on glass or not enough burnishing.
- Fix: Press down firmly; if it keeps lifting, replace that segment after cleaning the area with alcohol.
Problem: Wrinkles on Curves
- Cause: Tape segment too long for the curve.
- Fix: Use shorter pieces, or switch to a more flexible tape for curves.
Problem: Paint Runs (Especially on Installed Windows)
- Cause: Too much paint at once on a vertical surface.
- Fix: Apply lighter coats; let them set; build color gradually.
Problem: Bubbles That Dry Like Tiny Shame-Domes
- Cause: Shaking the paint or overbrushing.
- Fix: Stir gently; pop bubbles with a toothpick while wet; work slowly.
Cost, Time, and “Is This Actually Worth It?”
Real stained glass panels can be expensive because they involve skilled labor, specialty materials, and (often) custom fabrication. Faux leaded or stained glass using metal tape is a fraction of that cost and can be done in an afternoon plus drying time. The trade-off is durability: a carefully prepped, well-burnished, properly cured faux project can last a long time, but it’s still not a soldered panel built for a century of weather.
Worth it? If you want privacy, character, and a big visual upgrade without committing to major renovation costsabsolutely.
Safety Notes (Quick, Important, and Not Here to Kill the Vibe)
Most “instant lead line” craft products are designed for hobby use, and many are lead-free. Still, some traditional stained-glass materials and some tapes can involve real lead. If you’re using anything that contains lead (or you’re not sure), practice smart hygiene:
- Don’t eat or drink while working.
- Wash hands thoroughly after handling materials.
- Keep scraps away from kids and pets.
- Clean work areas using wet methods rather than dry sweeping.
And if you decide to “graduate” from faux methods into soldered stained glass someday, ventilation and proper safety practices become even more important.
FAQ
Will this work on double-pane windows?
You can apply the design to the interior-facing surface you can reach. Just avoid placing anything where it could interfere with seals, and remember that cleaning needs to be gentle around tape edges.
Can I remove it later?
Many faux stained glass paints are removable/peelable when used as a “cling” style design, while others are meant to be permanent. Metal tape removal depends on adhesive strength, surface prep, and how long it’s been installed. If removability is a priority, test your exact materials on a small corner or a spare pane first.
What’s the easiest “first project”?
A thrifted picture frame panel with a simple geometric pattern. You’ll learn tape handling, burnishing, and paint leveling without risking your actual bathroom window.
Conclusion: The Shortcut to “Custom Window Charm”
Faux leaded or stained glass with metal tape is one of those rare DIY projects that looks dramatically more impressive than it is difficult. Clean the glass well, keep your design simple, burnish like you’re trying to win a prize, and let the paint cure properly. You’ll end up with a window that throws colorful light, adds privacy, and makes your home feel a little more like it has secrets (the good kind).
Extra: Real-World Experiences (So You Don’t Have to Learn the Hard Way)
The first time I tried the metal-tape method, I was wildly confident for exactly seven minutesthe exact amount of time it took me to realize glass is basically a fingerprint magnet with a personality disorder. I cleaned the pane, admired my reflection, and started laying tape. Ten minutes later, the tape began lifting at one corner like a tiny silver flag of protest. That’s when I learned the unglamorous truth: “clean” and “adhesive-ready” are not the same thing. The fix was simpleglass cleaner, then a final alcohol wipebut that little lesson alone made every later project smoother.
Next came the “what tape width should I use?” rabbit hole. On small cabinet panes, a wide tape looked cartoonish, like I’d outlined everything with a highlighter. On a larger window, narrow tape disappeared from a distance and the design felt busy instead of bold. The sweet spot, for me, was matching the line weight to the viewing distance: thicker lines for entryways and big windows you see from across a room, thinner lines for pieces you’ll view up close. It’s the same logic as fontsbillboards and paperback books don’t use the same size.
I also learned to stop trying to be a tape hero on curves. Long curved pieces feel efficient, but they’re the fastest way to get wrinkles, edge lift, and a sudden desire to “start over tomorrow.” Short segments take longer, but they behave. If you want a graceful arch, build it like a brick wall: little pieces, carefully aligned, and burnished down until the edges look seamless.
Paint was its own adventure. My first fill coat was too thin, so the sunlight showed “light holes” where I’d missed the edge by a millimeter. My second fill coat was too thick, and gravity reminded me that vertical windows are not the same as flat practice panes. Once I started applying lighter coats on installed windowsand letting them set before adding moreruns basically disappeared. Bubbles were another surprise: shake the bottle and you’ll spend your evening popping tiny air pockets like you’re defusing a very colorful bomb. Stir gently, move slowly, and keep toothpicks nearby.
The most satisfying moment, though, is always the same: the first sunny day after it’s cured. Light hits the colored sections and suddenly the room feels warmer, softer, and slightly fancierlike your house put on earrings. And the project has a weird bonus: you start noticing stained glass everywhere. Front doors, old stair landings, restaurant transomsyou name it. Once you’ve built even a faux version, you can “read” designs better: where lines are thick for strength, where shapes repeat for rhythm, where color is used sparingly so the whole thing doesn’t become a rainbow riot. In the end, the tape-and-paint shortcut doesn’t just give you a pretty window. It gives you a new set of eyes. (And yes, those eyes will absolutely judge smudges on glass forever after.)