Table of Contents >> Show >> Hide
- Why a DIY Penny Desk Is More Than a Novelty
- Before You Start: Plan First, Glue Later
- Materials and Tools for a DIY Penny Desk
- How to Make a DIY Penny Desk
- Design Ideas That Make a Penny Desk Look Custom
- Common Mistakes to Avoid
- Is a DIY Penny Desk Worth It?
- Real-World Experiences With a DIY Penny Desk
- Conclusion
If you have ever looked at a jar of spare change and thought, “What if this became furniture instead of laundry noise?” welcome to the wonderfully weird world of the DIY penny desk. It is part home office upgrade, part mosaic art project, and part conversation starter for people who walk into your room and immediately say, “Wait… are those actual pennies?”
A penny desk is exactly what it sounds like: a desk with a top covered in pennies, usually sealed beneath a clear finish such as epoxy. The result can lean industrial, vintage, modern, or full-on eccentric-genius-with-a-glue-gun, depending on the pattern, wood tone, and finish you choose. And unlike some flashy DIY ideas that look good for one Instagram post and then fall apart by Tuesday, a properly built penny desk can be practical, durable, and surprisingly polished.
The trick is not simply dumping coins onto a tabletop and hoping craft destiny takes over. A great DIY penny desk needs a stable base, a flat top, smart layout planning, and a finish that protects both the wood and the coin surface. Do it right, and you get a custom desk that looks expensive, feels personal, and tells a much better story than “I bought it online at 2 a.m. because the shipping was free.”
Why a DIY Penny Desk Is More Than a Novelty
The best thing about a penny desk is that it blends craftsmanship with personality. It is not just a desk; it is a surface with texture, color variation, history, and a built-in reason for guests to linger awkwardly in your office. Pennies create a mosaic effect that works especially well in home offices, studios, dorm rooms, reading nooks, and creative workspaces.
There is also a practical upside. When the coins are attached securely and covered with a strong clear coat, the desk surface becomes easy to wipe down and tough enough for daily use. Pens, laptops, notebooks, mugs, and all the little clutter gremlins of modern work life can live there without making the desk feel bland.
Design-wise, penny surfaces have a charm that sits somewhere between vintage tile, copper accents, and industrial loft style. Some builders keep the pennies bright and shiny. Others mix old and new coins for a more varied, aged look. Some arrange dates, initials, or patterns into the design. It is one of those rare projects where “imperfection” is not a bug; it is the entire personality of the thing.
Before You Start: Plan First, Glue Later
Choose a desk size that actually fits your life
A penny desk should still function like a real desk, which means comfort matters. A work surface around 28 to 30 inches high is comfortable for many people, with roughly 30 inches of depth working well for monitors, notebooks, and elbow room. If you are building from scratch, measure your chair height, knee clearance, and wall space before you buy a single board or coin. A beautiful desk that makes your shoulders hate you is still a bad desk.
Start with a stable top
Use a solid, flat surface such as a 3/4-inch plywood project panel or a finished wood top. A penny covering adds weight, and a glossy topcoat will show every dip, hump, and tiny disaster. Sanded plywood, project panels, butcher block, or a well-built existing desktop all work. Flimsy particleboard with a wobble problem? That is not a charming foundation. That is a future regret.
Pick your finish before you begin
Most DIY penny desks use one of two finishing approaches. The first is a thick clear epoxy that creates a glassy, level surface over the coins. This is the bold, glossy, dramatic option. The second is a more traditional furniture finish on the wood base and frame, with the penny top itself still sealed but with a less built-up appearance. If you want a smooth writing surface and easy cleanup, epoxy is usually the winning move.
Materials and Tools for a DIY Penny Desk
You do not need a giant workshop or a contractor reality show soundtrack. You do need the right materials. A basic build usually includes:
3/4-inch plywood or a premade desktop, lumber or legs for the base, wood screws, wood glue, a drill, pilot bits, sandpaper in coarse and fine grits, filler if needed, primer or paint for the desktop base color, hundreds or thousands of pennies, strong adhesive, painter’s tape, plastic sheeting, a level, a clear tabletop epoxy or other protective topcoat, a heat gun or small torch for bubbles, and safety gear such as glasses, gloves, and a dust mask.
For a standard 24-by-48-inch desk, expect to need roughly 2,900 pennies for full coverage, and a little extra if you want to fill edges or account for pattern changes. That means the coin value alone is around $29 to $32. For a larger 30-by-60-inch top, you are looking at roughly 4,500 pennies, or about $45. Suddenly that change jar starts looking less like clutter and more like building material.
How to Make a DIY Penny Desk
1. Build or choose the desk base
You can build a simple desk base from lumber and a plywood top, use stock legs with brackets, or upgrade an existing desk. If you are building from scratch, keep the frame square and strong. Pocket-hole joinery, apron boards, and pilot holes help keep everything straight. This is not the glamorous part of the project, but it is the part that keeps your monitor from doing interpretive dance every time you type.
2. Prep the desktop
Sand the surface smooth. Fill dents, patch screw holes, and make sure the top is clean and dry. Many builders paint the desktop black, dark brown, or charcoal before laying pennies. That background color helps disguise tiny gaps between coins and gives the finished surface more depth. If you skip this step, little slivers of raw wood can peek through and ruin the illusion.
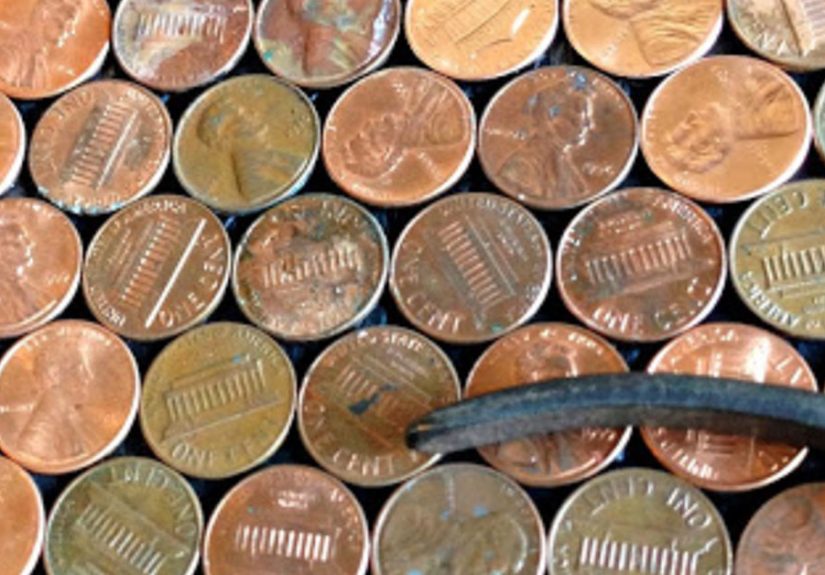
3. Clean and sort the pennies
You do not need every penny to look identical. In fact, variation often makes the surface richer. But you should wipe them clean and make sure they are dry before gluing them down. Sort out damaged coins if they are too bent to sit flat. You can also separate brighter coins from darker ones if you want to create patterns, gradients, initials, or a border. Think of it as pixel art for people who also own clamps.
4. Dry-fit the layout
Before using adhesive, lay out a section of pennies to decide how you want them oriented. Heads-up only? Random? Date-forward? A honeycomb-like staggered pattern usually gives the cleanest coverage. Start from the center if you want a symmetrical look, or start from one straight edge if you are trying to minimize awkward cuts and visual drift. The goal is intentional chaos, not actual chaos.
5. Glue the pennies down
Apply adhesive in manageable sections. Do not cover the entire desk at once unless you enjoy stress and tacky surfaces. Press each penny firmly into place and keep spacing tight. Small craft glues, construction adhesives, and certain clear adhesives can work, but always choose one that bonds metal to the painted or sealed substrate beneath it. Check that the coins stay flat as you go. One crooked penny may look charming. Forty of them look like a mutiny.
6. Create an edge dam for the topcoat
If you are pouring epoxy, tape and seal the edges carefully so the liquid finish does not drip everywhere like a very expensive pancake syrup. Some builders add wood trim around the desktop for both style and containment. Others tape the perimeter and remove it later. Either way, protect the floor, protect the legs, and protect your peace.
7. Pour the clear coat slowly
Mix your tabletop epoxy exactly according to the manufacturer’s directions. Slowly. Thoroughly. Without whipping in a million tiny bubbles like you are making dessert. Pour in stages and spread evenly. Many DIYers use a torch or heat gun lightly over the surface to release bubbles. This is the part where the project suddenly goes from “craft table” to “custom furniture,” and it is deeply satisfying to watch.
8. Let it cure completely
Do not poke it. Do not “just check one little corner.” Do not set your phone on it because you are curious. Let the finish cure in a dust-free area for the full recommended time. Some products are dry enough to handle in a day, while thicker pours may need longer before normal use. Rushing this step is how people end up with fingerprints fossilized in their furniture.
9. Sand and recoat if needed
If the cured surface has dust nibs, slight waves, or edge ridges, you may be able to sand lightly and add another thin coat. For wood parts of the desk, use a clear protective finish in thin coats, sanding lightly between coats and removing dust carefully. This adds durability and gives the base the same finished, intentional look as the showpiece top.
Design Ideas That Make a Penny Desk Look Custom
A DIY penny desk does not have to look rustic or crafty. With the right details, it can look clean and upscale. Try a matte black frame with a glossy penny top for modern contrast. Use walnut-toned wood for warmth. Add brass hardware if you want the desk to lean vintage. Keep the pennies mostly similar in tone for a sleek, unified look, or mix bright and dark coins for more visual texture.
You can also personalize the top with a border of darker pennies, a date worked into the center, or a subtle monogram made from older-looking coins. Some people love the highly polished coppery glow. Others embrace a more weathered feel. Copper does not rust, but it does oxidize and develop patina over time, which is part of the reason penny surfaces feel so alive compared with plain laminate or painted tops.
If you love the look but not the idea of full coverage, consider a penny inset. Build a wood desk with a framed center panel, then apply pennies only inside that section. It lowers the coin count, reduces weight, and keeps the project from looking too busy. Think of it as giving the desk a metallic centerpiece instead of dressing the whole thing in spare change.
Common Mistakes to Avoid
Using an uneven top: Epoxy magnifies imperfections. If the substrate dips, your finished surface will tell on you.
Skipping the layout test: Pennies can drift visually. A quick dry-fit saves a lot of “Why does this corner look haunted?” energy later.
Pouring too much epoxy at once: Thick pours can trap bubbles or cure unevenly if the product is not designed for that depth.
Ignoring dust: Dust is the silent villain of clear finishes. Clean your area, cover nearby surfaces, and keep pets away unless you want a decorative whisker permanently preserved in resin.
Forgetting about weight: Thousands of coins plus wood plus finish equals a heavier desk. Make sure the base can handle it.
Getting casual with coin rules: Decorative use is one thing, but melting pennies is prohibited. If you are doing anything unusual with coins, check current rules first.
Is a DIY Penny Desk Worth It?
Yes, if you want a desk that feels personal and looks nothing like mass-produced office furniture. A DIY penny desk is not the fastest weekend project, but it is one of the most memorable. It works best for people who enjoy detail work, appreciate quirky materials, and do not mind trading speed for character.
It is also a surprisingly flexible project. You can build the whole desk from scratch, upgrade a basic desk, or create a smaller writing desk, vanity, or side workstation using the same concept. The cost can stay reasonable if you already have a desk base or a stash of pennies, and the final result often looks far more expensive than the materials suggest.
Most importantly, a penny desk does something many home office projects fail to do: it brings a little joy into daily routine. Bills, emails, spreadsheets, and deadlines feel slightly less hostile when they are happening on top of a desk you made yourself. Especially one made from thousands of tiny copper circles that probably used to live in a cup holder.
Real-World Experiences With a DIY Penny Desk
One of the most interesting things about a DIY penny desk is that people usually start the project for the look, but they remember it for the process. On paper, it sounds simple: build a desk, glue down pennies, pour a clear coat, admire genius. In real life, the experience is a mix of patience, problem-solving, and a surprising amount of staring at tiny coins while asking yourself deep design questions such as, “Does this penny look moodier than the other pennies?”
A common experience is underestimating how many pennies the project actually takes. At first, a jar of coins looks huge. Then you cover one corner of the desktop and realize you have completed approximately four percent of the mission. That moment tends to shift the project from casual craft to strategic operation. Builders often start organizing coins by brightness, age, or tone once they see how much the visual rhythm matters across a larger surface.
Another lesson people run into quickly is that the base color underneath the pennies matters more than expected. A dark-painted top usually makes the gaps disappear and gives the finished desk a richer, more professional look. Builders who skip that step often notice tiny bright gaps later and wish they had spent one extra hour with a roller and some paint. It is not a glamorous step, but it is one of those boring choices that quietly saves the whole project.
The epoxy stage is usually where the emotional plot twist happens. Before the pour, the desk looks cool but slightly crafty. After the pour, it suddenly looks finished, dimensional, and custom. That is also when nerves show up. People worry about bubbles, dust, edge leaks, uneven curing, and whether the room is somehow generating floating lint out of pure malice. Builders who do well here tend to prep obsessively, tape carefully, mix slowly, and resist the urge to rush.
Many DIYers also discover that a penny desk becomes a conversation magnet. Friends notice it immediately. Family members ask how long it took. Coworkers on video calls squint at the screen and ask if the top is tile, copper, or some kind of fancy imported material. There is a specific kind of satisfaction in saying, “Nope, it is pennies,” and then casually pretending this was all very normal behavior.
Functionally, most people who finish the project are happy with the result, especially if the clear coat is smooth and the frame is sturdy. The desk is easy to wipe clean, looks great in natural light, and has enough visual texture to make even a simple workspace feel designed. The most frequent regrets are almost always process-related rather than design-related: not buying enough pennies at the start, not leveling the top perfectly, not controlling dust well enough, or trying to finish too much in one day.
In the end, the shared experience of building a DIY penny desk is less about perfect craftsmanship and more about attention. It rewards steady hands, thoughtful prep, and a willingness to let the project take the time it needs. And when it is done, the desk does not just hold your laptop. It holds the memory of building something odd, beautiful, and unexpectedly practical from one of the most overlooked materials in the house.
Conclusion
A DIY penny desk is proof that functional furniture does not have to be boring. With the right base, careful prep, a strong layout, and a durable finish, you can turn a pile of ordinary coins into a desk that feels artistic, useful, and completely your own. It is a smart project for anyone who wants a home office desk with character, a custom look, and a story built right into the surface.
Whether you go all-in with a glossy epoxy top or keep the look a little more subtle, the appeal of a penny desk is the same: it transforms humble materials into something unforgettable. And in a world full of flat-pack sameness, that is worth more than a few cents.