Table of Contents >> Show >> Hide
If you have ever looked around your house and thought, “I should probably have a better place for passports, jewelry, and emergency cash than the random drawer where batteries go to retire,” a wall safe starts to sound pretty smart. It is compact, discreet, and far more secure than hiding valuables in a shoebox behind winter sweaters. Better yet, many wall safes are designed to fit neatly between standard wall studs, which makes installation more realistic for a capable DIY homeowner than people expect.
That said, installing a wall safe is not a “grab a saw and hope for the best” kind of project. You are cutting into a finished wall, working around framing, and relying on a secure fit to protect important items. A clean installation depends on choosing the right safe, selecting the right wall, measuring carefully, and resisting the deeply human urge to say, “Eh, that looks close enough.” Drywall is forgiving. A crooked safe is not.
This guide walks you through how to install a wall safe step by step, including planning, tools, common mistakes, and real-world lessons that make the difference between a polished job and a rectangle-shaped regret. Whether you are installing a hidden wall safe in a closet, home office, or bedroom, this article will help you do it the right way.
Why a Wall Safe Is Worth Considering
A wall safe gives you three things at once: concealment, convenience, and a dedicated place for valuables. Unlike a large floor safe, an in-wall safe does not take up precious room. Unlike a lockbox shoved under the bed, it is mounted into the structure of the home. And unlike the classic “hide it behind a stack of towels” strategy, it is made for actual security.
For most homeowners, a wall safe makes sense for storing items like:
- Passports and birth certificates
- Jewelry and watches
- Backup cash
- Hard drives, USB drives, and important digital backups
- Small keepsakes or legal papers
It is best to think of a wall safe as secure storage for compact valuables, not as a magical portal that holds everything you own. Most models are relatively slim so they can fit inside a stud bay. That makes them easy to conceal, but it also means capacity is limited. If you need heavy fire protection, oversized storage, or room for bulkier items, a different type of safe may be a better match.
Before You Cut Anything: Plan the Installation First
Choose the Right Wall
The best location is usually an interior wall with standard framing and minimal hidden obstructions. Interior walls are typically easier to work with than exterior walls because they are less likely to be packed with insulation or affected by outdoor temperature swings. A hallway closet, bedroom closet, home office, or low-traffic room often works well.
Try to avoid walls that are likely to contain plumbing, dense wiring, or vent stacks. The area above or behind bathrooms can be surprisingly crowded inside. Exterior walls can also be trickier because of insulation and moisture considerations. In plain English: just because a wall exists does not mean it wants to host your safe.
Make Sure the Safe Fits the Stud Bay
Many wall safes are made to fit between studs spaced 16 inches on center, which leaves about 14.5 inches of open space between the studs. But “many” is not the same as “all,” and this is where people get themselves into trouble. Always check the manufacturer’s cutout dimensions and mounting instructions for your exact model before buying or cutting.
Also check the safe depth. A typical interior framed wall may not give you unlimited depth, especially once drywall thickness is considered. Some safes are designed specifically for standard wall cavities, while others need deeper framing or special installation conditions.
Confirm the Wall Is Not a Structural Problem Waiting to Happen
If the install requires cutting studs, reframing, or altering a wall that may be load-bearing, stop and get a licensed contractor or structural professional involved. A standard wall safe install should fit between existing studs. The minute your plan turns into “I’ll just cut that stud and figure it out later,” the project graduates from DIY to “please don’t.”
Gather Your Tools and Materials
Here is a practical tool list for a typical wall safe installation:
- Wall safe and manufacturer instructions
- Stud finder with wire detection if possible
- Tape measure
- Level
- Pencil
- Utility knife
- Drywall saw or oscillating multi-tool
- Drill and drill bits
- Screwdriver or driver bit set
- Safety glasses
- Dust mask
- Drop cloth or shop vacuum
- Lag screws, washers, or mounting hardware supplied with the safe
- Flashlight and small inspection mirror
Some models also include a cutout template. If yours does, use it. Templates exist to save time, improve accuracy, and reduce the chance of inventing new bad words in front of a crooked hole.
How to Install a Wall Safe Step by Step
Step 1: Pick the Height and Exact Position
Start by deciding where the safe should sit within the wall. Think about access, concealment, and everyday convenience. A safe hidden behind hanging clothes in a closet can work beautifully. So can one behind framed art in a home office. Place it high enough to stay out of obvious sightlines, but not so high that you need a step stool and a prayer every time you open it.
Mark a rough placement on the wall once you know the safe’s exterior and cutout dimensions.
Step 2: Locate the Studs and Scan for Obstacles
Use a stud finder to locate the studs on both sides of the intended opening. Mark the inside edges of each stud with a pencil. Measure the open cavity width to make sure it matches the safe’s required opening. Then scan the area for live wires, metal, or plumbing. Make multiple passes with the stud finder rather than trusting one heroic beep.
A smart extra step is to cut a small inspection hole first. A modest square opening lets you peer inside the wall with a flashlight and mirror before committing to the full cut. This is one of those tiny steps that can save a big repair bill.
Step 3: Mark the Opening Carefully
Transfer the exact cutout dimensions from the safe manual or template onto the wall. Use a level so the lines are straight and square. Double-check width, height, and orientation. Then check again, because drywall is easy to cut and annoying to un-cut.
If your safe has a front flange, it may cover minor imperfections around the opening, but do not use that fact as permission to get sloppy. A clean opening makes installation easier and the final result more professional.
Step 4: Cut the Drywall
Score the outline lightly with a utility knife first, then use a drywall saw or oscillating tool to cut the opening. Work slowly, especially near the edges where studs or hidden obstructions may be close. Remove the drywall section and inspect the cavity.
At this stage, confirm that the space is clear and the wall framing matches what you expected. If you discover wires, pipes, blocking, or anything mysterious enough to make you lean back and squint, pause the project until you know exactly what you are dealing with.
Step 5: Test-Fit the Safe
Slide the safe into the opening to check the fit before drilling anything. It should sit flush and fit snugly without forcing the wall apart. If it binds, remove it and adjust the opening carefully. Do not muscle the safe into place like you are winning an argument with drywall. That approach usually ends with chipped edges, scratched paint, and fresh annoyance.
Some manufacturers recommend removing the safe door before installation to reduce weight and make handling easier. Only do this if your manual allows it and explains how.
Step 6: Drill Pilot Holes and Mount the Safe
Once the safe is sitting correctly, open the door and locate the factory mounting holes inside the body of the safe. Mark the stud locations through those holes if needed. Then remove the safe or hold it steady, depending on the model, and drill pilot holes into the studs.
Reinsert the safe, align the mounting holes, and drive the supplied lag screws or fasteners into the studs. Tighten them evenly. The goal is firm and secure, not brutally over-torqued. If you crank too hard, you can distort the safe body and affect door operation.
Step 7: Set Up the Lock Before You Close It
If your wall safe uses an electronic keypad, install the batteries and program your new code while the door is still open. Test the code more than once. Then test the backup key. Then test the code again. This is not paranoia. This is wisdom.
Many electronic safes ship with a factory code or default opening sequence, and that should be changed immediately before you store anything valuable inside. Keep the override key and code record in a separate secure location. Not in the safe. Not taped to the back of the safe. Not in the drawer labeled “Important Stuff.”
Step 8: Finish the Installation
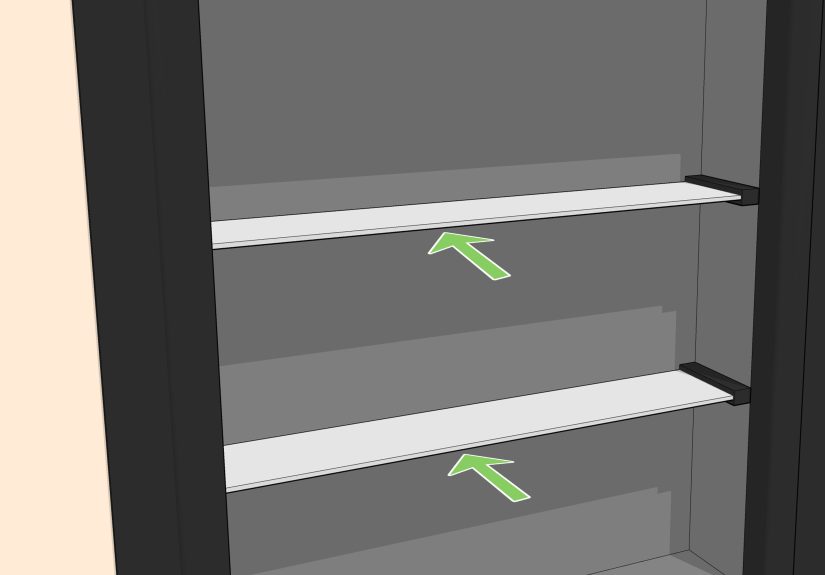
Once the safe is mounted and functioning properly, install any shelves, interior lining, or accessories included with the unit. Clean the area, patch any minor wall imperfections if needed, and decide whether you want to conceal the safe behind art, clothing, or cabinet-style coverage.
The finished look should be neat, flush, and intentional. A well-installed hidden wall safe should blend into the room, not announce itself like a trophy.
Common Wall Safe Installation Mistakes to Avoid
- Skipping the manual: Every safe has different cutout dimensions and mounting details.
- Assuming all walls are clear: Wiring, plumbing, blocking, and insulation can ruin your day fast.
- Cutting first and measuring later: A classic DIY tragedy.
- Installing in a questionable wall: If the wall may be structural, do not improvise.
- Over-tightening mounting hardware: Secure is good. Bent safe housing is not.
- Closing the door before testing the lock: This is how a one-hour project becomes a customer service saga.
- Using the safe for the wrong purpose: A small wall safe is ideal for documents and valuables, not for items the manufacturer specifically says not to store.
When to Call a Pro
There is no shame in handing this project to a pro if the wall is complicated, the safe is expensive, or your house is older and full of surprises. Bring in a contractor, carpenter, or safe installer if:
- You suspect the wall is load-bearing
- You find wiring or plumbing in the target cavity
- Your walls are plaster, masonry, or otherwise non-standard
- You need reframing or custom trim work
- You want the safest possible install with minimal cosmetic risk
Paying for professional installation is often cheaper than fixing a bad cut in the wrong wall.
Real-World Experiences and Lessons From Installing a Wall Safe
What surprises people most about installing a wall safe is that the cutting is usually not the hard part. The hard part is everything you learn five minutes before cutting. On paper, the project sounds simple: find studs, cut drywall, slide in safe, tighten screws, feel accomplished. In real houses, though, the wall tends to have opinions. Maybe the stud spacing is standard, but there is a horizontal fire block halfway up. Maybe the stud finder gives one reading, then a different one two inches away because the wall has old patching behind the paint. Maybe the “perfect” location turns out to be directly next to wiring added during a renovation nobody documented. That is why patient prep beats fast confidence every single time.
One of the most common homeowner experiences is choosing a location based on concealment first and practicality second. It sounds clever to install the safe in a super-secret spot, but if that spot forces you to crouch behind shoe racks and winter coats every time you need your passport, you will eventually hate your own good idea. The best installs tend to happen in places that are both discreet and easy to reach, like a closet wall at chest height or a home office wall behind framed art. Convenience matters. Security is important, but so is not throwing hangers across the room while trying to find your birth certificate.
Another common lesson is that older homes rarely behave like diagrams in product manuals. Plaster walls can crumble differently than drywall. Studs may not be perfectly straight. Previous homeowners may have patched, moved, or added things in ways that make a neat install more complicated. In those situations, the people who have the best outcome are the ones who slow down, open a small inspection hole, and inspect before enlarging it. That little bit of restraint can turn a stressful installation into a controlled one.
Many first-time installers also underestimate how important it is to test the lock repeatedly while the safe door is still open. This sounds obvious until you are standing there with batteries half-installed, a new code you think you entered correctly, and the optimism of someone who has not yet been humbled by electronics. The experienced move is simple: program the code, test it multiple times, test the override key, and only then shut the door. It is boring advice, which is usually how you know it is excellent advice.
Finally, people who are happiest with their wall safe months later are usually the ones who treat the project like part security upgrade and part finish carpentry. They vacuum the cavity, keep the opening square, line the safe up carefully, and think about how it looks in the room after installation. They do not just “get it in the wall.” They install it so it feels intentional. The safe becomes part of the home rather than a metal box awkwardly wedged into drywall. That is the difference between a project you tolerate and one you are genuinely glad you did.
Final Thoughts
If you want a smart way to protect passports, jewelry, documents, and other small valuables, learning how to install a wall safe can be a worthwhile project. The key is not speed. It is planning. Choose the right wall, verify the stud bay, check for hidden obstacles, follow the model-specific instructions, and test everything before you lock the door. Do that, and you will end up with a clean, secure installation that looks sharp and works exactly the way it should.
In other words, do the measuring, respect the wall, and let the drywall dust be the most dramatic part of the day.