Table of Contents >> Show >> Hide
- Why Homemade Crystals Work in the First Place
- Method 1: Make Fast Epsom Salt Crystals
- Method 2: Grow Clear Alum Crystals
- Method 3: Make Sugar Crystals (Rock Candy)
- Which Crystal Method Should You Choose?
- Tips for Better Homemade Crystals
- Final Thoughts
- Crystal-Growing Experiences: What It Feels Like in Real Life
- SEO Tags
If you have ever looked at a snowflake, a geode, or a suspiciously fancy piece of rock candy and thought, “Wow, nature really knows how to show off,” good news: you can make your own crystals at home. No secret wizard cave required. Just a few everyday materials, a little patience, and the ability to resist poking the jar every ten minutes to “check progress.”
Homemade crystals are one of those rare projects that manage to be fun, beautiful, inexpensive, and scientifically legit at the same time. They are part craft, part chemistry, and part exercise in self-control. Whether you want fast frosty crystals, clear gem-like ones, or edible sugar sparkles, there is a method that fits your mood.
In this guide, you will learn three ways to make your own crystals: quick Epsom salt crystals, classic alum crystals, and edible sugar crystals better known as rock candy. Along the way, you will also learn why crystals form, what makes some grow faster than others, and how to get better results without turning your kitchen into a chemistry crime scene.
Why Homemade Crystals Work in the First Place
Before we get to the fun part, here is the simple science. A crystal forms when tiny particles in a substance line up in a repeating pattern. That neat internal structure is what gives crystals their sharp edges, flat faces, and “I belong in a museum gift shop” energy.
Most homemade crystal projects begin by making a saturated solution. That means you dissolve as much of a substance as possible into water. Once the water cannot hold any more, you are at the limit. If the solution then cools down or some of the water evaporates, the dissolved material has to go somewhere. Instead of staying mixed in, it starts coming out of the liquid and arranging itself into crystals.
That is why heat matters. Warm or hot water can usually dissolve more material than cool water. That is also why patience matters. If the solution is left alone, the particles can settle into better organized shapes. Disturb the container too much, and your crystal project may still work, but the results can look more “science happened” than “jewelry-adjacent masterpiece.”
In short, crystal growing is a mix of saturation, cooling, evaporation, and good old-fashioned waiting. So yes, science and patience are friends, even if they do not always feel like it.
Method 1: Make Fast Epsom Salt Crystals
If you want the quickest payoff, Epsom salt crystals are your best bet. They tend to grow fast and often develop delicate, needle-like shapes that look a little like frost on a window. This is the crystal method for people who want results before their enthusiasm wanders off to do something else.
Why This Method Is Great
Epsom salt crystals are fast, simple, and visually dramatic. They are excellent for beginners because you can usually see something happening within hours instead of days. If you are the type who likes instant feedback, this is your crystal.
What You Need
- 1 cup warm distilled water
- About 1 cup Epsom salt
- A clear glass or cup
- A shallow bowl or saucer
- A spoon
- Optional: food coloring
How to Do It
- Pour the warm distilled water into a glass.
- Add Epsom salt one spoonful at a time, stirring after each addition.
- Keep adding salt until no more dissolves and a little sits at the bottom.
- Let the mixture rest for a minute or two.
- Carefully pour the clear liquid into a shallow bowl, leaving the undissolved bits behind.
- Add a drop or two of food coloring if you want colored crystals.
- Put the bowl in the refrigerator for a few hours.
What to Expect
This method usually creates fine, feathery, frost-like crystals. They are beautiful, but they are also more delicate than the larger crystals you get from alum or sugar. Think “winter fairy decor,” not “treasure chest gemstone.”
Best Use for Epsom Salt Crystals
Use this method when you want a quick science activity, a dramatic classroom demo, or decorative crystal patterns on a dish, lid, or flat surface. It is not the best choice if your dream is one giant showpiece crystal. It is the best choice if your dream is “something cool by this afternoon.”
Common Mistakes
The biggest mistake is pouring the undissolved salt into the shallow dish. That often gives you messy buildup instead of cleaner crystal growth. Another mistake is using water that is too cool, which can make it harder to dissolve enough salt. And of course, moving the bowl around a lot does your crystals no favors. Leave them alone and let them do their sparkly business.
Method 2: Grow Clear Alum Crystals
If Epsom salt crystals are the sprinters, alum crystals are the elegant marathoners. Alum is often sold as a pickling spice, and it is famous in educational crystal-growing activities because it can produce clear, faceted, gem-like crystals that look far fancier than the ingredient list would suggest.
Why This Method Is Great
Alum is ideal if you want crystals that look more geometric and substantial. This method is excellent for students, hobbyists, and anyone who wants a crystal that says, “Yes, I made this,” in a very smug and justified way.
What You Need
- 1/4 to 1/2 cup hot distilled water
- Alum powder
- A spoon
- A clear glass or jar
- A saucer or small dish
- Optional: fishing line or nylon thread for growing one larger crystal
How to Do It
- Pour the hot water into a glass or heat-safe container.
- Add alum a spoonful at a time, stirring until it dissolves.
- Keep adding alum until no more dissolves and a little remains at the bottom.
- Let the mixture settle briefly.
- Pour the clear solution into a clean saucer or dish, leaving the extra grains behind.
- Set the dish in a place where it can sit undisturbed for a day or two.
How to Grow a Bigger Crystal
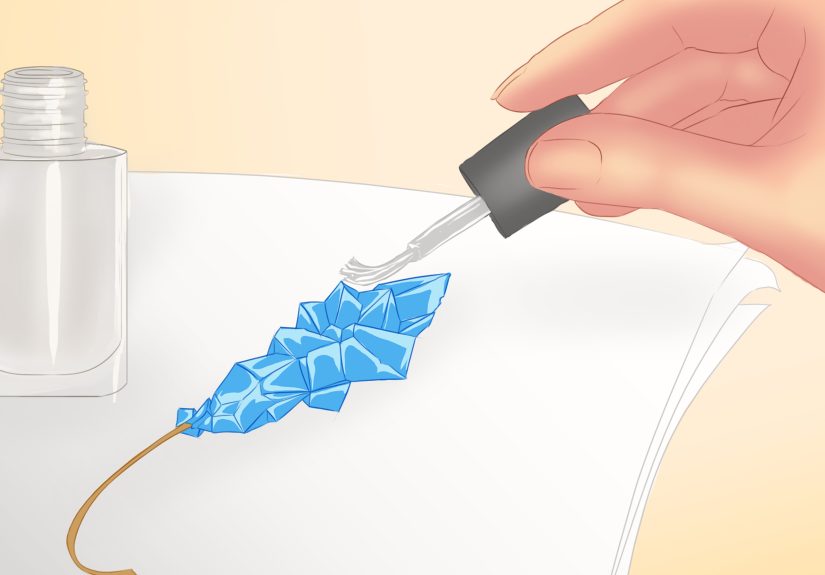
If you want a larger single crystal instead of a cluster, start by making a small batch and letting tiny crystals form. Pick the best-looking one and use it as a seed crystal. Tie it gently to nylon string, suspend it in a fresh saturated alum solution, and let it hang without touching the bottom or sides of the container. Over time, more alum will collect on that seed and make it grow.
What to Expect
Alum crystals often look cleaner and more gemstone-like than Epsom salt crystals. They can develop sharp faces and a more defined structure. This is why alum is a favorite in crystal-growing competitions and school science activities. If you want a crystal that looks like it has ambitions, alum is the way to go.
Best Use for Alum Crystals
Use alum when you care about shape, clarity, and display value. It is a great choice for science projects, photos, and decorative jars. It is also a good method for learning how seed crystals work, which is the next-level move in home crystal growing.
Common Mistakes
Using too much water is a classic rookie move. More water means the solution may not become concentrated enough to give you the results you want. Another issue is impatience. Faster evaporation is not always better. Sometimes slower growth gives you a cleaner crystal. And yes, bumping the setup “just once” is still bumping the setup.
Method 3: Make Sugar Crystals (Rock Candy)
Now for the sweetest member of the crystal family: sugar crystals. Rock candy is essentially a crystal-growing experiment you can eat at the end. Science has rarely been this polite.
Why This Method Is Great
This is the best method if you want an edible result. It is also a terrific way to connect chemistry with everyday life, because the same principles of saturation and crystal growth still apply. The only difference is that your final product looks like a science project and a treat had a very successful meeting.
What You Need
- 3 cups sugar
- 1 cup water
- A small saucepan
- A jar or tall glass
- A wooden skewer, popsicle stick, or cotton string
- A pencil if you use string
- Optional: food coloring or flavoring
- A paper towel or coffee filter
How to Do It
- Heat the water in a saucepan.
- Add the sugar gradually, stirring until it fully dissolves.
- Once the solution is clear, remove it from the heat.
- Let it cool a bit before pouring it into the jar.
- Place the skewer or prepared string into the jar so it hangs in the middle without touching the bottom.
- Cover the jar loosely with a paper towel or coffee filter to keep dust out.
- Set the jar somewhere safe and leave it undisturbed for several days.
How to Improve Results
Many people lightly coat the skewer or string with sugar first and let it dry. That gives sugar crystals a place to start forming more easily. It is a clever little shortcut that makes the project feel less like a gamble and more like a plan.
What to Expect
Sugar crystals usually take longer than Epsom salt crystals. You may need close to a week for really satisfying rock candy growth. But once they form, they are sturdy, sparkly, and delightfully dramatic. They also have the advantage of not requiring you to explain why your decorative crystal absolutely should not be eaten.
Best Use for Sugar Crystals
Choose this method for edible science, party activities, or a fun kitchen experiment. It is a favorite for families, classrooms, and anyone who thinks chemistry should occasionally come with snacks.
Common Mistakes
The biggest issue is touching or moving the jar too often. Another is not dissolving enough sugar to make a rich solution. Also, hot syrup is no joke, so use care during the cooking step. Let the jar sit in peace, and do not let the stick rest against the side, where crystals may glue it in place like a sugary hostage situation.
Which Crystal Method Should You Choose?
If you want speed, choose Epsom salt. If you want beauty and structure, choose alum. If you want something edible, choose sugar. That is the short version.
The longer version is that each method teaches you something different. Epsom salt shows how fast crystals can appear when cooling happens quickly. Alum shows how evaporation and seed crystals can produce clearer, more defined shapes. Sugar shows that crystal growth is not just a lab thing; it is part of cooking, candy making, and a lot of everyday science.
Honestly, the best answer may be to try all three. Then you can compare the shapes, speed, texture, and size. That turns a fun craft into a genuinely useful experiment, which is a neat trick for one kitchen counter.
Tips for Better Homemade Crystals
- Use clean containers. Tiny bits of dust can interfere with crystal growth.
- Do not dump in the undissolved solids. Pour off only the clear solution.
- Leave the setup alone. Crystals like peace and quiet more than most people do.
- Try distilled water. It can help reduce impurities.
- Be patient. Bigger, cleaner crystals often need more time.
- Use seed crystals for larger results. One good crystal can become the foundation for a much larger one.
- Keep expectations realistic. Your first attempt may be charmingly chaotic. That still counts as science.
Final Thoughts
Making your own crystals is one of the easiest ways to bring chemistry to life without needing fancy equipment. You get to watch invisible particles organize into visible shapes, which is honestly one of science’s better party tricks. Whether you choose quick Epsom salt crystals, showy alum crystals, or sweet rock candy, the basic lesson is the same: structure emerges when conditions are just right.
And that is what makes this project so satisfying. It is not only about the final crystal. It is about noticing how temperature, concentration, time, and patience all work together. You start with a plain liquid in a jar, and after a while, you get something sharp, geometric, and unexpectedly beautiful. Not bad for a project that begins with ingredients you can buy at a grocery store.
Crystal-Growing Experiences: What It Feels Like in Real Life
One of the funniest things about making crystals at home is that the project seems almost too simple at first. You stir, pour, wait, and then spend an unreasonable amount of time peering into a jar like you are a Victorian scientist who has just discovered a new element. The first experience most people have is surprise. Real surprise. Not the polite kind. The kind where you come back later, see sparkly shapes clinging to a stick or dish, and immediately want to show someone nearby, even if they were just trying to make coffee in peace.
The Epsom salt method usually creates that instant “wait, that actually worked” feeling. It is fast, and the crystals can look like frost, feathers, or tiny glassy needles. That makes it satisfying in a very immediate way. You do not have to imagine what is happening on the molecular level because the results appear quickly enough to keep your curiosity fully awake. It feels less like reading about chemistry and more like catching chemistry in the act.
Alum crystals create a different kind of experience. They are slower, and because of that, they teach patience in a sneaky way. At first, the jar or dish looks boring. Then one day you notice a small faceted crystal, and suddenly the project feels strangely serious. You start evaluating which crystal has the best shape, whether it is clear enough, whether it would make a good seed crystal, and whether moving it one inch to the left would be helpful or deeply foolish. This is how many people accidentally become crystal perfectionists.
Sugar crystals are their own category of joy because they combine science with anticipation and dessert. Rock candy projects tend to attract more checking, more excitement, and more temptation to cheat. You tell yourself you are observing the experiment. In reality, you are seeing whether snack science is ready yet. There is also something especially memorable about watching a plain stick turn into a glittering candy wand. It feels playful in a way that most science projects do not.
Another common experience is learning that small changes matter. A cleaner jar, steadier temperature, or better seed crystal can noticeably change the results. That makes crystal growing feel rewarding because you can improve with practice. Your first batch may be cloudy, uneven, or hilariously lopsided. Your second batch usually looks better. By the third, you start acting like you have strong opinions about evaporation rates. Congratulations. You have become the kind of person who casually says things like, “I think slower growth gives better crystal faces.”
What sticks with people most, though, is the combination of beauty and logic. Crystals look magical, but they are not random. Their shapes come from orderly patterns. That means every successful crystal is both a decoration and a tiny lesson in structure, change, and patience. In a world full of flashy projects that promise instant results, crystal growing is oddly calming. It rewards attention. It rewards waiting. And when it works, it gives you something solid and sparkly to prove that science can be both smart and gorgeous.


