Table of Contents >> Show >> Hide
- Can You Really Upholster a Couch With a Hot Glue Gun?
- When This DIY Upholstery Method Makes Sense
- Tools and Materials You Will Need
- Before You Start, Inspect the Couch Like a Detective
- Step-by-Step: How To Upholster Couch Project Using Hot Glue Gun
- 1. Take Photos and Label Everything
- 2. Remove the Underside Dust Cover and Loose Upholstery
- 3. Check Foam, Batting, and Surface Smoothness
- 4. Use the Old Fabric as a Pattern
- 5. Dry-Fit Before You Glue Anything
- 6. Use Staples for Strength, Hot Glue for Detail
- 7. Wrap the Arms, Back, and Outer Panels Carefully
- 8. Finish With Trim, Gimp, or Welt
- 9. Reattach the Dust Cover
- Best Places to Use a Hot Glue Gun on a Couch
- Places You Should Not Trust to Hot Glue Alone
- Fabric Tips for a Better-Looking Finish
- Common Mistakes to Avoid
- Is This Cheaper Than Professional Reupholstery?
- Extra Experience Section: What This Project Really Feels Like in Real Life
- Conclusion
- SEO Tags
If your couch looks tired, dated, or one snack spill away from retirement, you may be wondering whether a hot glue gun can help you fake a full upholstery makeover without opening a full-blown furniture surgery clinic in your living room. The answer is yeswith a giant, bold, underlined caveat. A hot glue gun can absolutely help with a couch refresh, especially for trim, folds, dust covers, decorative edges, and light no-sew sections. But for high-stress areas, it should be your sidekick, not your superhero.
That is what makes this project so appealing. You can give a worn sofa a cleaner, fresher, more custom look without immediately diving into advanced sewing, industrial staplers, or the kind of upholstery vocabulary that makes normal people panic. This method works best when you are doing a cosmetic update rather than a museum-grade restoration. Think “smart makeover” instead of “I have become a Victorian furniture conservator.”
In this guide, you will learn how to approach a couch upholstery project using a hot glue gun in a realistic, beginner-friendly way. We will cover where glue helps, where it absolutely should not be trusted alone, how to prep the couch, which fabrics are easiest to work with, and how to avoid turning your sofa into a lumpy fabric lasagna. By the end, you will have a practical plan, a better-looking couch, and hopefully all ten fingerprints still intact.
Can You Really Upholster a Couch With a Hot Glue Gun?
Yes, but not in the fairy-tale way social media sometimes suggests. If by “upholster” you mean fully rebuild the couch from the frame out, replace springs, sew complex cushions, and secure every panel for years of heavy use, then noa hot glue gun alone is not the right tool. But if your goal is to recover visible surfaces, attach decorative trim, secure light layers, smooth edges, hide staples, and create a polished budget refresh, a hot glue gun can be incredibly useful.
The smartest way to think about this project is as a hybrid method. Use glue where it shines: finishing edges, attaching welting or gimp trim, closing light folds, holding batting in place temporarily, and securing an underside dust cover when appropriate. Use stronger fastening methods where the couch gets pulled, pushed, sat on, flopped on, or attacked by children, pets, or adults who believe every sofa is a trampoline. In those zones, staples, upholstery tacks, hand sewing, or machine sewing still do the heavy lifting.
So yes, you can do a successful How To Upholster Couch Project Using Hot Glue Gun approach. You just need to use the glue gun strategically instead of romantically.
When This DIY Upholstery Method Makes Sense
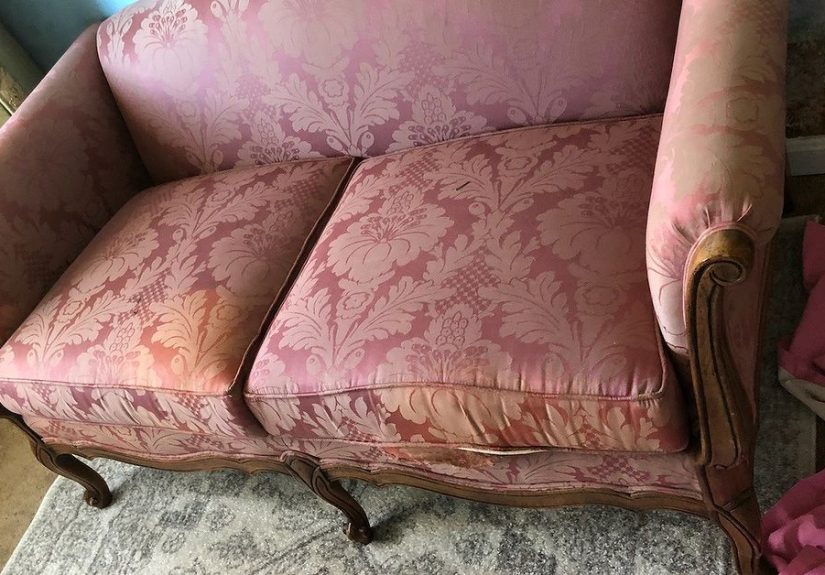
This project works best when the couch has good bones. That means the frame feels sturdy, the seat is basically sound, and you are mostly dealing with ugly fabric, small tears, worn corners, outdated style, or a piece that needs a fresh face. It is also ideal for rental homes, first apartments, guest rooms, playrooms, thrifted furniture, and budget-conscious refreshes.
It is especially handy if you want to:
- cover flat or gently curved sections with new fabric,
- hide old staples or raw edges with trim,
- attach a new dust cover underneath,
- refresh the outside arms or back,
- create a “recovered” look without doing full traditional reupholstery,
- work without advanced sewing skills.
It is not the best method if your couch has broken springs, deep sagging, severe odor, mold, crumbling foam, or heavily tailored upholstery with tufting, channels, or complex piping everywhere. That is when the project stops being “weekend DIY” and starts becoming “why is my dining table covered in upholstery foam for the third month in a row?”
Tools and Materials You Will Need
Keep your toolkit simple but smart. You do not need a truck full of professional equipment, but you do need enough supplies to make the project neat and secure.
- Hot glue gun, preferably dual-temperature
- Glue sticks made for fabric or flexible materials
- Upholstery fabric
- Fabric scissors
- Staple remover or needle-nose pliers
- Heavy-duty stapler or staple gun for stress areas
- Measuring tape
- Chalk or fabric marker
- Batting or foam, if needed
- Dust cover fabric or lightweight black cambric
- Trim, gimp, or welt cord for finishing
- Work gloves and a clean drop cloth
If your glue gun offers both low and high settings, that is even better. Delicate or synthetic fabrics may react badly to too much heat, while sturdier materials often bond better with a hotter setting. Always test the glue and the heat on a scrap first. That tiny test can save you from a giant melted regret.
Before You Start, Inspect the Couch Like a Detective
Before you buy fabric or plug anything in, inspect your couch closely. Lift the cushions. Check the frame. Flip it slightly if you can. Smell it. Yes, really. If the old upholstery is moldy, dirty beyond reason, smelly, or bulky, remove it instead of layering new fabric over it. If it is flat, clean, and stable, you may be able to recover right over some sections and save yourself time.
This is also the moment to decide whether your project is true reupholstery or more of a stylish recovery. A lot of DIYers confuse the two. Recovering means placing new fabric over old fabric in a strategic way. Reupholstering usually means stripping the piece down further and rebuilding more of the visible upholstery system. Neither approach is morally superior. One just involves fewer mysterious staples flying at your face.
Step-by-Step: How To Upholster Couch Project Using Hot Glue Gun
1. Take Photos and Label Everything
This may be the least glamorous part of the project, but it is one of the most important. Before removing any fabric, take detailed photos from all angles: front, back, sides, underside, cushion edges, arm corners, and any trim details. As you remove old pieces, label them with notes such as “outside arm,” “inside back,” or “front panel.”
These old fabric pieces are not trash yet. They are your patterns, your map, and your future sanity. If you toss them too early, you are basically deciding to freestyle upholstery. Bold move. Not recommended.
2. Remove the Underside Dust Cover and Loose Upholstery
Start underneath. Remove the black dust cover or bottom cloth first. Then carefully pull away any loose trim, tacks, or damaged outer fabric sections you plan to replace. Work slowly so the old fabric stays intact enough to guide your cuts later.
If the couch has decorative trim hiding staples, remove it gently. This is one area where a hot glue gun will come back later to save the day, because trim is often reattached with adhesive during finishing.
3. Check Foam, Batting, and Surface Smoothness
Once the outer fabric is off, inspect the padding. If the batting is thin, stained, or bunched up like a bad hotel comforter, replace it. A layer of fresh batting can dramatically improve how the final fabric lays over the couch. If the foam is sagging, add a layer of new foam or wrap the old cushion with fresh batting to improve shape.
The smoother the layer underneath, the smoother the final upholstery will look. Fabric is honest. It tattles on every bump.
4. Use the Old Fabric as a Pattern
Lay the removed upholstery pieces on the wrong side of your new fabric and trace around them, adding extra allowance where needed so you have enough fabric to wrap and secure the edges. Pay attention to the fabric grain and any pattern direction. A stripe that runs beautifully on one panel and sideways on the next will scream “DIY weekend energy,” and not in a good way.
If your fabric has a bold repeat, buy extra. Matching patterns across couch sections can eat fabric quickly.
5. Dry-Fit Before You Glue Anything
Before attaching new fabric, lay it over each section and test the fit. Smooth it with your hands. Fold the corners. Check the pull. Make sure seams and edges land where they should. This step helps you catch problems before hot glue becomes permanent-ish and emotionally complicated.
For flatter sections, you may find that the new fabric wraps neatly and can be held with a mix of staples on the hidden underside and hot glue on visible finished edges. That combination usually looks cleaner than relying on glue alone.
6. Use Staples for Strength, Hot Glue for Detail
Here is the golden rule: use staples where the fabric is under tension, and hot glue where the fabric is mostly lying flat, folding inward, or being finished decoratively. Seat decks, major pull points, and underside wraps usually need staples. Decorative trim, folded edge returns, lightweight panels, welt cord, and some dust cover work can use hot glue.
Apply hot glue in small sections rather than running a giant lava river across the couch. Press the fabric into place and hold it until the glue cools. Work neatly. Too much glue can seep through thinner materials or create hard ridges under the fabric. That is the upholstery equivalent of getting spinach stuck in your teeth before a photo.
7. Wrap the Arms, Back, and Outer Panels Carefully
For a beginner-friendly couch refresh, start with the outside arms and the outside back. These areas are usually easier than the inside seat or deck. Pull the fabric smooth, fold corners like you are wrapping a gift for someone you actually like, and secure the hidden sides first. Then use hot glue to tuck and finish clean visible folds where appropriate.
If you are covering the inside back or front apron, work from the center outward to avoid wrinkles. Smooth often. Step back and look at the couch every few minutes. Your eyes catch weird bunching faster from a distance than from six inches away with a glue gun in hand.
8. Finish With Trim, Gimp, or Welt
This is where the couch starts looking intentional instead of mid-project. Decorative trim can hide staple lines and raw edges beautifully. Hot glue is especially useful here. Attach trim in short sections, pressing it into place until cool. If you want a more custom look, use welt cord or double welt to create a crisp finished border.
Take your time here. Even a simple couch refresh can look much more expensive when the finishing details are tidy.
9. Reattach the Dust Cover
Once the visible upholstery looks good, reattach the dust cover on the underside. This step hides the guts of the project and gives the couch a cleaner, more finished appearance. You can use staples for the main hold and hot glue for small edges or corrections, depending on the fabric and frame.
Do not skip this. A couch without a dust cover is like wearing a nice blazer with pajama pants. Technically dressed, spiritually unfinished.
Best Places to Use a Hot Glue Gun on a Couch
- Attaching decorative trim or gimp over staple lines
- Securing double welt or premade piping
- Tacking down folded fabric returns on low-stress edges
- Holding batting or thin layers temporarily while positioning
- Finishing the underside dust cover in light areas
- Creating no-sew details on accent sections
Places You Should Not Trust to Hot Glue Alone
- Main seat attachment points
- Areas under constant pulling tension
- Structural repairs
- Spring or webbing repairs
- Heavily used seams on removable cushion covers
- Tufting buttons or load-bearing upholstery joins
If the area will be stretched, sat on, yanked, flopped onto, or chewed by a Labrador, glue alone is not enough. That is just a fact of couch life.
Fabric Tips for a Better-Looking Finish
The easiest upholstery fabrics for beginners are medium-weight materials with some body and not too much slipperiness. Textured weaves, canvas-like blends, and many upholstery-grade solids are easier to control than silky, stretchy, or ultra-thin fabrics. Performance fabrics can also be a smart choice for homes with kids, pets, or frequent spill-based drama.
Choose fabric with durability in mind, but also think about cleanability, fading resistance, and whether the pattern will hide small mistakes. A tiny geometric print can be forgiving. A giant stripe can expose every wobble in your measuring skills like it is being paid commission.
Common Mistakes to Avoid
- Using hot glue as the only fastening method everywhere
- Skipping the photo-and-label stage
- Cutting fabric without checking grain or pattern direction
- Choosing fabric that is too thin or too delicate
- Applying too much glue and creating visible lumps
- Ignoring old odors, mold, or crumbling padding
- Forgetting the finishing trim and dust cover
The most common visual mistake is not pulling fabric evenly. The most common emotional mistake is assuming “I can eyeball it.” No, you cannot. Measure it. Future you deserves that kindness.
Is This Cheaper Than Professional Reupholstery?
Usually, yes. A DIY couch refresh using selective upholstery methods and a hot glue gun is far cheaper than paying for a full professional reupholstery job. That said, it also delivers a different result. A pro rebuild is designed for longevity, structural correction, and highly tailored upholstery. A hot-glue-assisted DIY project is about visual improvement, smart budgeting, and extending the life of a couch that still has good bones.
In other words, this project is not trying to beat a master upholsterer. It is trying to save your couch from looking like it survived three roommates, two dogs, and one unfortunate red wine incident.
Extra Experience Section: What This Project Really Feels Like in Real Life
The first experience most people have with a couch upholstery project using a hot glue gun is surprise. Not the dramatic TV kind. More like, “Oh, this is less impossible than I thought, but also somehow more fiddly than expected.” At the start, the couch looks huge, the fabric looks intimidating, and the glue gun seems oddly tiny for such a big job. But once you begin removing trim, labeling pieces, and laying old panels on top of new fabric, the whole thing becomes more logical. The couch stops being one giant mystery object and starts turning into a collection of manageable parts.
Another common experience is realizing how much upholstery is really about patience, not brute strength. You do not win by pulling as hard as possible or gluing like you are frosting a cake. You win by smoothing, adjusting, stepping back, and fixing small issues before they become obvious. There is a strangely satisfying rhythm to it. Pull. Smooth. Fold. Hold. Check. Repeat. It is half craft project, half negotiation with corners.
One thing people often remember is how dramatic the visual improvement can be even before the project is fully done. Once one arm is wrapped neatly or the outside back is covered in crisp new fabric, the couch starts looking transformed surprisingly fast. That little early success is what keeps you going. It is the DIY equivalent of seeing one ab in the mirror after two salads and deciding fitness is your destiny.
There is also usually a moment of mild panic. Maybe you cut a panel slightly off grain. Maybe a corner looks bulky. Maybe a bead of glue sneaks too close to the fabric edge and you have to fix it before it cools. That moment is normal. Almost everyone hits one. The key is not to spiral. Upholstery rewards calm corrections. Most mistakes can be trimmed, re-folded, covered with welt, or visually softened by a better finish.
People who finish this kind of project also tend to talk about how much they learned from the old couch itself. Once the fabric comes off, you can see how the piece was assembled, where the original maker used staples, where trim hid rough edges, how batting smoothed the lines, and which areas mattered most structurally. That is useful knowledge. Even if you never upholster another couch, you end up understanding furniture better. You stop looking at sofas as giant anonymous blobs and start noticing construction, fabric tension, finishing details, and shape.
And then there is the oddly emotional part: sitting on the couch when it is done. It is still the same couch, but not really. It feels rescued. Personal. Less random. You notice the fabric because you chose it. You notice the trim because you attached it. You notice that one corner because, yes, you know exactly how long it took. The piece carries your fingerprints in the best possible way.
For many DIYers, that is the real reward of a How To Upholster Couch Project Using Hot Glue Gun makeover. It is not perfection. It is transformation. It is taking something worn, tired, and borderline embarrassing and making it useful and attractive again with creativity, care, and a tool usually associated with craft foam and holiday wreaths. Honestly, that is kind of beautiful.
So if you are hesitating because you are not an expert, good news: most people who do this successfully did not start as experts either. They started as people who were tired of looking at an ugly couch. That is a powerful motivator. Add a little planning, a little realism, the right fabric, and a glue gun used wisely, and you can absolutely pull off a couch refresh that looks intentional, polished, and far more expensive than it really was.
Conclusion
A hot glue gun is not a magic wand for full structural upholstery, but it is a genuinely useful tool for a budget-friendly couch makeover when used the right way. If your sofa has a solid frame and you mainly need a cosmetic refresh, this method can help you cover worn sections, attach trim, tidy edges, and create a finished look without diving headfirst into advanced upholstery work.
The secret is simple: use glue for detail, staples for strength, and patience for everything else. Take photos, label your pieces, test your fabric, work in small sections, and finish the project properly with trim and a dust cover. Do that, and your couch can go from “seen better centuries” to “wait, did you buy that?”