Table of Contents >> Show >> Hide
- Why PVC Works for an “Industrial” Shelf
- Plan Your Shelf Like a Pro (Even If You Don’t Feel Like One)
- Materials and Tools
- Cut List Example (3-Tier Shelf)
- Step-by-Step: Build the PVC Frame
- Add the Wood Shelves
- Make PVC Look Industrial (Without Pretending It’s Steel)
- Safety, Load, and “Don’t Turn This Into a Physics Lesson” Tips
- Cost Breakdown (Typical Range)
- Common Mistakes (and Easy Fixes)
- Easy Variations and Upgrades
- Conclusion
- Extra: Real-World Experiences and Lessons Builders Commonly Share (500+ Words)
Industrial shelves are usually made from heavy metal pipe and expensive bracketsaka the “my wallet just sighed” style of décor.
But if what you really want is the look (clean lines, pipe vibes, modern utility) without the price tag, PVC pipe is your new best friend:
lightweight, easy to cut, forgiving for beginners, and wildly customizable.
In this guide, you’ll build a sturdy, industrial-inspired shelf using PVC pipe for the frame and wood for the shelvesperfect for a garage, laundry room,
pantry, office, or any corner that needs storage without screaming “temporary.”
Why PVC Works for an “Industrial” Shelf
Let’s be honest: PVC is not metal. It will never develop that naturally gritty “I worked in a factory in 1912” patina.
But it can still deliver the industrial shelf aestheticstraight pipe runs, strong geometry, modular connectionsespecially if you finish it right.
The big wins
- Budget-friendly: Pipe, fittings, and caps are usually cheaper than steel pipe and flanges.
- Beginner-friendly: Cuts quickly with simple tools, and mistakes are easier to fix.
- Customizable: Change the height, add tiers, widen it, or build two and “accidentally” start a matching set.
- Lightweight: Easier to move and adjustgreat for renters or frequently reorganized spaces.
Reality check (so your shelf doesn’t become a slapstick moment)
PVC pipe is commonly rated for fluid pressure, not for furniture loads, so treat your shelf like a storage solution for
moderate weight: bins, books, towels, pantry items, small tools. If you want to store dumbbells or a complete encyclopedia set
from 1978, reinforce heavily or choose metal.
Plan Your Shelf Like a Pro (Even If You Don’t Feel Like One)
Before you buy anything, decide three things: where it goes, how big it should be, and what it will hold.
Those answers determine how many supports you need and how beefy your shelves should be.
Simple shelf dimensions that look good and work well
- Width: 24–48 inches (wider than 48? add more vertical supports)
- Depth: 10–14 inches for most rooms; 16–18 inches for garage storage
- Height: 30–72 inches, depending on how many tiers you want
- Shelf spacing: 10–14 inches between shelves (taller if storing bins)
Choose a basic design
The most reliable PVC shelf is a ladder-style frame: two side frames connected by front and back rails,
with wood shelves resting on the rails. This spreads weight across multiple pipes and keeps wobble under control.
Materials and Tools
Materials (typical build: 3-tier, ~36″ wide x 12″ deep x 48″ tall)
- PVC pipe: Schedule 40, 1″ diameter is a sweet spot for stiffness vs cost (you can use 3/4″ for lighter shelves).
- Fittings: tees, elbows, and (optional) caps for feet.
- Wood shelves: 3/4″ plywood, edge-glued pine panels, or solid boards.
- Fasteners: wood screws (for shelf attachment), optional L-brackets or pipe straps.
- Finishing supplies: sandpaper, primer suitable for plastic, spray paint (matte black is the classic industrial move), optional clear coat.
- Optional stability upgrades: a thin plywood backer, diagonal strap bracing, or wall anchors.
Tools
- Measuring tape + marker
- PVC cutter, hacksaw, or miter saw
- Deburring tool or utility knife (don’t skip thisfuture you will thank you)
- Drill/driver + bits
- Level
- Clamps (helpful, not required)
- Safety glasses and a well-ventilated work area (especially if painting or cementing)
Cut List Example (3-Tier Shelf)
Here’s a beginner-friendly cut list you can adjust. This design uses two side frames with multiple shelf supports.
Measure twice, cut oncebecause PVC is cheap, but your time is not.
Example measurements
- Overall width: 36″
- Overall depth: 12″
- Overall height: 48″
PVC cuts (approximate)
- Vertical legs: 4 pieces @ 48″ (or shorter if you want feet pieces separate)
- Depth rails (left and right sides): 6 pieces @ 12″ (two per shelf tier)
- Width rails (front and back per tier): 6 pieces @ 36″
- Optional feet: 4 pieces @ 2–4″ + 4 caps (or use elbows/tees depending on your base design)
Pro tip: Fittings add length. If you need exact final dimensions, do a dry-fit with one tier first,
then adjust cut lengths so the finished shelf lands where you want.
Step-by-Step: Build the PVC Frame
Step 1: Mark, cut, and deburr your pipe
Cut your PVC pipe with a cutter, hacksaw, or power saw. Then remove burrs and shavings from the inside and outside edges.
Burrs can keep fittings from seating properly, causing crooked joints and wobbly frames.
Step 2: Dry-fit everything (the no-regrets phase)
Assemble the entire frame without glue or screws first. This lets you confirm:
shelf height, overall squareness, and whether anything twists. If something looks off now,
it will look way off after you paint it matte black and proudly show it to someone.
Step 3: Choose your joining method
You have two good options:
-
Friction-fit (no cement): Great for prototypes or shelves you may reconfigure.
Add screws through fittings (pilot holes!) to lock joints. -
Solvent cement (permanent): Strong and clean-looking. Best when you’re confident in your final layout.
Follow label instructions and let joints cure fully before loading the shelf.
Step 4: Build two side frames
Each side frame is like a ladder: two vertical legs connected by depth rails at each shelf tier.
Use tees or elbows depending on your design. Keep the side frames identical so the shelf sits level.
Step 5: Connect the side frames with width rails
Once both sides are assembled, connect them with front and back rails at each tier.
Check for square by measuring diagonally corner-to-cornerif both diagonals match, you’re square.
Step 6: Add stability upgrades (highly recommended)
If you want your shelf to feel less “DIY breezy” and more “wow, that’s solid,” choose at least one:
- Plywood back panel: Screw a thin plywood sheet to the back of the wood shelvesthis acts like a brace.
- Diagonal strap: Add a metal strap in an X on the back.
- Wall anchor: Anchor the top of the shelf to studs (best for tall shelves or homes with pets/kids).
Add the Wood Shelves
Pick the right wood
- 3/4″ plywood: strong, stable, easy to paint or stain
- Edge-glued pine panel: quick “finished” look, good for home offices and living spaces
- Solid boards: classic and durable, but can expand/contractleave tiny gaps or use proper fastening
Cut and finish first
Cut shelves to size, sand edges, and apply your finish (stain, paint, or clear coat).
Doing this before final assembly avoids trying to paint neatly while the shelf frame stares at you like a judgmental octopus.
Attach shelves to the frame
Rest shelves on the PVC rails and secure them with screws down into small brackets, or use pipe straps on the underside to “hug” the rails.
If you prefer a cleaner look, add small L-brackets underneath where they’re less visible.
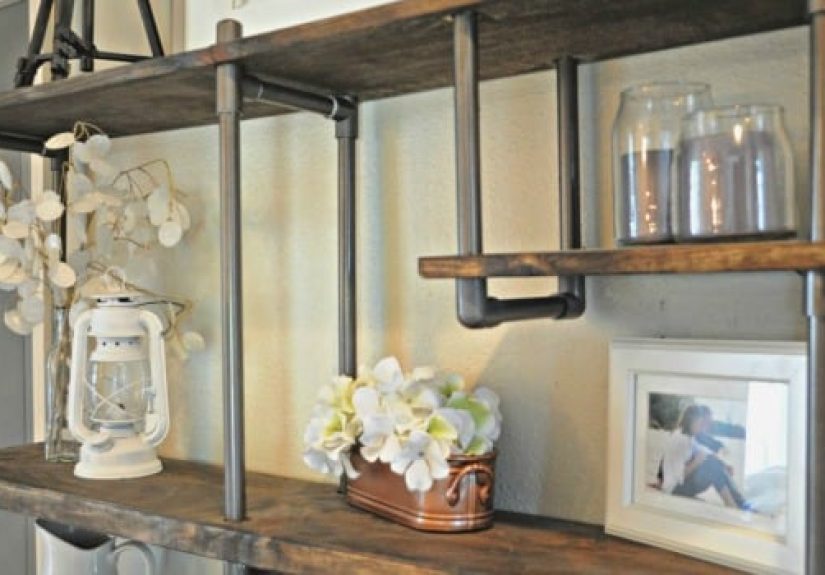
Make PVC Look Industrial (Without Pretending It’s Steel)
Prep is everything
PVC is smooth and slightly oily-feeling, which can make paint peel. Light sanding plus proper cleaning helps paint stick.
Use a primer designed for plastic, then apply multiple thin coats of paint.
Two finishes that nail the vibe
- Matte black “pipe” look: primer + matte black spray paint + optional satin clear coat for durability.
- Faux galvanized: gray base coat + light silver mist coat + subtle dark rub in corners for depth.
Extra style points
- Use darker wood stain (walnut tones are a classic industrial pairing).
- Add labels or small bins for a workshop vibe.
- Swap plain caps for rubber feet to reduce sliding and protect floors.
Safety, Load, and “Don’t Turn This Into a Physics Lesson” Tips
- Anchor tall shelves: If it’s tall and in a high-traffic area, secure the top to wall studs.
- Don’t overload: Keep heavy items low; distribute weight evenly; add supports for wider spans.
- Avoid heat: PVC can soften with high heatdon’t place it near heaters, hot water pipes, or heat vents.
- Ventilate when cementing or painting: Solvent products are flammable and fumes shouldn’t be inhaled.
- Use PVC only for its intended uses: Don’t repurpose PVC for compressed air or gas systems.
If you’re new to power tools or chemicals, build with supervision and follow product labels closely.
A “budget project” stops being budget-friendly the moment it becomes an urgent-care field trip.
Cost Breakdown (Typical Range)
Costs vary by region and store, but a 3-tier shelf like this is often dramatically cheaper than a metal-pipe version.
Your biggest costs are usually the wood shelves and the fittings.
- PVC pipe + fittings: often the most affordable part of the build (especially compared with steel pipe)
- Wood shelves: can be budget plywood or nicer panels depending on the room
- Paint/primer: optional but recommended for the industrial look and easy cleaning
- Extras: straps, brackets, anchors, feetsmall costs that add big stability
Common Mistakes (and Easy Fixes)
“It wobbles when I look at it.”
Add a back brace (plywood panel or diagonal strap). Also confirm your shelf is square and that all feet contact the floor.
If your floor is uneven, rubber feet can help.
“My shelves sag in the middle.”
Add a center support: an extra vertical leg in the middle front and back, or another rail under the shelf.
For wood, use thicker material or add a front edge band to stiffen it.
“The paint is scratching off.”
That’s usually prep. Lightly sand the PVC, clean it well, prime for plastic, then do thin coats.
A clear coat can help in high-touch areas.
Easy Variations and Upgrades
- Rolling shelf: add a plywood base and locking casters for a mobile storage cart.
- Corner shelf: build an L shape with additional tees and a corner shelf panel.
- Closet organizer: add a hanging rod made from PVC across the top tier.
- Plant shelf: use water-resistant paint and sealed wood; add a tray for drips.
- Mixed-material look: wrap parts of the PVC with jute rope or use wood end caps for contrast.
Conclusion
Building an industrial-style shelf with PVC pipe is a smart way to get the look you want while staying on budget.
The real magic is in the design: solid geometry, enough supports, and smart bracing. Finish it with a convincing paint job,
pair it with good-looking wood shelves, and your “plumbing aisle project” suddenly becomes furniture.
Start simple, keep weight reasonable, and anchor tall shelves for safety. Once you build one, you’ll notice a strange phenomenon:
empty wall space begins to look like a personal challenge.
Extra: Real-World Experiences and Lessons Builders Commonly Share (500+ Words)
People who try a PVC pipe shelf for the first time usually have the same emotional arc:
excitement (“I’m basically an engineer”), mild confusion (“Why are there seventeen types of tees?”),
confidence (“This is going great”), and then a very specific moment of humility
when the frame dry-fit isn’t square and the shelf looks like it’s leaning into a strong breeze.
The good news is that almost every “oops” has an easy fixespecially if you dry-fit first. A common lesson is that
fittings add up. Even a small miscalculation can grow across multiple tiers. That’s why experienced DIYers often
assemble one tier, measure the real-world dimensions, and then cut the remaining pieces to match.
It’s less “perfect blueprint” and more “friendly negotiation with reality.”
Another shared experience: PVC shelves feel sturdier than expected when you add bracing. Without a back brace,
even a well-built shelf can rack side-to-side, especially if it’s tall. Many builders say the project
“clicked” the moment they attached a thin plywood panel across the back or anchored the top to studs.
Suddenly, the shelf doesn’t sway when you slide a bin onto itand it starts to feel like actual furniture instead of a science fair exhibit.
Finishing is where the “industrial” style really happens. People often assume paint is optional, then realize bare PVC
looks exactly like… bare PVC. The builders who are happiest with the final look usually do three things:
they scuff-sand the pipe lightly, use a primer designed for plastic, and apply several thin coats instead of one thick coat.
The thin-coat approach takes longer, but it prevents drips and helps durability.
If the shelf is going into a garage or laundry room, many DIYers also recommend a protective topcoat so scuffs wipe off easier.
On the functional side, shelves sagging is the most common “second-week surprise.” It’s not always the PVC
the wood shelf can bow if it spans too far without support. Builders often respond by adding a center vertical support,
shortening the shelf span, or switching to thicker wood. A small center support can dramatically boost confidence,
especially if you plan to store books, kitchen appliances, or tool cases. And almost everyone agrees on this rule:
heavy stuff goes on the bottom. The shelf will feel steadier, and you’ll be less likely to accidentally create
a top-heavy wobble machine.
Finally, experienced builders tend to treat the first PVC shelf as a “template,” not a final masterpiece.
The first one teaches you your preferred shelf depth, the right spacing for your bins, and how much bracing you personally like.
The second one is usually faster, cleaner, and somehow looks like it came from a storebecause you’ve already made the tiny mistakes
and learned what actually matters: square corners, solid supports, and a finish that doesn’t quit the moment it meets a moving storage bin.
If you take one lesson from the shared DIY experience, make it this: the best-looking PVC shelf is the one that’s
designed for your stuff. When the shelf fits your baskets, your pantry containers, your laundry supplies,
or your toolboxes perfectly, it feels custombecause it is.