Table of Contents >> Show >> Hide
- Quick Planning Checklist Before You Build Anything
- The Anatomy of a Rock-Solid Floating Nightstand
- Tools and Materials You’ll Use Again and Again
- DIY Modern Floating Nightstand Ideas
- 1) The Minimalist “Thick Shelf” Nightstand
- 2) The Plywood Box with a French Cleat (The “Most Likely to Succeed” Build)
- 3) The Floating Nightstand with a Drawer (Modern, But With Secrets)
- 4) The “Waterfall” Nightstand (One Board, Big Design Energy)
- 5) The Two-Tier Floating Nightstand (Because One Surface Is Never Enough)
- 6) The Corner Floating Nightstand (The Space Saver)
- 7) The Live-Edge Modern Floating Nightstand (Organic + Modern)
- 8) The “Charging Station” Floating Nightstand (Cords, But Make Them Discreet)
- 9) The “One-Stud” Floating Nightstand (When Studs Won’t Cooperate)
- Step-by-Step: A Simple Modern Floating Nightstand Box (Beginner-Friendly)
- Modern Finishing Tricks That Make DIY Look Expensive
- Common Mistakes (So You Can Skip the Regret Phase)
- FAQ
- Experiences DIYers Commonly Have (And What They Learn)
- Conclusion
- SEO Tags
A floating nightstand is the bedroom equivalent of a good haircut: instantly cleaner, sharper, and somehow your whole life looks more “put together.”
It also has a sneaky superpowerwhen your nightstand doesn’t touch the floor, your room feels bigger, your robot vacuum stops crying,
and dust bunnies lose their favorite hiding spot.
In this guide, you’ll find modern DIY floating nightstand ideas (from “I own a drill” beginner builds to “I label my clamps” intermediate projects),
plus the practical stuff that keeps your nightstand from becoming a gravity experiment: ideal height, strong mounting methods, and finishing tricks
that make DIY look designer.
Quick Planning Checklist Before You Build Anything
Pick the right height (so you’re not doing midnight yoga)
A good rule of thumb: set the top of the floating nightstand roughly level with the top of your mattressor slightly below/above by an inch or two,
depending on how you reach from bed. Many common nightstands land in the 23–28 inch range, but the “right” height is the one
that lets you grab your water, phone, and book without a dramatic shoulder stretch.
Choose a depth that won’t bruise your hip at 2 a.m.
For a modern floating look, shallow often wins. Try 10–14 inches deep for minimalist shelves and small bedrooms. If you want a drawer and “real storage,”
aim for 14–18 inches deepbut make sure it won’t clash with bed frames, baseboards, or your walking path.
Decide what the nightstand must hold
- Minimal: phone + charger + water = open shelf style
- Moderate: book stack + lamp + small tray = box or thicker shelf
- Max: drawer + lamp + “miscellaneous life items” = drawer build + stronger mounting
Map your wall realities
Outlets, studs, and baseboards decide more than your mood board does. Find your studs, note outlet locations, and check for trim that may push your nightstand away from the wall.
(If your baseboard is tall, you may need a spacer strip behind the nightstand or a cleat that sits above the trim.)
The Anatomy of a Rock-Solid Floating Nightstand
Use studs whenever possible
A floating nightstand is basically a shelf that gets used dailyso treat it like a “serious shelf.” The most dependable method is fastening into wall studs.
In typical framing, studs are commonly spaced 16 inches apart (sometimes 24), which affects how wide your mounting points can be.
Pick a mounting method that matches your design
-
French cleat (best all-around): A 45°-ripped cleat on the wall and a matching cleat on the nightstand.
Strong, forgiving, and easy to level. -
Hidden floating-shelf bracket: Metal rods or a concealed bracket system.
Clean look, but you must be precise with holes and alignment. -
Ledger strip / nailing strip: A wood strip screwed to studs, with the nightstand fastened to it from inside.
Great for box-style builds. -
Heavy-duty angle brackets (modern-industrial): Visible hardware can be a style choice.
Very strong and beginner-friendly.
Don’t let drywall anchors be your entire personality
Quality anchors and toggle bolts can be useful when studs aren’t available, but the strongest, safest approach for a nightstand is still
anchoring into studs. If you must rely on anchors, choose heavy-duty options, follow the manufacturer’s load ratings, and keep the nightstand’s “daily load”
conservative. Also: avoid adhesive hooks for anything shelf-like. Your lamp deserves better.
Tools and Materials You’ll Use Again and Again
Tools
- Stud finder (or a magnet method), tape measure, pencil
- Level (a longer one helps)
- Drill/driver + bits (including a countersink bit)
- Saw (circular saw with guide, miter saw, or table saw)
- Sander (or sanding block), clamps
- Optional but nice: pocket-hole jig for clean joinery
Materials
- Wood: 3/4″ plywood (birch/maple) for crisp modern boxes; hardwood for slab styles; MDF for paint-grade (not ideal for heavy loads)
- Mounting: French cleat stock, hidden bracket kit, or heavy-duty angle brackets
- Fasteners: construction screws for studs, wood screws, wood glue
- Finish: paint + primer, stain + topcoat, or hardwax oil for a modern matte look
- Optional upgrades: drawer slides, soft-close hardware, grommet for cords, small pull, LED strip channel
DIY Modern Floating Nightstand Ideas
Below are practical designs that look modern on purpose (not “modern because the legs fell off”). Each idea includes what it looks like, how to build it,
and why it works.
1) The Minimalist “Thick Shelf” Nightstand
Look: A chunky floating shelfclean lines, no drawer, no drama.
Best for: Small bedrooms, minimalist decor, rentals (if you can hit studs).
Build approach: Create a hollow “torsion box” shelf: a thin plywood skin wrapped around a lightweight internal frame.
Mount it on a hidden floating-shelf bracket or a cleat.
- Pro tip: Add a small lip (1/2″ tall) at the back to keep your phone from doing a slow-motion slide into the abyss.
- Modern finish: matte black, warm white, or a natural clear coat over birch ply edges (yes, plywood edges can be a design feature).
2) The Plywood Box with a French Cleat (The “Most Likely to Succeed” Build)
Look: A simple open box floating beside the bedmodern, functional, easy to replicate.
Best for: Beginners who want maximum stability with minimum stress.
Build approach: Build a 3-sided box (top, bottom, sides) with a back rail inside. Attach a French cleat inside the back.
Mount the matching cleat to the wall across studs.
- Suggested size: 16″ wide × 12″ deep × 6″ tall (adjust to taste).
- Why it’s great: French cleats make leveling easier and let you lift the nightstand off for finishing or cable tweaks.
3) The Floating Nightstand with a Drawer (Modern, But With Secrets)
Look: A sleek box with one drawerclean outside, chaos hidden inside.
Best for: Anyone tired of seeing chapstick, earbuds, and mystery receipts on display.
Build approach: Build a strong outer carcass from 3/4″ plywood, then add a drawer box (1/2″ plywood is common) on side-mount slides.
Use a cleat or ledger strip into studs.
- Pro tip: Install drawer slides with spacers/jigs so both sides land at the exact same height. One tiny mismatch can turn a soft-close drawer into a soft-cry drawer.
- Modern detail: Use a finger-pull groove or a flat black minimalist pull.
4) The “Waterfall” Nightstand (One Board, Big Design Energy)
Look: The top surface continues down one side like a waterfall edge.
Best for: Modern bedrooms that want a high-end look without a complicated build.
Build approach: Use plywood or hardwood with mitered corners (45°) so the grain/finish wraps cleanly.
Build as a shallow U-shape and mount with a hidden cleat.
- Beginner-friendly alternative: Skip miters and do clean butt joints with edge banding for a modern, crisp look.
- Modern finish: warm oak stain + matte topcoat.
5) The Two-Tier Floating Nightstand (Because One Surface Is Never Enough)
Look: Top shelf for lamp + bottom shelf for books (or the “I’ll read this someday” collection).
Best for: Small spaces that still need storage.
Build approach: Build a box with an internal divider, or stack two floating shelves aligned vertically.
Use a single long French cleat behind the entire piece for strength and easy leveling.
- Style trick: Make the lower shelf slightly shallower so it looks intentional and lighter.
6) The Corner Floating Nightstand (The Space Saver)
Look: A triangular or trapezoid shelf tucked into a corner.
Best for: Tight bedrooms, angled walls, or when your bed is shoved into a cozy nook.
Build approach: Build a triangular box or thick shelf and mount into studs on both walls if possible.
Corner builds can be very stable when they’re supported from two directions.
- Pro tip: Add a small front rail so items don’t “escape” during enthusiastic alarm snoozing.
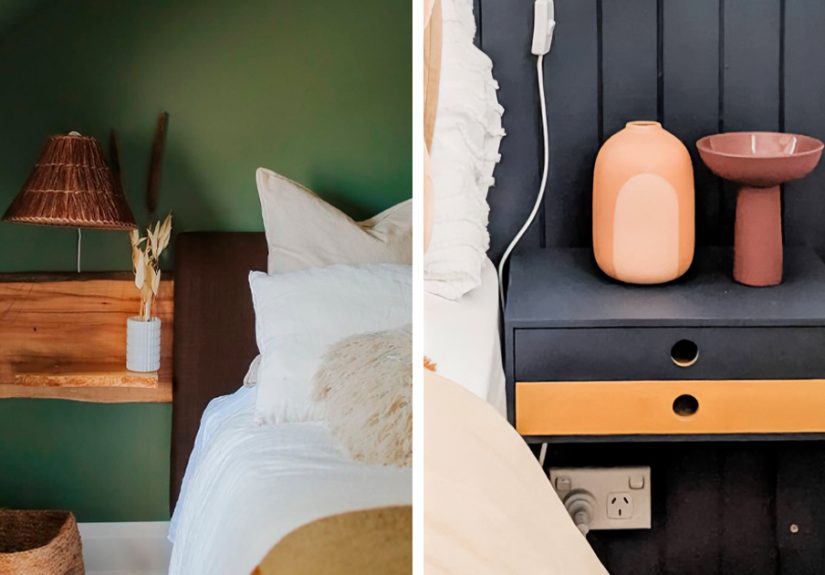
7) The Live-Edge Modern Floating Nightstand (Organic + Modern)
Look: Natural wood slab top with a clean, minimal undersidewarm, modern, and a little “boutique hotel.”
Best for: Bedrooms that need warmth without clutter.
Build approach: Use a slab for the top and attach a hidden bracket system designed for floating shelves.
Keep the slab thickness substantial enough to hide mounting hardware.
- Modern balance: Pair the organic edge with a very simple shapeno extra trim, no ornate pulls.
- Finish tip: A hardwax oil or satin polyurethane can protect the wood while keeping a modern sheen (not glossy).
8) The “Charging Station” Floating Nightstand (Cords, But Make Them Discreet)
Look: A floating nightstand with hidden cable managementclean surface, power where you need it.
Best for: People with phones, watches, earbuds, tablets, and the emotional support charger they swear they don’t need.
Build approach: Add a rear grommet hole (or a cord slot) and a hidden channel underneath for cable routing.
If you add an in-drawer power strip, ensure the cord can exit safely without pinching.
- Safety note: If you’re modifying outlets or hardwiring anything, hire a qualified electrician. Keep DIY power solutions plug-in and well-ventilated.
9) The “One-Stud” Floating Nightstand (When Studs Won’t Cooperate)
Look: A compact box or shelf designed to mount primarily on one stud, with additional stabilization.
Best for: Awkward layouts where studs aren’t centered where you want the nightstand.
Build approach: Use a long internal mounting plate (plywood backer) that reaches the stud plus heavy-duty anchors for anti-tilt support.
Or widen the piece so a cleat can span two studs.
- Reality check: This is where planning pays off. If you can redesign to hit two studs, do it. Your future self will thank you every time you set down a glass of water.
Step-by-Step: A Simple Modern Floating Nightstand Box (Beginner-Friendly)
Example build: open box with French cleat
This is the “I want it modern, sturdy, and done this weekend” build. Adjust dimensions to your space.
Cut list (example)
- Top: 16″ × 12″ (3/4″ plywood)
- Bottom: 16″ × 12″ (3/4″ plywood)
- Sides (2): 6″ × 12″ (3/4″ plywood)
- Internal cleat support strip: ~14″ × 3″ (3/4″ plywood)
- French cleat pieces: 2 strips, each ~14–16″ long (3/4″ plywood, ripped at 45°)
Assembly
- Dry fit first: Make sure everything is square before glue touches wood.
- Build the box: Glue and screw (or brad nail) the sides between the top and bottom.
- Add the internal support: Install the internal strip near the back inside the box. This gives you a beefy place to attach the cleat and prevents racking.
- Attach the nightstand cleat: Secure one half of the French cleat inside the box, near the back, with screws into the internal support strip.
- Fill and sand: Wood filler, then sand smooth. Break sharp edges slightly for a more finished look.
Mounting to the wall
- Mark height: Choose your nightstand height relative to the mattress and mark a level line.
- Find studs: Mark stud centers along your mounting line.
- Install wall cleat: Level the matching French cleat on the wall and screw it into studs with appropriate screws (pilot holes help prevent splitting).
- Hang the nightstand: Lift the nightstand onto the cleat. Check level.
- Lock it in: Add a couple of small screws through the inside back of the nightstand into the wall cleat (or add a lower anti-tip screw) so it can’t lift off accidentally.
Modern Finishing Tricks That Make DIY Look Expensive
Go matte or satin (gloss is a brave choice)
Modern bedrooms tend to look best with low-sheen finishes. Matte paint hides minor imperfections and looks intentionally modern.
Satin clear coats protect wood while keeping it sleek.
Make plywood edges look intentional
- Edge banding: Clean, furniture-like lookespecially for paint or stain.
- Exposed ply: If you like the modern Scandinavian vibe, sand smooth and clear coat.
- Chamfer or roundover: A tiny bevel on edges instantly looks more “designed.”
Hardware that stays modern
- Flat black bar pull
- Small round knob (simple, not ornate)
- Finger pull cutout (ultra modern, no extra parts)
Common Mistakes (So You Can Skip the Regret Phase)
- Mounting too low/high: If you have to sit up to reach your water, it’s too far. If you bump it with your elbow every time you roll over, it’s too close or too tall.
- Ignoring baseboards: A floating nightstand that rocks because trim pushes it forward is not “floating,” it’s “wobbling.” Use spacers or position cleats above trim.
- Overloading a minimalist shelf: A thin shelf can look amazinguntil it’s holding a lamp, books, a candle, and a full emotional breakdown. Build for your habits.
- Skipping leveling: Your eyes will notice a crooked nightstand forever. Take the extra 3 minutes with a level.
FAQ
How much weight can a floating nightstand hold?
It depends on how you mount it, what hardware you use, and whether you hit studs. A properly installed cleat or bracket into studs can hold substantial everyday loads.
If you’re unsure, build and mount it like a shelf meant for real usenot just decoration.
Is a French cleat strong enough for a nightstand?
YesFrench cleats are a classic method for hanging cabinets and shelves, and they’re excellent for floating nightstands when installed into studs and built with solid joinery.
Can I make a floating nightstand without power tools?
You can do a simplified version with pre-cut lumber and basic tools, but you’ll still need a drill/driver for mounting.
For clean, modern results, a saw (or store cuts) and a sander make life much easier.
Experiences DIYers Commonly Have (And What They Learn)
If you ask a room full of DIYers about floating nightstands, you’ll hear a surprising amount of emotion for a piece of furniture that’s basically a wall-mounted box.
The first “experience” is usually optimismmeasuring tape in hand, Pinterest board open, confidence at an all-time high.
Then comes the stud finder’s plot twist: the studs are not where your design wants them to be. That’s when many people learn the first big lesson:
design is flexible; gravity is not. The smartest builders either widen the nightstand so a cleat can span two studs, or they redesign the internal mounting plate
so the attachment points land exactly where framing exists.
Another common experience is discovering that walls are… personalities. Some are flat. Some are subtly bowed. Some have thick baseboards that shove your nightstand forward
like the wall is saying, “No, thank you.” DIYers often solve this by adding spacers behind the nightstand or building the cleat system so it sits above the trim.
It’s also common to realizemid-installthat “level” and “looks level” are two different things when your floor is slightly off.
The workaround is simple: level the nightstand to the wall line and the bed, not to the floor. Your eyes care about alignment with the bed more than they care
about what your floor has been up to since 1997.
Finishing is where the real character development happens. Many DIYers start with “I’ll just slap on some paint,” then learn that modern finishes look best
when you do the boring steps: fill, sand, prime, sand again, then paint. A matte finish is forgiving and modern, but it still needs a smooth surface underneath.
If the nightstand is wood, people often learn that a clear coat can turn “nice grain” into “wow, that’s furniture” fastespecially when edges are cleanly banded
or intentionally exposed. It’s also common to underestimate drying time and end up gently placing a lamp on a finish that’s “dry to the touch” but not fully cured.
(The resulting ring mark becomes… a design feature. A story. A warning.)
Living with a floating nightstand teaches practical lessons too. DIYers notice how much easier it is to sweep, vacuum, or mop beneath itespecially in small bedrooms.
They also notice that shallow nightstands encourage calmer surfaces: you simply can’t stack five things and a small existential crisis on a 10-inch-deep shelf.
On the flip side, people who build drawer versions often feel a deep sense of peace when clutter disappears behind a clean front.
One of the most repeated “I’m glad I did this” moments is adding cord managementa simple grommet hole or hidden channelbecause it keeps the modern look intact.
The most repeated “I wish I did this” moment is mounting slightly higher than planned after buying a thicker mattress later. That’s why measuring from the actual bed setup
(frame + mattress + topper) is a small step that saves future regret.
The most satisfying experience, though, is the first night you reach over and everything is exactly where you want itphone, water, bookon a nightstand you built
with your own hands. It feels a little like cheating at adulthood. And if it’s perfectly level? Congratulations: you have achieved a rare form of DIY enlightenment.
Conclusion
The best DIY modern floating nightstand is the one that fits your bedroom, matches your habits, and mounts safely into the structure behind the drywall.
Start by choosing the right height relative to your mattress, then pick a design that matches your storage needsminimal shelf, clean box, or a sleek drawer build.
Use dependable mounting methods like a French cleat or a concealed bracket system, take your time leveling, and finish with modern materials (matte paint, satin clear coats,
and crisp edges). Do that, and your bedroom will look cleaner, feel bigger, and function betterno floor legs required.