
Table of Contents >> Show >> Hide
- Why a DIY Accent Cabinet Makeover Is Worth It
- Choose the Right Cabinet for Your Makeover
- Pick a Design Direction Before You Start
- Gather Your Supplies
- Step 1: Remove Doors, Drawers, and Hardware
- Step 2: Clean Like the Finish Depends on It
- Step 3: Repair Dents, Holes, and Rough Spots
- Step 4: Sand the Surface
- Step 5: Prime for Durability
- Step 6: Paint in Thin, Patient Coats
- Step 7: Add a Decorative Feature
- Step 8: Protect the Finish
- Step 9: Reassemble and Style the Cabinet
- Budget-Friendly Makeover Example
- Common Mistakes to Avoid
- How to Make the Cabinet Look More Expensive
- Extra Experience: Lessons From Real DIY Accent Cabinet Makeovers
- Conclusion
A DIY accent cabinet makeover is one of those home projects that looks suspiciously fancy but does not require a trust fund, a design degree, or a garage full of mysterious power tools. With a little planning, a few smart supplies, and the courage to look at an outdated cabinet and say, “Today, you become interesting,” you can turn a forgotten piece of furniture into a stylish focal point.
Accent cabinets are the charming side characters of home décor. They hold extra dishes, hide board games, store entryway clutter, and occasionally pretend to be more organized than we are. The beauty of giving one a makeover is that the project is small enough for a weekend but impactful enough to change the mood of a room. A painted cabinet in deep green, navy blue, warm terracotta, soft cream, or bold black can make a living room, hallway, dining nook, or bedroom feel instantly more intentional.
This guide walks through a practical, beginner-friendly cabinet makeover idea using paint, updated hardware, simple surface prep, and optional decorative touches. The goal is not to create a museum piece that guests are afraid to touch. The goal is a durable, beautiful, personality-packed cabinet that looks custom without making your wallet dramatically faint.
Why a DIY Accent Cabinet Makeover Is Worth It
A new accent cabinet can be expensive, especially when you want something with character. The problem is that affordable furniture often looks too plain, while designer cabinets sometimes cost enough to make you whisper, “Does it also do my taxes?” A DIY makeover lands happily in the middle. You can rescue a thrifted cabinet, update an old family piece, or transform a basic flat-pack cabinet into something that looks curated.
The biggest advantage is control. You choose the color, finish, knobs, pulls, legs, trim, and interior details. Want a moody cabinet with brass hardware? Done. Prefer a coastal cabinet with cane webbing and soft white paint? Also done. Dreaming of a playful color-blocked cabinet that makes your hallway less boring than a waiting room? Absolutely allowed.
Even better, a cabinet makeover is forgiving. Unlike painting an entire kitchen, you are working on a manageable surface area. If one door gets a drip, you sand it smooth and try again. If the first color looks wrong, you repaint it. The cabinet will not judge you. It has probably seen worse.
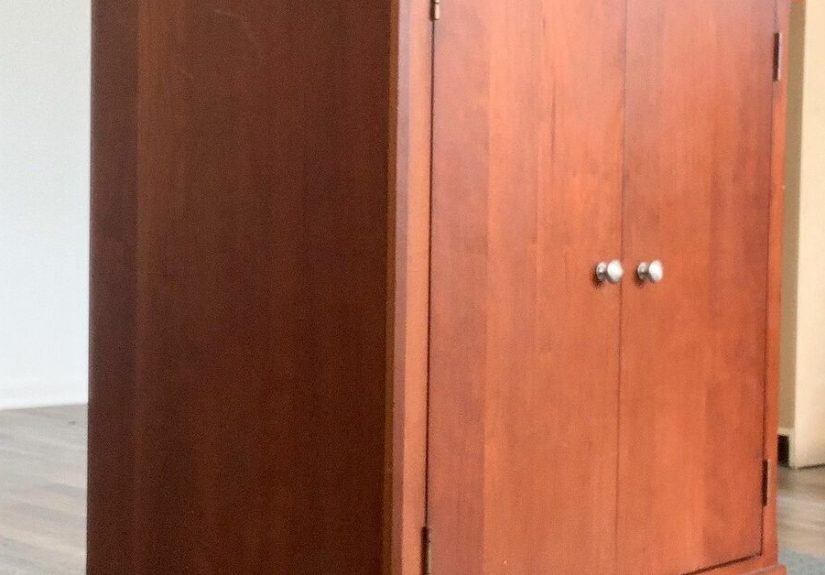
Choose the Right Cabinet for Your Makeover
Before grabbing a paintbrush, start with the cabinet itself. A great DIY accent cabinet makeover begins with good bones. Look for a piece that is sturdy, level, and useful for your space. Solid wood is wonderful, but laminate, veneer, MDF, and previously painted furniture can also be upgraded with proper prep and the right primer.
What to Look For
Open and close the doors. Slide the drawers. Check whether the cabinet wobbles. A little cosmetic wear is fine; deep structural damage is another story. Scratches, dull finish, dated hardware, and an uninspiring color are all makeover-friendly problems. Broken frames, swollen particleboard, or doors that hang like they have given up on life may require more repair than a beginner wants to tackle.
Also think about where the cabinet will live. A dining room cabinet may need to store linens, dishes, or serving pieces. An entryway cabinet might hide shoes, pet supplies, or mail. A bedroom cabinet could hold accessories, books, or blankets. The best makeover does not only look good; it solves a small household problem while wearing a cute outfit.
Pick a Design Direction Before You Start
Paint can work magic, but random paint choices can work chaos. Before buying supplies, choose a clear design direction. This does not need to be complicated. Think of three words that describe the finished cabinet. For example: “moody, modern, brass,” or “light, coastal, textured,” or “vintage, green, charming.” These words will guide your color, hardware, and decorative details.
Popular Accent Cabinet Makeover Styles
A modern makeover might use matte black or charcoal paint, sleek bar pulls, and simple styling. A vintage-inspired cabinet could shine in sage green or dusty blue with antique brass knobs. A boho cabinet might include cane webbing, fluted trim, warm wood tones, or woven baskets. A glam cabinet can go bold with lacquer-like paint, gold hardware, and peel-and-stick wallpaper inside the doors.
If your room already has a lot of patterns and color, a calm cabinet color may work best. If the room feels neutral and sleepy, your cabinet can be the espresso shot. Accent furniture is allowed to be brave. That is literally its job.
Gather Your Supplies
A smooth cabinet makeover depends on using the right materials. You do not need every gadget in the paint aisle, but a few basics make the difference between “custom furniture” and “I painted this during a power outage.”
Basic Supply List
- Degreasing cleaner or mild cleaner suitable for furniture
- Microfiber cloths or tack cloth
- Screwdriver or drill for removing hardware
- Wood filler for holes, dents, or scratches
- Sandpaper or sanding sponge, usually medium and fine grit
- Bonding primer or stain-blocking primer, depending on the surface
- Cabinet, furniture, enamel, or durable acrylic paint
- High-density foam roller and quality angled brush
- Painter’s tape
- Drop cloth
- Protective topcoat if needed
- New knobs, pulls, legs, trim, or decorative inserts
For a cabinet that will get regular use, choose paint made for cabinets, trim, or furniture. These paints are generally more durable than standard wall paint and are better suited to doors, drawers, edges, and surfaces that people touch often. Satin, semi-gloss, and enamel finishes are common choices because they are easier to wipe clean than very flat finishes.
Step 1: Remove Doors, Drawers, and Hardware
Start by removing the cabinet doors, drawers, hinges, knobs, and pulls. Label the doors and hardware as you go, especially if the cabinet has more than one door. A tiny piece of painter’s tape inside each door can save you from playing “which hinge belonged where?” later. That game is not fun. It has no snacks.
Place screws and hardware in a small bag or container. If you are replacing the hardware, keep the old pieces until the new ones fit properly. Measure the distance between screw holes for pulls so you can buy replacements that match the existing spacing. If the new hardware does not match, fill the old holes with wood filler, sand smooth, and drill new holes after painting.
Step 2: Clean Like the Finish Depends on It
Because it does. Cleaning is one of the least glamorous steps in a DIY accent cabinet makeover, but it is also one of the most important. Furniture collects dust, oils, fingerprints, polish, cooking residue, and mystery grime from previous decades. Paint does not bond well to grime. Paint looks at grime and says, “No thank you.”
Wipe the entire cabinet with a degreasing cleaner or a mild cleaner recommended for painted surfaces. Pay extra attention to areas around knobs, door edges, and drawer fronts. After cleaning, wipe again with clean water if your cleaner requires rinsing, then let the cabinet dry completely.
Step 3: Repair Dents, Holes, and Rough Spots
Once the cabinet is clean, inspect it closely. Fill scratches, dents, chipped corners, and unused hardware holes with wood filler. Let the filler dry according to the label, then sand it smooth. Do not rush this step. Paint has a special talent for highlighting every bump you thought it would hide. Paint is honest like that.
If the cabinet has loose trim or veneer, secure it before painting. For small lifted veneer edges, wood glue and clamps may help. For damaged areas that cannot be repaired neatly, consider adding decorative trim, cane panels, peel-and-stick wallpaper, or a textured door treatment to turn the flaw into a design feature.
Step 4: Sand the Surface
You usually do not need to sand down to bare wood. The goal is to scuff the surface so primer and paint can grip. Light sanding removes shine and creates a slightly rough texture. For glossy finishes, laminate, or previously painted furniture, this step is especially important.
Use a sanding sponge or sandpaper and work evenly across doors, drawers, sides, and trim. After sanding, remove dust thoroughly with a vacuum, microfiber cloth, or tack cloth. Dust left behind can create a gritty finish, and nobody wants a cabinet that feels like it spent spring break at the beach.
Step 5: Prime for Durability
Primer is the quiet hero of a cabinet makeover. It helps paint adhere, improves coverage, blocks stains, and creates a more even finish. For slick surfaces like laminate or melamine, use a bonding primer. For dark wood, knots, tannin bleed, or old stains, a stain-blocking primer is a smart choice.
Apply primer in thin, even coats using a brush for corners and a foam roller for flat areas. Let it dry fully. Then lightly sand the primed surface with fine-grit sandpaper or a sanding sponge to smooth out texture. Wipe away dust before painting. This extra sanding step is one of the secrets to a finish that looks less “craft table accident” and more “boutique furniture shop.”
Step 6: Paint in Thin, Patient Coats
Now comes the satisfying part: color. Stir your paint well and apply the first coat thinly. A high-density foam roller helps create a smooth surface on flat cabinet areas, while an angled brush works well for corners, grooves, and trim. Avoid loading the roller with too much paint. Thick coats take longer to dry and are more likely to drip, bubble, or stay soft.
Let the first coat dry according to the paint label. Lightly sand if needed, then wipe away dust and apply the second coat. Many cabinet makeovers need two coats; some dramatic color changes may need three. Deep colors, bright shades, and whites over dark wood can be a little dramatic. Let them have their process.
Best Color Ideas for an Accent Cabinet
Deep green is a beautiful choice for dining rooms, living rooms, and entryways because it feels rich without being too loud. Navy blue adds a classic, tailored look. Warm beige or mushroom creates a soft designer feel. Terracotta, clay, or muted coral can warm up a neutral room. Black is bold, timeless, and surprisingly versatile. Soft white or cream works well when you want texture and hardware to be the star.
If you are unsure, test paint colors on poster board and place them near the cabinet for a day. Look at them in morning light, afternoon light, and evening lamp light. Paint colors are sneaky. A calm green at noon can turn into “haunted pickle” by dinner if the lighting is wrong.
Step 7: Add a Decorative Feature
A simple painted cabinet is lovely, but an accent cabinet makeover becomes memorable when you add one special detail. This is where the project can look custom without requiring expert carpentry.
Easy Decorative Ideas
Add peel-and-stick wallpaper to the inside back panel for a surprise pattern when the doors open. Install cane webbing or decorative metal mesh in door fronts if the cabinet design allows it. Apply thin wood trim to create a shaker-style or geometric pattern. Use fluted pole wrap or half-round molding for a trendy textured front. Paint the inside a contrasting color for a playful touch.
For beginners, the easiest upgrade is hardware. New knobs or pulls can completely change the cabinet’s personality. Brass adds warmth, matte black feels modern, glass knobs lean vintage, and leather pulls bring a casual handmade feel. Hardware is basically cabinet jewelry, and yes, your cabinet deserves accessories.
Step 8: Protect the Finish
Some cabinet and furniture paints are durable enough without a separate topcoat, especially enamel or hybrid cabinet paints. Chalky, milk, or very matte paints usually need sealing for protection. If your cabinet will live in a busy entryway, dining room, or family room, a clear protective topcoat can help resist scratches and stains.
Choose a water-based polyurethane or polycrylic topcoat if you want a clear protective layer. Apply thin coats and allow proper drying time between coats. Sand lightly between coats if the product instructions recommend it. For white or light-colored paint, test the topcoat first because some finishes can slightly yellow over time.
Step 9: Reassemble and Style the Cabinet
After the paint has dried and cured enough to handle, reattach doors, drawers, hinges, and hardware. Be gentle. Paint may feel dry to the touch before it has fully cured. Avoid slamming doors or placing heavy décor on top too soon. Your cabinet has just had a makeover, not a wrestling match.
Once assembled, style the top with intention. Try a lamp, stacked books, a tray, a small plant, or framed art. Keep it balanced but not crowded. If the cabinet is colorful, let it breathe. If it is neutral, use décor to bring in texture, shape, and contrast.
Budget-Friendly Makeover Example
Imagine you find a plain brown two-door cabinet at a thrift store for $45. It is sturdy, but the finish is scratched and the hardware looks like it came from a very tired office. You clean it, fill the old hardware holes, scuff sand the surface, and apply bonding primer. Then you paint it a deep olive green in a satin cabinet finish.
For the doors, you add thin wood trim in a simple rectangular frame. After painting the trim to match, you install antique brass knobs. Inside, you add peel-and-stick botanical wallpaper to the back panel. The total cost might include the cabinet, primer, paint, trim, knobs, and wallpaper. Depending on what supplies you already own, the result can look like a high-end accent piece for a fraction of retail price.
The best part is that no one needs to know the cabinet once looked like it stored printer paper in 1998. That is between you, the thrift store, and the paint can.
Common Mistakes to Avoid
The first mistake is skipping cleaning. Even beautiful paint cannot bond properly to dust and grease. The second is skipping primer on slick or dark surfaces. Primer may feel like an extra step, but it often prevents peeling, uneven color, and future regret.
Another common mistake is applying paint too thickly. Thin coats look better and cure harder. Rushing dry time is also risky. Follow the label instructions for recoat and cure times. Finally, do not ignore hardware measurements. Buying gorgeous pulls that do not fit the existing holes is a small tragedy, but still a tragedy.
How to Make the Cabinet Look More Expensive
To create a high-end look, focus on details. Smooth prep, quality paint, and upgraded hardware matter more than complicated techniques. Choose a color that feels intentional in the room. Add trim to flat doors for depth. Paint the interior. Replace basic legs with bun feet, tapered legs, or a simple plinth base. Use matching hinges if they are visible.
Also consider scale. Larger hardware can make a basic cabinet feel more substantial. A pair of oversized brass pulls on a dark painted cabinet can look designer-level with very little effort. The trick is to keep the final design cohesive. One standout detail is stylish. Five unrelated details can make the cabinet look like it got dressed in the dark.
Extra Experience: Lessons From Real DIY Accent Cabinet Makeovers
After working through cabinet makeovers, one lesson becomes clear very quickly: the exciting part is not always the most important part. Everyone wants to jump straight to the paint color, because color is fun. Color is the dessert. But the boring prep steps are the vegetables, and unfortunately, the vegetables are what help the dessert behave. A cabinet that is cleaned, sanded, primed, and painted patiently almost always looks better than one that was rushed with enthusiasm and a dangerously optimistic brush.
A helpful experience is to treat the first makeover as a learning project, not a perfection contest. Start with a small cabinet instead of a huge heirloom buffet. Choose a piece that has value but not emotional pressure. If you make a mistake, it is easier to fix and less likely to cause dramatic pacing around the room. A small accent cabinet teaches you how paint moves, how primer covers, how long drying really takes, and how much dust can appear from nowhere like tiny furniture confetti.
Another practical lesson is that lighting changes everything. A color that looks elegant in the store can look completely different at home. Testing a sample is worth the extra step. Put the sample near the wall, flooring, rug, and existing furniture. A moody blue might look rich beside warm wood but too cold next to gray flooring. A cream paint may look soft in daylight but slightly yellow under warm bulbs. Let the color audition before giving it the starring role.
Hardware is also more powerful than beginners expect. Changing knobs and pulls can make a cabinet look older, newer, bolder, softer, or more expensive. However, hardware should be chosen after you know the paint color and style. Brass on green feels classic. Matte black on white feels crisp. Wood knobs on a pale cabinet feel Scandinavian and calm. Glass knobs on a vintage color feel charming. Hardware is not just functional; it tells the cabinet what personality it is supposed to have.
One of the most satisfying tricks is painting or decorating the inside. Many people focus only on the exterior, but an interior surprise makes the piece feel thoughtful. A patterned wallpaper backing, contrasting paint color, or neatly lined shelf can turn a basic storage cabinet into something delightful. It is like opening a coat and discovering a fancy lining. Nobody needs it, but everyone enjoys it.
Patience is the final boss of this project. Paint needs time to dry and cure. Reassembling too soon can lead to sticky doors, dents, and chipped edges. The cabinet may look finished, but the finish is still gaining strength. Give it breathing room before loading it with heavy dishes, baskets, or décor. This is the part where your future self thanks your present self for not treating fresh paint like cured armor.
The best DIY accent cabinet makeover does not have to be perfect. In fact, a tiny brush mark or small uneven spot is often invisible once the cabinet is styled and living in the room. What people notice is the transformation: an old or ordinary piece became useful, beautiful, and personal. That is the real reward. You did not just paint furniture. You rescued storage, upgraded a room, and gave a cabinet a second career. Honestly, that is more than many of us accomplish before lunch.
Conclusion
A DIY accent cabinet makeover is a smart, creative way to refresh your home without buying brand-new furniture. With proper cleaning, light sanding, primer, durable paint, updated hardware, and one thoughtful decorative detail, you can create a cabinet that looks custom and works beautifully in your space.
The project is approachable for beginners, flexible for different styles, and budget-friendly compared with purchasing a designer accent piece. Whether you choose deep green, classic navy, warm neutral, dramatic black, or a cheerful pop of color, the key is preparation and patience. Take your time, use thin coats, protect the finish when needed, and let the cabinet cure before putting it back to work.
In the end, your cabinet will do more than store things. It will add character, solve clutter, and give your room that satisfying “something changed, and it looks expensive” feeling. Not bad for a weekend, a paintbrush, and a piece of furniture that was just waiting for its glow-up.


