Table of Contents >> Show >> Hide
- Why Roots Look Uneven After Dyeing
- Easy Ways to Dye Hair Evenly with Roots: 12 Steps
- 1. Choose the Right Shade and Formula
- 2. Read the Instructions Before Mixing
- 3. Do a Patch Test 48 Hours Ahead
- 4. Do a Strand Test
- 5. Gather Your Tools
- 6. Start with Dry, Detangled Hair
- 7. Protect Your Skin and Clothes
- 8. Divide Hair into Four Sections
- 9. Apply Dye to the Roots First
- 10. Saturate, Do Not Smear
- 11. Time the Roots Before Refreshing the Ends
- 12. Rinse, Condition, and Check in Natural Light
- Common Mistakes That Cause Patchy Root Color
- How to Blend Roots with the Rest of Your Hair
- When You Should See a Professional
- Aftercare Tips for Longer-Lasting Root Color
- Real Experience: What Actually Helps When Dyeing Roots at Home
- Conclusion
Editorial note: This guide synthesizes practical at-home hair-coloring guidance from dermatologist safety advice, FDA hair dye precautions, and professional beauty application methods, including patch testing, strand testing, root-first timing, sectioning, and careful rinsing.
Dyeing your hair at home sounds simple until your roots turn one shade, your ends turn another, and the back of your head starts acting like an unsupervised art project. The good news? Even hair color is not magic. It is mostly preparation, sectioning, timing, and resisting the dramatic urge to “just slap it on and hope.”
Whether you are covering grays, refreshing faded color, or blending grown-out roots, the biggest trick is understanding that roots and ends behave differently. Roots are newer, healthier, and warmed by your scalp, so they often process faster. Ends are older, more porous, and may grab color more strongly. That is why a smart root touch-up is not the same as painting a wall. Your hair has opinions, and unfortunately, it expresses them in uneven patches.
Below is a clear, beginner-friendly guide to dye hair evenly with roots in 12 steps, with practical examples, common mistakes, and a real-world experience section at the end.
Why Roots Look Uneven After Dyeing
Uneven roots usually happen for one of four reasons: the dye was not applied in thin sections, the roots did not get enough product, the color was pulled through the ends too early, or the formula was not right for the job. Gray hair can also be more resistant, which means it may need fuller saturation or the maximum processing time listed in the instructions.
Another common issue is the dreaded “hot roots” effect. This happens when the roots come out warmer, brighter, or lighter than the rest of the hair. Because the scalp gives off heat, color can lift or develop faster near the roots, especially when going lighter. For big lightening jobs, bleach corrections, or dramatic color changes, a salon professional is usually the safer choice.
Easy Ways to Dye Hair Evenly with Roots: 12 Steps
1. Choose the Right Shade and Formula
Start with a realistic color goal. If you are coloring at home, stay close to your current shade, ideally within one to three levels. Dermatology guidance commonly recommends staying near your natural color because major lightening requires stronger chemicals and can cause more dryness and damage.
For gray coverage, choose a permanent dye or a root touch-up kit labeled for gray coverage. For a softer refresh, semi-permanent or demi-permanent color may be enough. If your roots are dark and your ends are blonde, do not expect one box of color to magically create salon balayage. Box dye is talented, but it is not a mind reader.
2. Read the Instructions Before Mixing
Every hair dye brand has its own mixing ratio, timing, and warning statements. The FDA advises users to follow package directions, pay attention to caution labels, wear gloves, avoid the eyes, and never leave dye on longer than directed.
Read the instructions before you put on gloves. Once the color is mixed, the clock starts ticking, and that is not the ideal time to discover the leaflet has six panels, two languages, and one tiny diagram that looks like modern art.
3. Do a Patch Test 48 Hours Ahead
A patch test helps check whether your skin may react to the dye. Many permanent and semi-permanent dyes contain ingredients that can irritate or trigger allergic contact dermatitis in some people. Apply a tiny amount of the prepared dye mixture to the area recommended by the product, often behind the ear or inside the elbow, and wait as instructed. The FDA recommends patch testing before dyeing, even if you have used hair dye before.
Do not skip this step just because you are busy. A patch test is like checking the weather before a picnic. It may feel unnecessary until everything goes sideways.
4. Do a Strand Test
A strand test shows how your hair will actually respond to the color. Choose a hidden section near the nape of your neck, apply the dye, process it for the recommended time, rinse, dry, and check the result in natural light.
This is especially helpful if your hair is porous, previously colored, highlighted, relaxed, or heat-damaged. Ends that look innocent can suddenly turn too dark because porous hair absorbs dye quickly. The strand test gives you a preview before your entire head becomes the experiment.
5. Gather Your Tools
For even root coverage, you need more than the bottle in the box. Prepare a tint brush, plastic bowl if the product allows bowl mixing, sectioning clips, wide-tooth comb, old towel, petroleum jelly or barrier cream, disposable gloves, timer, and two mirrors if possible.
If your hair is thick, long, or dense, buy two boxes. Running out of dye halfway through is how people end up with “creative dimension” they did not ask for.
6. Start with Dry, Detangled Hair
Most permanent at-home dyes are applied to dry hair unless the package says otherwise. Detangle your hair gently before coloring so you can create clean sections and move quickly. Avoid heavy styling products right before dyeing because buildup can interfere with even application.
Many stylists recommend not washing immediately before coloring because natural scalp oils can provide a small buffer against irritation. However, if your hair is coated in gel, wax, or dry shampoo, wash it earlier and let it dry fully before coloring.
7. Protect Your Skin and Clothes
Apply a thin layer of petroleum jelly or barrier cream around your hairline, ears, and nape of the neck. Do not smear it onto the roots, because it can block the dye. Wear an old button-down shirt or a dark towel over your shoulders.
Hair dye has a special talent for finding white towels, expensive countertops, and your favorite shirt. Assume the dye is mischievous and prepare accordingly.
8. Divide Hair into Four Sections
Sectioning is the difference between even color and “I missed a spot the size of Ohio.” Part your hair down the middle from forehead to nape, then part it from ear to ear. Clip each of the four sections separately.
If your hair is very thick, create six sections instead of four. Smaller sections allow better control and fuller root saturation. Professional colorists use sectioning because it works, not because clips look cute on Instagram.
9. Apply Dye to the Roots First
Begin at the areas where regrowth is most visible: the center part, hairline, temples, and crown. Use the tint brush to paint dye directly onto the roots, extending slightly beyond the line where your natural roots meet previously colored hair. L’Oréal Paris also recommends sweeping root color just past the demarcation line for a softer blend.
Work in thin slices, about one-quarter inch at a time. Lift each slice, paint both sides of the root area, then move to the next. Do not just coat the top layer. Hair has an underside, and it will absolutely reveal your shortcuts when you put it in a ponytail.
10. Saturate, Do Not Smear
Uneven roots often come from under-saturation. The root area should look fully coated, not lightly kissed by color. Gray roots, coarse strands, and dense hair often need more product than you think.
Use the brush to press color into the roots instead of dragging it down the hair shaft. If you are covering grays, pay special attention to the temples and front hairline. These areas tend to be more visible and, for many people, more stubborn.
11. Time the Roots Before Refreshing the Ends
Follow the processing time on the box. In many root touch-up routines, the roots need most of the processing time, while the mid-lengths and ends need only a short refresh at the end. Good Housekeeping notes that roots often need the most color and processing time because that is where regrowth appears first.
If your ends are already the right shade, do not pull permanent dye through them for the full processing time. That can make ends too dark, dull, or dry. Instead, add a small amount of color to the lengths only during the final few minutes if the instructions allow it. For previously colored hair, think “blend,” not “repaint the whole house.”
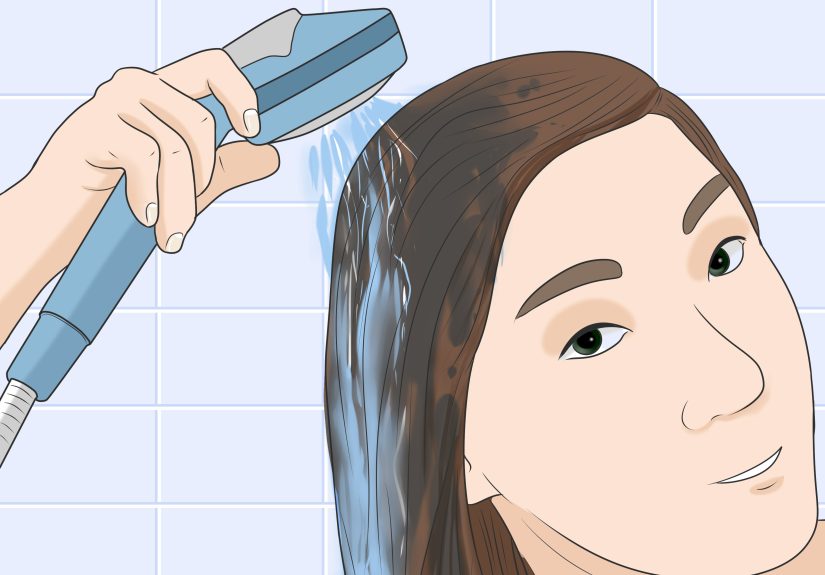
12. Rinse, Condition, and Check in Natural Light
When the timer ends, rinse thoroughly with lukewarm water until the water runs mostly clear. Use the conditioner included in the kit, or a color-safe conditioner, to smooth the cuticle and add softness. Avoid shampooing immediately unless the instructions tell you to do so.
After drying, check the color in natural light. Bathroom lighting is dramatic, dishonest, and responsible for many unnecessary panic spirals. If you notice a tiny missed spot, use a root touch-up product or wait before doing a full correction. Coloring again too soon can stress the hair and scalp.
Common Mistakes That Cause Patchy Root Color
Using Too Little Dye
If the roots are not fully saturated, the final color may look translucent or uneven. This is common around the back of the head because it is harder to see. Use two mirrors or ask someone you trust to check your sections. Ideally, ask someone who will not say, “Looks fine,” while staring at their phone.
Starting Randomly Instead of Sectioning
Random application creates random results. Always work in an organized pattern: front left, front right, back left, back right, or whatever order helps you stay consistent. The key is knowing where you have already applied color.
Pulling Color Through the Ends Too Early
Ends are usually more porous than roots. If you apply permanent dye from roots to ends for the full processing time, the ends may become darker or flatter than the roots. Refresh the ends only if needed and only according to the product directions.
Choosing a Shade That Is Too Dark
When in doubt, choose a slightly lighter root touch-up shade rather than going too dark, especially around the hairline. Fine baby hairs near the face can grab color quickly, making the front look heavy or harsh.
How to Blend Roots with the Rest of Your Hair
To blend roots naturally, apply color just past the regrowth line instead of stopping at a hard border. This soft overlap helps avoid a stripe. However, do not drag the dye all the way to the ends unless the instructions say to refresh the full length.
If your roots are gray and your lengths are brunette, use a gray-coverage formula at the roots and refresh the ends with a gloss or color-depositing conditioner later if needed. If your roots are dark and your lengths are blonde, do not try to lift the roots evenly with standard box dye. That usually requires professional lightener, toner, and careful timing.
When You Should See a Professional
At-home root dyeing works best for simple maintenance: covering grays, matching natural roots to dyed hair, or refreshing a shade close to your current color. See a professional if you want to go much lighter, correct banding, remove dark dye, bleach your roots, fix orange tones, or color hair that is fragile or chemically treated.
You should also avoid using hair dye on eyebrows or eyelashes because serious eye injury can occur. The FDA specifically warns against dyeing eyebrows or eyelashes with hair dye products.
Aftercare Tips for Longer-Lasting Root Color
Use Color-Safe Shampoo
Choose a gentle shampoo made for color-treated hair. Harsh cleansing products can fade color faster, especially on porous ends.
Wash with Cooler Water
Hot water can make color fade more quickly and may leave hair feeling dry. Lukewarm water is a better everyday choice.
Protect Hair from Heat
Use a heat protectant before blow-drying, curling, or straightening. Heat styling can make color look dull faster, especially on the ends.
Touch Up Strategically
Most people notice roots every four to eight weeks, depending on hair growth, gray percentage, and contrast between natural and dyed color. Between dye sessions, root sprays, powders, and temporary touch-up sticks can help disguise regrowth without committing to another chemical process.
Real Experience: What Actually Helps When Dyeing Roots at Home
After many at-home coloring sessions, the biggest lesson is simple: even color comes from patience, not panic. The first time someone dyes their roots, they usually focus on the front because that is what they can see. The front looks fabulous. The back, meanwhile, has entered witness protection. That is why mirrors, clips, and a slow section-by-section method matter so much.
One practical experience is to begin with the most visible areas but not spend too long there. Apply color to the center part, temples, and hairline first, then move quickly through the crown and back sections. If you spend 20 minutes perfecting the front before touching the back, the front will process longer and may look darker or warmer. A timer helps, but consistent pacing helps even more.
Another useful habit is making thinner sections than you think you need. Many beginners create large chunks because they want to finish quickly. Unfortunately, dye does not travel through a thick slice of hair like butter melting into toast. It sits on the surface. Thin slices allow the brush to reach both sides of the roots, which gives better coverage and fewer surprise patches.
For gray roots, the experience is slightly different. Gray hair can be stubborn, especially around the temples. A light dab is rarely enough. Press the color into the roots with the brush, then check the area again before starting the timer. If the gray hairs are still peeking through like tiny silver rebels, add more product. Full saturation is the secret.
The back of the head is the hardest part for almost everyone. A handheld mirror helps, but touch is just as important. Use the tail of the brush or comb to create a clean part, feel the line with your fingers, paint the roots, then move to the next slice. It may feel slow, but it is faster than fixing a missed patch later.
One more lesson: do not judge the color while it is processing. Hair dye often looks terrifying before it is rinsed. Brown may look black. Blonde toner may look suspiciously purple. Red may look like you are frosting a cupcake with lava. Trust the timing on the box unless you feel burning, severe itching, swelling, or another warning sign. In that case, rinse immediately and seek medical guidance if symptoms are serious.
Finally, post-color lighting matters. Always check your result in daylight before deciding whether it is uneven. Artificial bathroom light can exaggerate warmth, shadows, and shine. Sometimes the color is perfectly fine; sometimes your bathroom is just being dramatic.
Conclusion
Dyeing hair evenly with roots is completely possible when you treat the process like a careful routine instead of a race. Choose a realistic shade, patch test, strand test, section your hair, saturate the roots, follow timing instructions, and refresh the ends only when needed. The roots deserve attention, but the ends deserve mercy.
The secret is not a fancy salon spell. It is organization. Thin sections, enough product, a timer, and good lighting can turn a stressful root touch-up into a manageable beauty ritual. And if things get complicatedbleach, major color changes, banding, or fragile haircall a professional. Your future self, and possibly your bathroom towels, will thank you.