Table of Contents >> Show >> Hide
- Why YouTube Playback Settings Matter
- The Quick Answer
- How to Adjust Playback Settings on YouTube in 4 Steps
- Desktop vs. Mobile: What Changes?
- Best Times to Change YouTube Playback Settings
- Useful YouTube Playback Tips
- Troubleshooting YouTube Playback Problems
- Final Thoughts
- Real-World Experiences With YouTube Playback Settings
- SEO Tags
YouTube is great until it decides your tutorial should play in potato quality, your interview is moving at the speed of molasses, or the captions look like they were designed by a tiny goblin with a grudge against readability. The good news is that adjusting playback settings on YouTube is easy once you know where the controls live. Whether you want to speed up a lecture, slow down a recipe video, sharpen the picture, or turn on subtitles so you can watch in peace while the dog barks at invisible enemies, YouTube gives you plenty of tools.
This guide walks you through four simple steps to adjust YouTube playback settings on desktop and mobile. Along the way, you’ll learn what each setting actually does, when to change it, and how to avoid common frustrations like buffering, blurry video, and captions that look like they’re auditioning for a sci-fi movie. If you’ve ever tapped the gear icon and then immediately forgotten why you came there, this article is for you.
Why YouTube Playback Settings Matter
Playback settings are the controls that shape how a video looks, sounds, and feels while you watch it. On YouTube, the most useful playback options usually include playback speed, video quality, and subtitles or closed captions. These settings can make a huge difference depending on what you’re watching.
For example, a slow walkthrough for software setup may be easier to watch at 1.25x or 1.5x speed. A guitar lesson or workout demonstration might need 0.75x speed so you can actually follow along without feeling personally attacked by the instructor’s pace. If your internet connection is acting dramatic, lowering video quality can reduce buffering. And if you’re watching in a busy coffee shop, captions can save the day without requiring max volume or superhero hearing.
In short, adjusting YouTube playback settings is not just a nice bonus. It is one of the easiest ways to improve your viewing experience.
The Quick Answer
To adjust playback settings on YouTube, open a video, reveal the player controls, click or tap the Settings icon, and choose the option you want to change, such as Speed, Quality, or Subtitles/CC. Then select your preferred setting and return to the video.
How to Adjust Playback Settings on YouTube in 4 Steps
Step 1: Open a YouTube Video and Reveal the Controls
Start by opening the YouTube video you want to watch. On a computer, move your cursor over the video player. On a phone or tablet, tap the video once. This brings up the playback controls, including the play button, timeline, volume options, and the all-important settings icon.
If you do not see the controls right away, do not panic. YouTube likes to hide them when the video is playing, because apparently mystery is part of the user experience. Just hover or tap again, and the controls should reappear.
This first step matters because nearly all playback changes begin from the video player itself. If you are trying to adjust the current video’s speed, quality, or captions, this is your starting line.
Step 2: Click or Tap the Settings Icon
Next, select the Settings icon. On desktop, this usually appears as a small gear in the lower-right corner of the player. On mobile, you may see either the gear icon or an options menu depending on the app version and device.
Once you open Settings, YouTube displays a short menu of options for the current video. This is where the magic happens. The exact labels can vary slightly by device, but the most common playback controls include:
- Playback speed or Speed
- Quality
- Subtitles/CC
- Captions options or styling settings on some devices
Think of this menu as the cockpit for your viewing experience. Small controls, big consequences.
Step 3: Choose the Playback Setting You Want to Change
Now pick the setting you want to adjust. This is where most people stop guessing and start customizing.
Adjust Playback Speed
If a video is dragging, select Speed or Playback speed. You can usually choose a slower setting like 0.75x or a faster one like 1.25x, 1.5x, or 2x. Faster speeds are ideal for news recaps, long podcasts, lectures, and tutorials you already mostly understand. Slower speeds work better for dance lessons, language learning, music instruction, and anything involving a lot of detail.
One of the best things about YouTube playback speed is that it lets you match the video to your brain instead of forcing your brain to chase the video. That is a small modern miracle.
Change Video Quality
If the video looks blurry or keeps buffering, go into Quality. On many devices, YouTube offers options like Auto, Higher picture quality, Data saver, or an Advanced option that lets you manually choose a resolution when available.
Use Higher picture quality when you want a sharper image and your internet connection can handle it. Use Data saver if you are on mobile data or your connection is struggling. If the video is freezing every ten seconds like it is being dramatic for awards season, reducing quality can often help.
Also remember this: not every video is available in every resolution. The creator’s upload quality, your device, and your connection all affect what you can choose.
Turn On Captions or Adjust Subtitle Settings
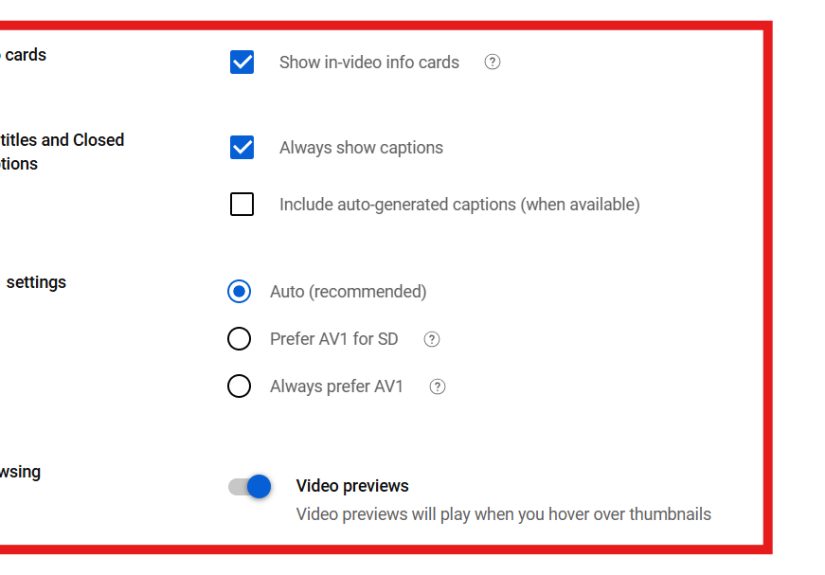
If a video includes captions, select Subtitles/CC to turn them on. On desktop, you can often go a step further and open caption options to customize how the text looks. That can include font size, opacity, background color, or style.
This is surprisingly useful. If the default captions are tiny, faint, or floating over a bright background like they are trying not to be perceived, increasing the font size or changing the background can make the video much easier to follow.
Captions are especially helpful for viewers in noisy places, people watching quietly at night, language learners, and anyone who has ever muttered, “What did they just say?” more than three times in one minute.
Step 4: Test the Change and Fine-Tune Your Experience
After you pick a playback setting, go back to the video and see how it feels. That part is important. The best setting is not always the highest resolution or the fastest speed. It is the one that makes the video easiest and most enjoyable for you to watch.
If 1.5x speed makes a speaker sound like they have had way too much coffee, dial it down to 1.25x. If 1080p looks great but keeps buffering, step down a notch. If captions are on but still hard to read, adjust their appearance. This is not a one-time decision. It is a quick tune-up.
On mobile, you can also improve your experience by changing app-level video quality preferences for Wi-Fi and mobile networks. That is useful if you want YouTube to lean toward better picture quality at home but be more conservative when you are using cellular data on the go.
Desktop vs. Mobile: What Changes?
The basic idea is the same across devices, but the path can feel a little different.
On Desktop
Desktop users usually get the most granular control from the player menu. This is often where adjusting speed, quality, and subtitle appearance feels easiest. If you watch YouTube for work, tutorials, research, or study, desktop can be the most comfortable place to fine-tune playback settings.
On Mobile
Mobile users can still adjust the current video through the player’s settings menu, but some options may be simplified. The upside is portability. The downside is that tapping a tiny settings menu while holding a phone in one hand and a coffee in the other can feel like a mini dexterity test.
Mobile also has app-wide video quality preferences, which is handy if you frequently watch on cellular data and want to avoid accidentally burning through your plan just because one cooking channel insists on making onions look cinematic.
On Smart TVs and Streaming Devices
YouTube on smart TVs usually lets you change video quality, but playback speed may not be available on every device. If you watch long videos on a TV and cannot find the speed control, that may be a device limitation rather than user error. In other words, it is not you. It is the television.
Best Times to Change YouTube Playback Settings
Not every video needs manual adjustments, but certain viewing situations almost beg for them.
- Tutorials and how-to videos: Speed up basic sections and slow down complex steps.
- Podcasts and interviews: Increase playback speed to get through longer content faster.
- Workout videos: Slow things down if you need to follow form carefully.
- Music lessons: Lower the speed for tricky sections.
- Travel or outdoor viewing: Use captions when audio is hard to hear.
- Weak internet connections: Reduce video quality to cut buffering.
- Mobile data use: Turn on Data saver or lower quality preferences.
Useful YouTube Playback Tips
Use Keyboard Shortcuts on Desktop
If you watch YouTube on a computer, keyboard shortcuts can make playback feel much smoother. You can pause with K or the spacebar, rewind or fast-forward with J and L, and enter full screen with F. If you want to explore more shortcuts, YouTube offers a shortcut list you can access from the interface.
These little tricks save time, especially if you watch educational content or work-related videos every day. Once you get used to them, clicking around with a mouse starts to feel weirdly inefficient.
Do Not Assume “Auto” Is Always Best
Auto quality is convenient, but it is not perfect. If you care about image sharpness, you may want to manually bump the resolution higher. If you care more about smooth playback, keeping Auto or choosing a lower setting may be smarter.
Captions Can Improve Comprehension, Not Just Accessibility
Many people turn on subtitles because they are hard of hearing, but captions also help with accents, noisy environments, unfamiliar vocabulary, and content-heavy videos. They are not a fallback. Sometimes they are the upgrade.
Troubleshooting YouTube Playback Problems
If your settings are not behaving the way you expect, here are some practical fixes.
Video Keeps Buffering
Lower the video quality first. If that does not help, check your internet connection, restart the app or browser, and close unnecessary background downloads. A strong-looking Wi-Fi symbol does not always mean strong actual performance.
Quality Options Are Missing
That can happen if the video was not uploaded in higher resolution, the video is still processing higher-quality versions, or your device does not support certain formats. Sometimes the option simply is not available for that video or screen.
Playback Speed Is Missing on a TV
Some smart TVs and streaming devices do not offer playback speed control. If speed settings are important to you, desktop or mobile may be a better choice.
Captions Look Bad
Try adjusting the subtitle style on desktop. A larger font size, darker background, or different opacity can instantly make captions more readable.
Final Thoughts
Learning how to adjust playback settings on YouTube is one of those tiny digital skills that pays off constantly. It only takes a few taps or clicks, but it can make videos clearer, faster, easier to hear, easier to follow, and less likely to test your patience. Whether you are trying to power through a two-hour lecture, catch every line in a quiet documentary, or stop a tutorial from buffering like it is trapped in 2009, the right setting can completely change the experience.
The beauty of YouTube is that it gives you options. The beauty of knowing where those options are is that you do not have to suffer through the default setup ever again. And frankly, life is too short to watch the wrong video speed.
Real-World Experiences With YouTube Playback Settings
Once you start adjusting YouTube playback settings regularly, you notice something funny: your watching habits become a lot more intentional. You stop treating every video the same. A long business interview does not need the same setup as a yoga class, a recipe, or a movie trailer. That is where these settings quietly become part of your routine.
Take educational videos, for example. Many people discover that watching lessons at 1.25x speed feels almost perfect. It trims the dead air, keeps the speaker moving, and somehow makes the content feel more focused. But there is a limit. Push the speed too far, and even the smartest tutorial starts sounding like an auctioneer explaining tax law. The sweet spot usually comes from trial and error, and once you find it, it can save a surprising amount of time over a week.
Then there are hands-on videos, where slowing things down feels like unlocking a cheat code. Think makeup tutorials, home repair demonstrations, guitar lessons, or recipe instructions. When someone is showing where to place a hand, how to fold dough, or which screw to remove first, slowing the video down can be the difference between “Aha, got it” and “Well, I’ve made a terrible mistake.” The best part is that you do not have to keep pausing and rewinding every five seconds like a confused time traveler.
Video quality settings also become more meaningful the moment your internet connection gets moody. At home on strong Wi-Fi, high resolution can make travel videos, sports highlights, and cinematic content look fantastic. But on a crowded airport network or spotty mobile connection, forcing the highest quality can turn every video into a buffering contest. Many viewers eventually learn that slightly lower quality with smooth playback often feels better than ultra-sharp video that freezes at the most dramatic moment.
Captions are another setting people often underestimate until they really need them. In a quiet room, you might not care. In a noisy household, on public transportation, or late at night when everyone else is asleep, captions suddenly feel essential. They also help when creators mumble, audio levels are uneven, or accents move faster than your ears can comfortably process. For many viewers, captions do not just improve accessibility. They improve confidence, focus, and comprehension.
Even keyboard shortcuts can change the experience. Regular desktop viewers often reach a point where pressing keys to pause, skip, or adjust speed feels more natural than chasing tiny on-screen buttons with a cursor. It is one of those small upgrades that does not sound glamorous but quietly makes the whole platform easier to use.
In real life, the best YouTube playback settings are not fixed. They change with your mood, your device, your internet connection, and what you are trying to get out of the video. That flexibility is the real win. You are not stuck with the default. You get to decide whether the video moves faster, looks sharper, or reads more clearly. That turns casual watching into smarter watching, and honestly, it makes YouTube feel a whole lot less chaotic.