Table of Contents >> Show >> Hide
- What Causes a Concrete Driveway to Crumble?
- First, Decide: Repair, Resurface, or Replace?
- Tools and Materials You May Need
- Step-by-Step: How to Fix a Crumbling Concrete Driveway
- Step 1: Check the Weather
- Step 2: Remove Loose and Crumbling Concrete
- Step 3: Clean the Driveway Thoroughly
- Step 4: Repair Cracks Before Resurfacing
- Step 5: Patch Holes, Pits, and Spalled Areas
- Step 6: Protect Expansion Joints
- Step 7: Mix the Concrete Resurfacer
- Step 8: Apply the Resurfacer
- Step 9: Cure the Repair Properly
- Step 10: Seal the Driveway
- Common Mistakes to Avoid
- How Much Does It Cost to Fix a Crumbling Concrete Driveway?
- How to Prevent Your Concrete Driveway From Crumbling Again
- When to Call a Professional
- Real-World Experience: What Homeowners Learn After Fixing a Crumbling Concrete Driveway
- Conclusion
A crumbling concrete driveway has a way of making your home look tired before guests even reach the door. One day it is a few harmless flakes near the garage. Then suddenly the surface looks like it survived a tiny earthquake, a salt storm, and a very angry shopping cart. The good news is that many crumbling, pitted, chipped, or spalling concrete driveways can be repaired without tearing out the entire slab.
The not-so-glamorous truth is that concrete repair is mostly about preparation. The patching compound does not care how optimistic you are. It only cares whether the old concrete is clean, solid, properly dampened, and ready to bond. If you skip the prep work, your repair may peel off faster than a cheap sticker on a water bottle.
This guide explains how to fix a crumbling concrete driveway the right way, when resurfacing makes sense, when patching is enough, and when replacement is the smarter move. You will also learn how to prevent the same damage from coming back after your driveway gets its fresh new face.
What Causes a Concrete Driveway to Crumble?
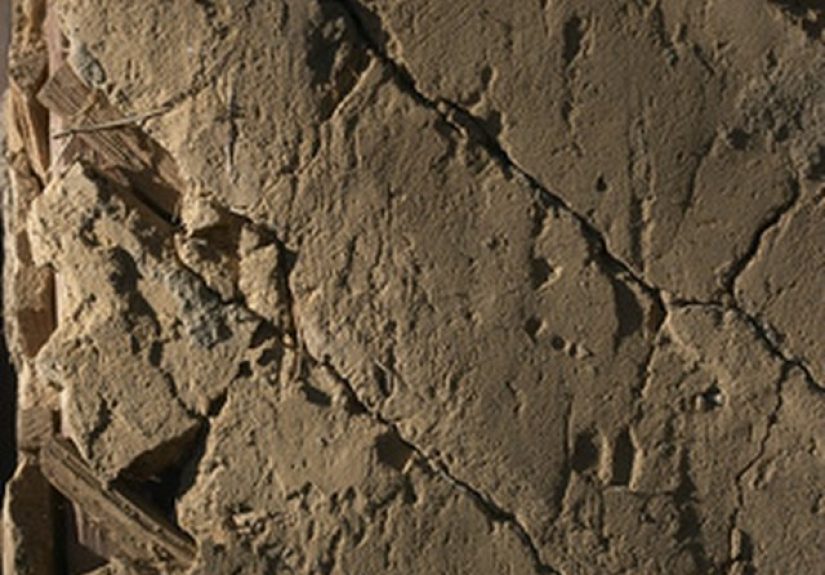
Concrete is tough, but it is not invincible. A driveway takes abuse from vehicles, water, sun, freeze-thaw cycles, road salt, oil stains, and the occasional “I’ll just pressure wash it at maximum power” weekend decision. Crumbling usually appears as surface flaking, pitting, scaling, chipping, or spalling. These problems may look similar, but the causes can vary.
Freeze-Thaw Damage
In cold climates, water enters tiny pores and cracks in the concrete. When temperatures drop, that water freezes and expands. As this cycle repeats, the surface can weaken and break apart. If the concrete was not properly air-entrained, cured, or sealed, the damage can happen faster.
Deicing Salts
Salt is useful for melting ice, but it can be rude to concrete. Deicing chemicals increase moisture movement and can contribute to scaling, especially on newer or poorly cured concrete. Even if you never spread salt yourself, your car can drag it in from winter roads and park it directly on your driveway like an unwanted houseguest.
Poor Finishing or Too Much Water
Concrete can develop a weak surface if too much water is added to the mix or if the slab is overworked during finishing. When finishers add water to make the surface easier to smooth, the top layer may become weaker than the concrete below it. That weak layer is often the first to crumble.
Improper Curing
Concrete does not simply “dry.” It cures through a chemical process that needs time and moisture. If a driveway dries too fast, especially in hot, windy, or sunny weather, the surface may not gain enough strength. Years later, the driveway may repay that shortcut by shedding little concrete crumbs everywhere.
Age, Drainage, and Heavy Loads
Older driveways naturally wear down. Poor drainage can keep the slab wet, encouraging cracks and freeze-thaw stress. Heavy vehicles, trailers, dumpsters, or delivery trucks can also worsen weak spots. If water pools on your driveway after rain, the concrete is already sending you a polite warning.
First, Decide: Repair, Resurface, or Replace?
Before buying bags of concrete repair material, inspect the driveway carefully. Not every crumbling driveway should be resurfaced. A concrete resurfacer works best when the slab is still structurally sound and the damage is mainly near the surface.
Repair Small Areas When Damage Is Localized
If you have a few chips, shallow pits, or small crumbling patches, you can usually patch those areas with a concrete repair mortar or polymer-modified patching compound. This is the “minor dental work” version of driveway repair. You are fixing cavities before the whole smile needs major reconstruction.
Resurface When the Surface Is Worn but the Slab Is Sound
Concrete resurfacing is ideal when the driveway has widespread shallow scaling, minor pitting, and cosmetic wear, but no major structural failure. A resurfacer creates a thin, new wearing surface over the existing slab. It can make an old driveway look dramatically better and help protect the surface from further moisture damage.
Replace When the Driveway Has Major Structural Problems
Replacement is usually the better choice if large sections are sunken, heaved, deeply cracked, hollow-sounding, severely broken, or moving. If cracks are wide enough to trip over, if slabs tilt toward your foundation, or if the base below the concrete has failed, a thin overlay will not magically fix the problem. It will only create a beautiful new surface over a bad situation, which is basically putting a tuxedo on a raccoon.
Tools and Materials You May Need
The exact supplies depend on the level of damage, but most concrete driveway repairs require common tools and a few specialized materials. Gather everything before mixing repair products because many resurfacing compounds have short working times.
- Safety glasses, gloves, dust mask, and hearing protection
- Pressure washer or garden hose with strong nozzle
- Wire brush, stiff broom, scraper, and shop vacuum
- Hammer and cold chisel or small demolition tool
- Concrete cleaner or degreaser
- Concrete patching compound for pits and spalled areas
- Polyurethane or flexible concrete crack sealant
- Backer rod or sand for deeper cracks
- Concrete resurfacer for large surface repairs
- 5-gallon bucket, paddle mixer, drill, margin trowel, and long-handled squeegee
- Concrete broom for texture
- Painter’s tape or foam strips to protect expansion joints
- Concrete sealer after curing
Step-by-Step: How to Fix a Crumbling Concrete Driveway
The basic process is simple: remove loose material, clean aggressively, repair deep damage, fill cracks, resurface if needed, cure properly, and seal. The details matter. Concrete is not difficult, but it is very good at punishing lazy preparation.
Step 1: Check the Weather
Most concrete repair products need moderate temperatures and dry weather. Avoid working during extreme heat, freezing temperatures, rain, or direct blazing sun. Many products perform best when the air and surface temperature are above 50 degrees Fahrenheit and below extreme summer heat. Always follow the product label because different repair materials have different rules.
Pick a day when you can work steadily. Once resurfacer is mixed, it begins to set quickly. This is not the moment to answer a long phone call, reorganize the garage, or debate lunch.
Step 2: Remove Loose and Crumbling Concrete
Use a hammer, chisel, scraper, or stiff wire brush to remove all loose, flaking, or crumbling concrete. Do not leave weak material behind. If it sounds hollow, chips easily, or flakes under pressure, it needs to go. A repair is only as strong as the surface underneath it.
For deeper spalled areas, square up the edges slightly and remove dust from the bottom of the hole. Avoid feathering patch material over dusty, weak concrete. A clean, firm edge gives the patch a better chance to grip.
Step 3: Clean the Driveway Thoroughly
Concrete resurfacer and patching compounds bond best to clean concrete. Sweep the driveway, then wash it with a pressure washer. Remove dirt, dust, moss, mildew, loose sand, and old peeling coatings. If the surface has oil stains, use a concrete degreaser. Oil is the enemy of bonding. It is also annoyingly persistent, like glitter but less festive.
After washing, let standing water drain away. Some repair products require a saturated surface-dry condition, meaning the concrete is damp but not puddled. Read the instructions carefully. Too dry and the old concrete can steal moisture from the repair mix. Too wet and the patch may weaken or fail to bond.
Step 4: Repair Cracks Before Resurfacing
Cracks should be cleaned and filled before you apply a resurfacer. For narrow cracks, use a concrete crack filler or flexible polyurethane sealant designed for horizontal concrete. For deeper cracks, insert backer rod or clean sand first so the sealant does not disappear into the abyss. The goal is to fill the crack near the surface, not donate three tubes of sealant to the center of the earth.
If the crack is actively moving, very wide, or uneven from one side to the other, consider getting a professional opinion. Resurfacer can hide a crack temporarily, but movement usually brings it back.
Step 5: Patch Holes, Pits, and Spalled Areas
Use a concrete patching compound or resurfacer mixed to a thicker, trowelable consistency for deeper pits and spalled sections. Press the material firmly into the damaged area with a trowel. Smooth it level with the surrounding surface. Let the patch set as directed before resurfacing the whole driveway.
For damage deeper than about a quarter inch, patching first is usually better than trying to cover everything with one thin resurfacing coat. Thin resurfacer is designed to renew the surface, not fill deep holes like cake frosting over a pothole.
Step 6: Protect Expansion Joints
Expansion joints and control joints are there for a reason. They help concrete move and crack in planned places. Do not fill them with resurfacer. Use painter’s tape, foam strips, or weather-resistant joint material to keep resurfacer out of those gaps. If you accidentally bridge the joints, the new surface may crack when the slab expands and contracts.
Step 7: Mix the Concrete Resurfacer
Follow the product instructions exactly. Use a clean bucket, measured water, and a paddle mixer attached to a heavy-duty drill. Add the powder gradually and mix until smooth. Avoid making the mix too watery. A soupy mix may be easier to spread, but it can dry weak, dusty, or uneven.
Only mix what you can apply within the working time. Resurfacer sets fast, especially on warm days. If you are resurfacing a large driveway, work in sections and recruit a helper. One person can mix while the other spreads. Friendship is nice; friendship with a paddle mixer is better.
Step 8: Apply the Resurfacer
Pour the resurfacer onto the prepared driveway and spread it with a long-handled squeegee. Work in small, manageable sections. Push the material into the surface rather than just floating it over the top. Maintain a consistent thickness according to the product directions.
For a driveway, add texture with a concrete broom before the resurfacer sets. A perfectly smooth driveway may look sleek, but it can become slippery when wet. A broom finish improves traction and gives the surface a classic concrete appearance.
Step 9: Cure the Repair Properly
Curing is where many DIY repairs quietly fail. Protect the surface from foot traffic, vehicles, rain, freezing temperatures, and fast drying. Some products may require misting in hot weather or protection from direct sun. Follow the manufacturer’s curing time before walking or driving on the driveway.
Do not rush vehicle traffic. A driveway repair may feel hard on the surface before it has gained enough strength underneath. Parking a car too soon can leave tire marks, surface damage, or the kind of regret that arrives with a tow truck bill.
Step 10: Seal the Driveway
After the repair has fully cured, apply a concrete sealer suitable for driveways. A good sealer helps reduce water absorption, makes stains easier to clean, and protects the surface from future freeze-thaw damage. Penetrating sealers are often a practical choice because they protect without creating a thick surface film.
Reapply sealer as recommended, especially in climates with snow, ice, and road salt. Sealing is not glamorous, but neither is watching your newly repaired driveway crumble again after one winter.
Common Mistakes to Avoid
Resurfacing Unsound Concrete
If the existing slab is loose, hollow, or structurally broken, resurfacer will not save it. It may look better for a short time, but the failure underneath will return. Fix the base problem first or replace the damaged section.
Skipping Surface Prep
Concrete repair products need a clean, solid bonding surface. Dust, oil, paint, moss, and loose flakes can all prevent adhesion. If you spend more time cleaning than applying the repair, you are probably doing it right.
Using the Wrong Product
Concrete caulk, patch mortar, resurfacer, hydraulic cement, epoxy, and polyurethane sealant all solve different problems. Use flexible sealant for active cracks, patching compound for deeper damaged areas, and resurfacer for thin surface renewal. One product cannot do every job, despite what your garage shelf may be whispering.
Ignoring Drainage
If water pools on the driveway, the repair is more likely to fail. Improve drainage where possible. Clean gutters, redirect downspouts, correct soil grading, and avoid letting sprinklers soak the slab every morning like it is a tomato plant.
Applying Deicers Too Soon
New concrete and fresh repairs need time before exposure to harsh deicing chemicals. When possible, use sand for traction during the first winter after a major repair. If you must use ice melt later, use it sparingly and remove slush promptly.
How Much Does It Cost to Fix a Crumbling Concrete Driveway?
The cost depends on the driveway size, damage level, product choice, and whether you do it yourself or hire a contractor. A small DIY patch may cost only the price of a bag of repair mortar, a tube of sealant, and a few tools. Resurfacing a full driveway costs more because you need multiple bags of resurfacer, cleaning products, joint protection, safety gear, and sealer.
Hiring a professional costs more, but it may be worth it for large driveways, decorative finishes, severe spalling, drainage problems, or uncertain structural damage. A pro can grind the surface, repair cracks properly, apply polymer-modified overlays, and seal the driveway with commercial equipment. If your driveway is very large or badly damaged, professional resurfacing can still be cheaper than complete replacement.
How to Prevent Your Concrete Driveway From Crumbling Again
Once your driveway is repaired, prevention becomes the secret sauce. Keep the surface clean. Seal it regularly. Avoid harsh chemicals when possible. Shovel snow before it turns into ice. Use sand for traction instead of dumping heavy amounts of salt. Keep heavy vehicles off weak edges, and repair small cracks before water gets inside.
Also watch your landscaping. Soil, mulch, and grass should not trap moisture against the driveway edges. Downspouts should send water away from the slab, not across it. Concrete is strong, but constant water exposure is like making it sleep in wet socks.
When to Call a Professional
Call a concrete contractor if the driveway has major settlement, deep cracks, exposed rebar, large hollow areas, severe heaving, drainage problems, or repeated repairs that keep failing. You should also get help if the driveway slopes toward your house, garage, or foundation. Water moving in the wrong direction can create bigger problems than ugly concrete.
A professional can tell whether resurfacing, slabjacking, partial replacement, grinding, or full replacement is the better option. Paying for expert advice can save money if it prevents you from resurfacing a driveway that really needs structural repair.
Real-World Experience: What Homeowners Learn After Fixing a Crumbling Concrete Driveway
Most homeowners begin a driveway repair thinking the hard part will be spreading the resurfacer. In real life, the messy part comes first. Cleaning, scraping, chiseling, pressure washing, degreasing, and waiting for the right surface condition usually take longer than expected. The actual resurfacing step may be over quickly, but the preparation can eat an entire Saturday and still ask for dessert.
One practical lesson is that small damage is rarely as small as it looks. A flaky patch near the garage may turn into a wider weak area once you start brushing and chiseling. That is not bad news. It means you are finding the weak material before it ruins the repair. If the concrete keeps crumbling under light scraping, keep removing it until you reach firm material. Patching over soft concrete is like painting over dust; it may look better for a minute, but the bond is already doomed.
Another common experience is underestimating how fast resurfacer sets. On a warm day, the working time can feel shockingly short. A smart homeowner divides the driveway into sections, stages water and tools nearby, and mixes smaller batches. Having one helper makes a big difference. The helper does not need to be a concrete wizard. They just need to mix, rinse tools, hand over the broom, and occasionally say, “No, that section still looks wet.”
Texture is another lesson people remember. A smooth repair may look elegant when wet, but a driveway needs traction. A broom finish is not just decorative; it helps tires and shoes grip the surface. Pulling the broom too early can make deep drag marks. Pulling it too late can barely mark the surface. The sweet spot is when the resurfacer has begun to firm up but is still workable. Practicing on a small edge or less visible section can save the main driveway from looking like it was styled by a nervous raccoon.
Color matching also deserves realistic expectations. Fresh repair material rarely matches old concrete perfectly. Older concrete has weathered, absorbed stains, and faded in the sun. A full resurfacing coat creates a more uniform look than spot patches, but even then, color can vary with moisture, curing conditions, and finishing technique. Sealer may slightly deepen the color. If appearance matters a lot, test a small area first.
The biggest experience-based tip is patience. Let patches set before resurfacing. Let resurfacer cure before traffic. Let the full repair cure before sealing. Concrete rewards patience and punishes hurry. Driving on a repair too soon can leave tire impressions, scuffs, or weak spots. Waiting a few extra days may feel annoying, but it is much easier than redoing the project.
Finally, homeowners usually learn that prevention is cheaper than repair. A sealed driveway, clean joints, controlled drainage, and careful winter maintenance can add years of life to the surface. Once you have spent a weekend wrestling with concrete dust and a paddle mixer, applying sealer every few years suddenly feels like a very reasonable hobby.
Conclusion
Fixing a crumbling concrete driveway starts with an honest inspection. If the slab is still solid, you can often repair cracks, patch spalled areas, resurface the worn concrete, and seal it for longer protection. The key is preparation: remove loose concrete, clean thoroughly, use the right repair product, preserve expansion joints, cure the surface properly, and protect the driveway from water and harsh deicers.
If the concrete is deeply cracked, sunken, unstable, or severely broken, replacement or professional repair may be the smarter investment. But for many driveways, a careful DIY repair can restore curb appeal, improve safety, and keep the surface from turning into a gravel impersonator. Your driveway may not send you a thank-you card, but it will stop leaving crumbs on your shoes.