Table of Contents >> Show >> Hide
- Before You Start: What You Will Need
- Step 1: Hold the Recorder the Right Way
- Step 2: Use Gentle Air, Not Birthday-Cake Air
- Step 3: Practice B, A, and G Until the Changes Feel Easy
- Step 4: Learn the Rhythm by Saying It First
- Step 5: Play the First Half of the Song Slowly
- Step 6: Add the Rest of the Melody
- Step 7: Smooth It Out and Make It Sound Like Music
- Common Problems and Easy Fixes
- Why This Song Works So Well for Beginners
- Beginner Experiences: What It Really Feels Like to Learn This Song
- Conclusion
If you are learning recorder for the first time, few songs are more beginner-friendly than "Mary Had a Little Lamb". It is familiar, catchy, and forgiving enough that even if your first note comes out sounding like an alarmed goose, you can still recover with dignity. Better yet, this tune is a classic in beginner music lessons because it helps you practice the basics that matter most: hand position, gentle breath, note changes, and steady rhythm.
There is also something charmingly old-school about this song. It has been around for generations, and it is so deeply woven into American culture that it often pops up in early music education and even in the history of recorded sound. On recorder, though, its magic is simpler: it lets beginners make real music fast. That quick win matters. When a new player can recognize the melody after just a few tries, practice stops feeling like homework and starts feeling like a tiny concert in the kitchen.
This guide walks you through how to play "Mary Had a Little Lamb" on the recorder in 7 steps, using clear fingering help, beginner-friendly practice tips, and realistic advice for avoiding squeaks, leaks, and all the other dramatic plot twists of recorder life.
Before You Start: What You Will Need
You do not need a full marching band, a velvet cape, or perfect pitch. You just need a basic soprano recorder, a little patience, and a willingness to play slowly at first. This tutorial assumes you are using the standard school-style recorder most beginners start with.
The main notes you will use
For the easiest version of the song, you will mostly work with B, A, and G. Many beginner-friendly classroom versions also add D later in the melody. That makes this song ideal for early recorder practice because it builds control without forcing you to wrestle with a bunch of complicated fingerings right away.
Quick fingering reminders
Here is the simple version:
B: cover the back thumb hole and the first front hole.
A: cover the back thumb hole and the first two front holes.
G: cover the back thumb hole and the first three front holes.
If your version includes D, check your classroom fingering chart and learn that note separately before trying to drop it into the melody. That saves a lot of mid-song panic.
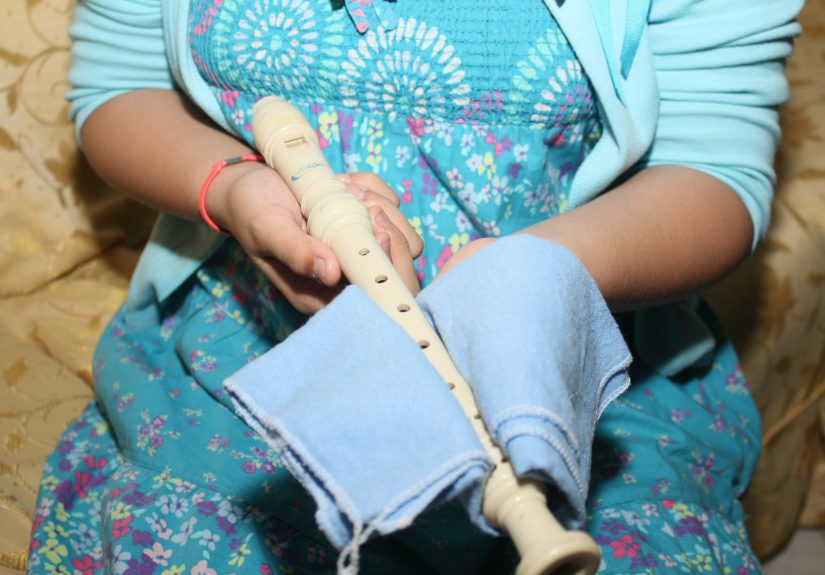
Step 1: Hold the Recorder the Right Way
The first step is not glamorous, but it saves you from future chaos. Hold the recorder with your left hand on top and your right hand on the bottom. Yes, even if your brain insists on doing the opposite because it "feels more natural." The recorder is one of those instruments that politely but firmly demands the correct setup.
Sit up tall, keep your shoulders relaxed, and angle the recorder slightly forward rather than jamming it straight into your face like you are challenging it to a duel. Your fingers should stay curved and relaxed, not flattened out like you are trying to fingerprint the instrument for a crime scene.
The biggest beginner mistake here is leaving tiny gaps over the holes. On recorder, tiny gaps make a huge difference. If the holes are not sealed completely, the note may sound airy, weak, or squeaky. So before you play even one note of the song, make sure your finger pads are covering the holes fully.
Step 2: Use Gentle Air, Not Birthday-Cake Air
If the recorder had a motto, it would probably be: Calm down. New players often blow far too hard, which produces the famous shriek that can clear a room faster than bad karaoke.
To get a cleaner sound, blow a slow, gentle, steady stream of air. Imagine you are trying to make a candle flame flicker, not blast it into the next zip code. The recorder responds better to controlled breath than brute force.
Take a few seconds to test this before you start the song. Play a single B note and listen carefully. If it squeaks, do not assume the recorder hates you personally. Usually, one of two things happened: you blew too hard, or one of your holes was not fully covered. Fix those two things first. They solve most beginner problems.
Step 3: Practice B, A, and G Until the Changes Feel Easy
Before you jump into the full melody, practice the note changes you will use most often. This is where the real learning happens. The song becomes much easier when your fingers already know where to go.
Start with this mini drill
Play these notes slowly, one at a time:
B - A - G - A - B
Then try:
B - B - B
A - A - A
G - A - B
This may feel almost too simple, but that is the point. Recorder beginners improve fastest when they isolate the small motions first. You are teaching your fingers the route before asking them to drive in traffic.
As you practice, lift only the fingers that need to move. Do not let the entire hand fly off the recorder every time you change notes. Efficient finger movement creates cleaner note changes and helps the melody sound connected instead of bumpy.
Step 4: Learn the Rhythm by Saying It First
A lot of beginners focus only on fingerings and forget rhythm. Then they wonder why the song sounds like it fell down the stairs. Before you play the melody, say the words out loud in rhythm:
Mary had a little lamb,
little lamb, little lamb,
Mary had a little lamb,
its fleece was white as snow.
Even if you are not singing at full Broadway volume, speaking the words helps you feel where the notes repeat and where the melody changes direction. That makes the tune easier to remember.
You can also clap the beat while saying the words. This helps if you tend to rush through familiar songs. Just because your brain knows the tune does not mean your fingers do.
Step 5: Play the First Half of the Song Slowly
Now it is time to start the real melody. For a common beginner version, begin with:
B A G A B B B
A A A
That gives you the opening phrase most players recognize right away. Play it slowly. Then play it again, even more slowly if needed. Speed is not the goal yet. Clean note changes and a steady beat matter more than racing to the finish line.
Try using a light tongue on each note by thinking "doo" as you begin each pitch. This keeps the notes separated without sounding choppy. If you do not tongue at all, the melody can get blurry. If you attack too hard, it can sound pecky and tense. A soft, neat start to each note is the sweet spot.
Once the first half feels comfortable, pause and check your sound. Are you still sealing the holes? Are you blowing gently? Are your fingers relaxed? Recorder players who stop and troubleshoot early improve much faster than the ones who power through while producing the soundtrack to a haunted teapot.
Step 6: Add the Rest of the Melody
After the opening phrase, many beginner versions continue like this:
B D D
B A G A B B B
A A B A G
This is the point where the song starts feeling complete. If your version uses D, practice the jump from B to D on its own a few times before playing the whole section. That one leap can trip up beginners, especially if they are still thinking hard about breath and hand position.
A smart practice trick
Break the melody into chunks:
Chunk 1: B A G A B B B
Chunk 2: A A A B D D
Chunk 3: B A G A B B B A A B A G
Practice each chunk three times correctly before connecting them. This keeps mistakes from becoming habits. It also makes the full song feel much less intimidating.
Step 7: Smooth It Out and Make It Sound Like Music
Once you can get through the notes, your next job is to make the tune sound less like a spelling test and more like a song. That means focusing on three things: steady tempo, clean note starts, and consistent tone.
Do not sprint through the repeated notes. Keep the pulse even. Let the melody breathe naturally. If you know the lyrics, think them while you play. That often helps shape the phrasing without you having to overthink it.
You can also try this final practice method:
Play the whole song once very slowly.
Play it a second time at a comfortable natural pace.
Play it a third time while imagining you are performing for someone.
That little performance mindset changes things. Suddenly you hold notes a bit more confidently, sit up straighter, and pay attention to the line of the melody. Congratulations: you are now doing musician stuff.
Common Problems and Easy Fixes
Problem: The recorder squeaks
Fix: Blow more gently and check every covered hole. Most squeaks come from too much air or leaky fingers.
Problem: The notes sound fuzzy
Fix: Use light tonguing with a soft doo sound, and make sure your fingers are not hovering halfway over the holes.
Problem: I know the tune, but I keep getting lost
Fix: Break the song into chunks and practice the note pattern without rhythm first. Then add rhythm back in.
Problem: My fingers feel clumsy
Fix: Slow down. Recorder skill is mostly small-movement control. Fast, messy practice just teaches your fingers bad habits faster.
Why This Song Works So Well for Beginners
"Mary Had a Little Lamb" is one of the best beginner recorder songs because it gives you an early success without oversimplifying the lesson. You get repeated notes, stepwise motion, and just enough change to keep your brain awake. It trains the exact skills beginner players need: correct hand setup, controlled breathing, listening, and note-to-note accuracy.
It also teaches a bigger lesson that applies to every instrument: familiar music is easier to learn because your ears already know what "correct" sounds like. When a note is wrong, you can hear it. That built-in feedback helps beginners adjust faster and practice with more confidence.
Beginner Experiences: What It Really Feels Like to Learn This Song
Learning "Mary Had a Little Lamb" on the recorder is rarely a straight line from silence to flawless performance. Usually, it starts with a strange mix of confidence and confusion. A beginner picks up the recorder thinking, "I know this song. How hard can it be?" Then the first note comes out like a frightened seagull, and suddenly there is a lot more humility in the room.
That experience is completely normal. In fact, it is part of why this song is so useful. Because the melody is familiar, beginners can tell right away when something sounds off. They hear the gap between the song in their head and the sound coming out of the recorder. That gap can feel annoying for about five minutes, and then it becomes incredibly helpful. It teaches listening. It teaches adjustment. It teaches patience.
Many players also discover that the hardest part is not memorizing the melody. It is getting the fingers to move calmly enough for the melody to appear. The brain knows what comes next, but the hands still need rehearsal. That is why so many students have the same little breakthrough moment: one repetition sounds messy, the next is a bit cleaner, and then suddenly the tune appears for two whole measures like it has been hiding there the entire time.
In a classroom, this song often creates a funny shared experience. At first, everyone is squeaking at different times, which makes the room sound like a flock of confused birds. Then one student plays the first phrase correctly, another joins in, and the whole class begins to lock into the same melody. That moment feels bigger than the song itself. It is the first taste of ensemble playing, where individual practice turns into something communal.
At home, the experience is different but just as memorable. A parent in the next room may hear the opening phrase repeated twenty times in a row. The family dog may develop opinions. A younger sibling may announce that the performance was "pretty good except for the loud part." But then comes that satisfying run when the entire melody finally holds together. It is only a short tune, yet it feels like a real milestone because the player can recognize their own progress in real time.
There is also something reassuring about starting with a song this old and familiar. It reminds beginners that simple music is not lesser music. A three-note pattern can still teach tone, rhythm, breath control, and expression. A nursery rhyme can still be a serious musical stepping stone. And for many players, this song becomes the first piece they can play from memory with confidence, which is a huge deal whether you are eight years old or eighty.
So if your first attempts are squeaky, uneven, or slightly dramatic, welcome to the club. That is not failure. That is the sound of learning. Keep the left hand on top, keep the air gentle, keep the holes covered, and keep playing the melody one clean phrase at a time. Before long, "Mary Had a Little Lamb" stops being an exercise and starts becoming proof that you can actually play the recorder.
Conclusion
If you want one beginner recorder song that teaches real technique without feeling overwhelming, "Mary Had a Little Lamb" is hard to beat. It helps you practice note changes, rhythm, tonguing, breath control, and confidence all in one short melody. Learn it slowly, chunk by chunk, and do not let the occasional squeak convince you that you are doomed. Every good recorder player started somewhere, and many of them started right here.
Master this song, and you are not just learning one tune. You are building the foundation for nearly every other easy recorder song that comes next.