
Table of Contents >> Show >> Hide
- What a Toilet Wax Ring Actually Does (and Why It Matters)
- How to Tell If a Toilet Wax Ring Is Bad
- 1) Water around the baseespecially after flushing
- 2) Sewer-gas smell that won’t quit
- 3) A toilet that rocks or shifts when you sit down
- 4) Stains or moisture on the ceiling below (for upstairs bathrooms)
- 5) Loose closet bolts or a toilet that keeps “coming undone”
- A quick 5-minute diagnosis checklist
- Before You Blame the Wax Ring: Rule Out These Look-Alikes
- Why Wax Rings Fail (So You Don’t Repeat the Problem)
- What You’ll Need
- How to Replace a Toilet Wax Ring (Step by Step)
- Step 1: Turn off the water and drain the toilet
- Step 2: Disconnect the supply line
- Step 3: Remove the toilet from the floor
- Step 4: Remove the old wax ring (and don’t be shy about it)
- Step 5: Inspect the toilet flange and floor
- Step 6: Set new closet bolts
- Step 7: Install the new wax ring (or wax-free seal)
- Step 8: Reset the toiletstraight down, like you mean it
- Step 9: Tighten the closet nuts evenly (don’t crack porcelain)
- Step 10: Shim if needed (a stable toilet is a happy toilet)
- Step 11: Reconnect the supply line and test
- Step 12: Caulk the base (optional, but often recommended)
- Wax Ring Choices: Standard vs Extra-Thick vs Wax-Free
- Common Mistakes That Ruin a Fresh Wax Ring
- When to Call a Pro
- FAQ
- Field Notes: 500+ Words of Real-World Experiences (What Usually Happens in Actual Bathrooms)
- SEO Tags
A toilet wax ring is one of those “invisible heroes” of your bathroom. When it’s doing its job, you never think about it.
When it’s not… you get mystery puddles, funky smells, and that sinking feeling that your floor is quietly plotting revenge.
The good news: diagnosing a bad wax ring is pretty straightforward, and replacing it is a very doable DIY project if you’re careful,
patient, and willing to temporarily remove a toilet (which, yes, is exactly as glamorous as it sounds).
This guide walks you through (1) how to tell if the wax ring is failing, (2) how to rule out other leaks that love to impersonate it,
and (3) how to replace the wax ring step by stepwithout turning your bathroom into a science experiment.
What a Toilet Wax Ring Actually Does (and Why It Matters)
The wax ring (also called a wax seal) sits between the bottom of the toilet and the toilet flange (the fitting that connects your toilet
to the drainpipe). Its job is simple but critical: create a watertight and airtight seal so wastewater goes down the drain and sewer gas stays where it belongs
(not in your bathroom, auditioning for “Worst Smell of the Year”).
Wax is used because it compresses and molds to tiny imperfections when the toilet is set in place. Once compressed, it doesn’t “spring back,” which is why
a wax ring is generally a one-shot deal: if you lift the toilet after setting it, you should replace the ring again.
How to Tell If a Toilet Wax Ring Is Bad
A failing wax ring usually announces itself in a few classic ways. Here’s what to look (and sniff) for.
1) Water around the baseespecially after flushing
The most common sign is water seeping out from under the toilet. It may appear as a small puddle, damp grout lines, or a “why is this tile darker?” moment.
A key clue: it often shows up after a flush, because that’s when water is rushing through the drain connection.
Tip: wipe the floor dry, then flush a few times while watching the base. If water reappears from underneath (not from a pipe connection),
the wax ring is a prime suspect.
2) Sewer-gas smell that won’t quit
If your bathroom smells like sewer gas (often described as rotten eggs or a strong “drain” odor) and normal cleaning doesn’t touch it,
a compromised wax seal can be the cause. The wax ring is part of what keeps drain gases from escaping at the toilet base.
3) A toilet that rocks or shifts when you sit down
Toilets shouldn’t wobble. If yours rocks, that movement can break the seal over timeor keep a new seal from ever forming properly.
Sometimes the fix is as simple as carefully tightening the closet bolts or adding shims, but if rocking is paired with leaking,
plan on replacing the wax ring.
4) Stains or moisture on the ceiling below (for upstairs bathrooms)
If the toilet is on an upper floor, a wax ring leak can show up as a water stain on the ceiling underneath. This is a “stop scrolling,
start investigating” sign, because repeated moisture can damage drywall, framing, and subflooring.
5) Loose closet bolts or a toilet that keeps “coming undone”
If you tighten the base bolts and they loosen again soon after, you may have flange issues (corrosion, damage, or poor anchoring),
which can contribute to wax ring failure. A wax ring can’t compensate for a toilet that never sits solidly in the first place.
A quick 5-minute diagnosis checklist
- Dry the floor completely around the toilet base.
- Flush 2–3 times while watching the base.
- Feel for dampness at the grout lines or under the front edge of the toilet.
- Sniff near the base (yes, it’s weird; yes, it works).
- Gently test for rocking by placing hands on the bowl and applying slight pressure (don’t yank).
If you get water at the base after flushing, persistent odor, and/or rocking, the odds of a bad wax ring go way up.
Before You Blame the Wax Ring: Rule Out These Look-Alikes
Not every puddle near a toilet is a wax ring failure. Some leaks are sneaky and love to frame the wax ring for crimes they committed.
Here are the usual impostors.
Tank condensation (“sweating”)
In humid bathrooms or during big temperature swings, the toilet tank can develop condensation that drips down and pools near the base.
This is more common with cold water supply lines and warm, humid air. If the water appears without flushing and feels like clean water,
condensation may be the culprit.
Supply line or shutoff valve leak
Check the braided supply line and the shutoff valve. Run a dry paper towel around connections; even a tiny leak will show.
Water from the supply side is clean and may create a slow, constant damp area.
Tank-to-bowl gasket or bolts (two-piece toilets)
If you have a two-piece toilet, water can leak from the tank bolts or the gasket between tank and bowl. This often drips down the back
or sides and eventually ends up on the floorright where you’ll assume it’s the wax ring. Check for dampness on the outside of the bowl
under the tank.
A cracked toilet base or bowl
Hairline cracks can leak only during or after flushing. Look closely with a flashlight. If you suspect a crack, replacement is usually the safe move.
Why Wax Rings Fail (So You Don’t Repeat the Problem)
Wax rings can last a long time when installed correctly and left undisturbed. Most failures happen because something else is “off” and the wax ring
becomes the messenger getting blamed for the bad news.
- Toilet movement: rocking loosens the seal and eventually opens leak paths.
- Loose closet bolts: if the toilet isn’t clamped down evenly, the seal can break.
- Flange height problems: a flange set too low (below the finished floor) may not compress the wax properly.
- Poor initial installation: misalignment, too much twisting, or reusing an old wax ring.
- Flange damage: corrosion, cracks, or broken slots can prevent stable bolting.
- “Quick fixes” that backfire: stacking wax rings instead of correcting flange height can lead to leaks.
What You’ll Need
You don’t need a plumbing warehousejust the right basics.
Tools
- Adjustable wrench or socket set (deep socket helps for closet nuts)
- Slip-joint pliers (optional, but handy)
- Putty knife or plastic scraper (for removing old wax)
- Utility knife
- Bucket, sponge, or a wet/dry vacuum (to remove water)
- Rags/paper towels, disposable gloves
- Flashlight
Materials
- New wax ring (standard, extra-thick, or with horn) or a wax-free seal
- New closet bolts (recommendedold ones can be corroded or stripped)
- Plastic toilet shims (for leveling if the floor isn’t perfectly flat)
- Optional: flange extender/repair ring kit (if flange height or damage is an issue)
- Optional: mildew-resistant bathroom silicone caulk
How to Replace a Toilet Wax Ring (Step by Step)
Set aside a calm block of time. Rushing a toilet reset is how people end up doing it twice (and inventing new words).
Step 1: Turn off the water and drain the toilet
- Turn the shutoff valve clockwise (usually behind the toilet).
- Flush to drain the tank and bowl.
- Hold the handle down to push as much water through as possible.
- Sponge out remaining water from the tank and bowl into a bucket (or use a wet/dry vac).
Step 2: Disconnect the supply line
Use an adjustable wrench to loosen the supply line nut where it connects to the toilet tank’s fill valve. Keep a towel handy for drips.
Step 3: Remove the toilet from the floor
- Pry off the decorative bolt caps at the base.
- Remove the nuts on the closet bolts.
- Gently rock the toilet a little to break the old wax seal.
- Lift the toilet straight up and move it onto cardboard or an old towel.
Safety note: toilets are awkward and heavier than they look. If you’re not sure you can lift it safely, grab help.
Your back is more expensive than a wax ring.
Step 4: Remove the old wax ring (and don’t be shy about it)
Scrape wax off the flange and the bottom outlet (horn) of the toilet using a putty knife. Dispose of wax in the trashnever down the drain.
Wipe the area clean so you can inspect properly.
Step 5: Inspect the toilet flange and floor
This is the “adulting” part that prevents repeat leaks.
- Check flange condition: cracks, corrosion, or broken bolt slots can cause instability.
- Check flange height: ideally, the flange sits on top of (or slightly above) the finished floor.
- Check for subfloor damage: soft spots, discoloration, or a musty smell may indicate rot or mold.
If the flange is damaged, consider a flange repair kit or replacement. If the floor is soft or rotten, address that before resetting the toilet,
or you’ll be sealing a problem that keeps growing.
Step 6: Set new closet bolts
Insert new closet bolts into the flange slots and position them so they’re parallel and evenly spaced. Many kits include washers or clips to keep bolts upright.
This makes the next step far less frustrating.
Step 7: Install the new wax ring (or wax-free seal)
With a wax ring, you typically either:
- Press the wax ring onto the flange, centered over the opening, or
- Press it onto the toilet outlet (horn) if that’s easier for alignment.
Pick one method and commitdon’t “test fit” the toilet onto wax and lift it back off unless you’re ready to replace the wax ring again.
Step 8: Reset the toiletstraight down, like you mean it
- Align the toilet over the bolts.
- Lower it straight down onto the ring.
- Once it contacts, press down firmly and evenly to compress the wax.
Avoid aggressive twisting or sliding. A tiny wiggle to settle is fine; a full dance routine is not.
Step 9: Tighten the closet nuts evenly (don’t crack porcelain)
Add washers and nuts. Tighten each side gradually, alternating left and right so pressure stays even. Stop when snug and stable.
Over-tightening can crack the basethen your “simple DIY” becomes “unexpected toilet shopping.”
Step 10: Shim if needed (a stable toilet is a happy toilet)
If the toilet rocks even slightly, use plastic shims to stabilize it. Trim excess shim material with a utility knife.
Rocking is one of the fastest ways to kill a new wax seal.
Step 11: Reconnect the supply line and test
- Reconnect the water supply line.
- Turn the shutoff valve back on slowly.
- Let the tank fill, then flush several times.
- Check for water at the base and around the supply connection.
Step 12: Caulk the base (optional, but often recommended)
Many homeowners caulk around the toilet base for a cleaner look and to keep grime and moisture from collecting underneath.
Local requirements vary, but a common compromise is to apply a neat bead and leave a small gap at the back so any future leak becomes visible.
Use mildew-resistant bathroom caulk if you choose to do this.
Wax Ring Choices: Standard vs Extra-Thick vs Wax-Free
Standard wax ring
Works in most situations when the flange is at the correct height and the toilet is stable.
Extra-thick wax ring or wax ring with horn
Helpful when the flange sits slightly low. The “horn” can help guide flow into the drain, but correct alignment is important.
If the flange is significantly below the finished floor, a flange extender is usually the smarter fix than trying to “make wax do gymnastics.”
Wax-free seals
Wax-free gaskets (often rubber/foam systems) can be cleaner to install and may allow repositioning without instantly ruining the seal.
They’re also popular when flange height varies or when you want an easier reset during remodeling.
Common Mistakes That Ruin a Fresh Wax Ring
- Reusing an old wax ring: once compressed, it’s done.
- Setting the toilet, then lifting it to “check”: that breaks the seal; replace the ring again.
- Not fixing rocking: movement destroys seals.
- Over-tightening bolts: cracked porcelain is a heartbreak you can’t unfeel.
- Stacking wax rings: it often creates uneven compression and future leaks; fix the flange height instead.
When to Call a Pro
DIY is greatuntil it stops being great. Consider calling a plumber if:
- The flange is broken, severely corroded, or sitting far below the finished floor.
- You find soft, damaged subflooring or suspected mold.
- The toilet leak continues even after replacing the seal.
- You have a cast-iron setup or complicated flange replacement that requires specialty tools.
- You’re uncomfortable lifting and resetting the toilet safely.
FAQ
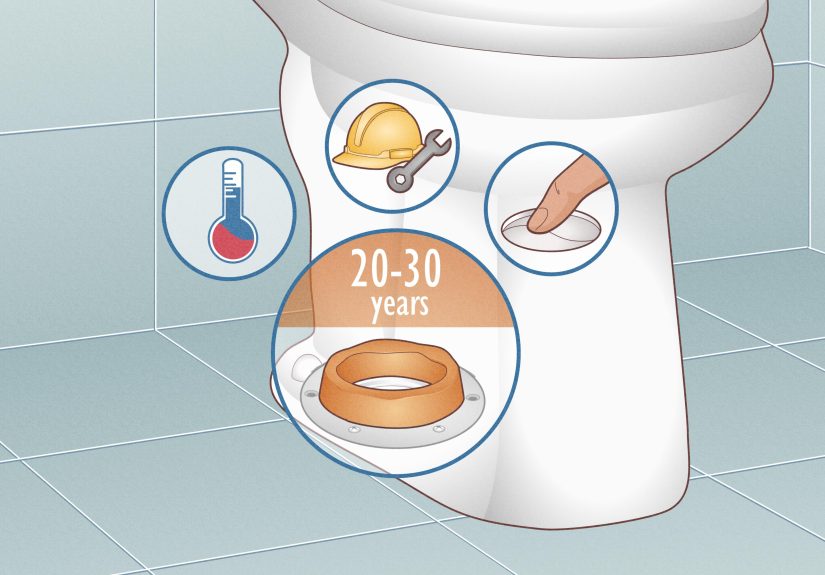
How long does a toilet wax ring last?
A properly installed wax ring can last for decades. Many failures happen due to movement, improper flange height, or a toilet being removed and reset.
If the toilet is lifted for any reason, plan on replacing the wax ring during reinstallation.
Is a sewer smell always a bad wax ring?
Not always. Sewer odor can also come from a dry P-trap in a rarely used drain, venting issues, or other plumbing leaks.
But if the smell is strongest near the toilet base, a compromised wax seal is worth investigating.
Can I just tighten the bolts and call it a day?
If the toilet is slightly loose but there’s no leaking, careful tightening might solve it. If there’s water at the base after flushing,
tightening alone usually won’t fix a failed wax ring.
Should I caulk around the toilet base?
Many people do for cleanliness and code compliance in some areas. A common approach is to caulk most of the perimeter but leave a small gap at the back
(out of view) so a future leak can reveal itself instead of hiding under the toilet.
Field Notes: 500+ Words of Real-World Experiences (What Usually Happens in Actual Bathrooms)
In the real world, wax ring problems rarely show up like a neat textbook diagram. They show up like this: you’re half-awake, step into the bathroom,
and your sock touches something cold and damp. You freeze. You look down. You try to convince yourself it’s “just the bath mat.” It is not the bath mat.
That’s how a lot of wax ring stories begin.
One common DIY experience is the “false alarm puddle.” Homeowners notice water near the base and assume the wax ring is toast, only to discover
condensation dripping from the tank. This happens a lot in humid climates or in bathrooms without great ventilation. The difference is timing:
condensation tends to appear whether or not you flush, while wax ring leaks often show up after a flush (or after someone sits down and shifts the toilet).
A quick dry-and-flush test usually separates the two.
Another classic: the “mystery wobble.” The toilet rocks a little, but it’s been that way “forever,” so it gets ignored. Over time, that movement
compromises the wax seal. Then the leak starts, and it’s tempting to tighten the bolts like you’re trying to win an arm-wrestling contest.
The better outcome is slow, even tighteningplus shimming if the floor is unevenbecause the long-term goal is stability, not brute force.
A stable toilet is boring, and in plumbing, boring is beautiful.
Many DIYers are surprised by how often the flange height is the root problem. During flooring changes (new tile, thicker vinyl, added underlayment),
the finished floor height changes, but the flange sometimes doesn’t get adjusted to match. Then a standard wax ring doesn’t compress enough to seal reliably.
People may be tempted to stack wax rings as a quick fix, but that can compress unevenly and shift during installation. In practice, homeowners who correct
the flange heightusing a flange extender or the proper seal typetend to get a more dependable, long-lasting fix.
There’s also the “I didn’t expect it to be that heavy” moment. Toilets are deceptively awkward: bulky, porcelain, and shaped exactly wrong for comfortable
lifting. A very common experience is realizing that a helper (or at least a careful lift plan and a staging area) turns the job from stressful to manageable.
Setting the toilet on cardboard and having rags ready for drips sounds minor, but it prevents the job from turning into a slippery mess.
Finally, many people report that the best part of the project isn’t the replacement itselfit’s the testing. Turning the water back on, flushing
multiple times, and seeing a totally dry floor feels like winning a small domestic championship. The lesson that comes up again and again:
don’t rush the reset, don’t ignore rocking, and don’t skip the flange inspection. Most “wax ring failures” are actually “installation conditions”
that the wax ring can’t overcome forever. Fix those conditions, and the wax ring usually goes back to doing what it does best: quietly existing,
asking for nothing, and keeping your bathroom from smelling like a municipal complaint.


