Table of Contents >> Show >> Hide
- Why This Works (And Why Plastic Is Picky)
- Materials and Tools
- Step 1: Choose Your “Metal Personality”
- Step 2: Prep Like a Pro (This Is Where Durability Is Born)
- Step 3: Paint the Faux Metal Finish
- Step 4: Add the “Real Metal” Details (Handles, Labels, and Faux Rivets)
- Drying, Curing, and Not Ruining It on Day Two
- Where These Faux Metal Bins Look Amazing
- Troubleshooting: When Your “Metal” Tries to Betray You
- Cost and Time: The Reality Check
- Conclusion: Cheap Plastic, Expensive Energy
- Real-World Experiences and Lessons Learned (Extra)
Dollar store plastic bins are the unsung heroes of home organizationlightweight, cheap, and available in approximately 47 shades of “close enough.”
The only problem? They sometimes look like they cost exactly what you paid for them.
The good news: with the right prep and a smart paint strategy, you can turn bargain-bin plastic into storage that looks like galvanized steel, hammered metal,
or industrial “I own a label maker and I’m not afraid to use it” décor.
This guide walks you through durable methods for creating a faux metal finish on plastic bins, plus styling upgrades (handles! labels! faux rivets!)
that make them look like boutique organizers. You’ll also get troubleshooting tips so your “metal” doesn’t peel off the first time someone
grabs the bin like they’re starting a lawn mower.
Why This Works (And Why Plastic Is Picky)
Plastic is notoriously hard for paint to grab onto because many plastics are smooth, flexible, and sometimes manufactured with release agents.
The secret to a finish that lasts is a three-part plan:
- Clean like you mean it (oils and residue are paint’s worst enemy).
- Create grip with a plastic-bonding primer or adhesion-promoting paint system.
- Build thin layers (light coats cure better and chip less than thick coats).
Materials and Tools
Pick the method first, then buy supplies. You don’t need everything below for every finish.
Core supplies
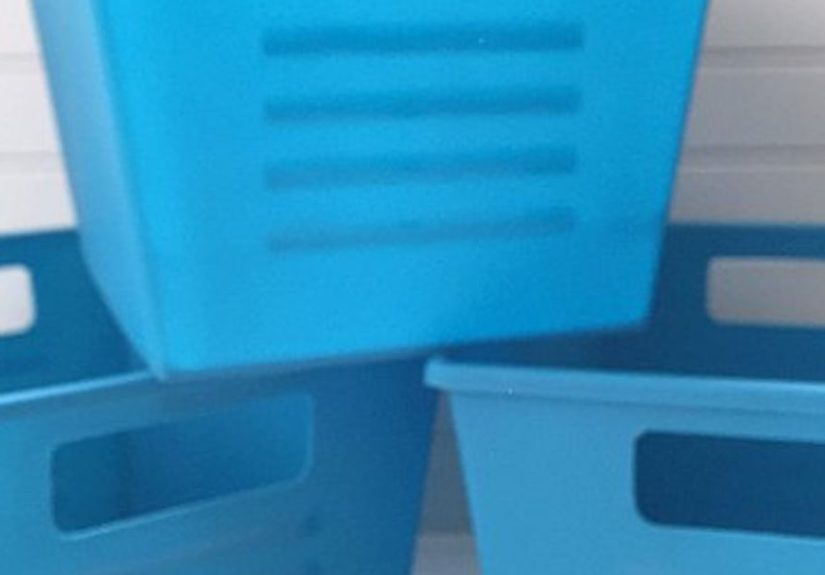
- Dollar store plastic bins (smooth or lightly textured both work)
- Dish soap + warm water
- Isopropyl alcohol (for final wipe-down)
- Microfiber cloths or lint-free rags
- Painter’s tape (optional for crisp stripes or label borders)
- Nitrile gloves + mask/respirator; drop cloth or cardboard spray booth
For adhesion
- Plastic primer (spray) or a paint formulated to bond to plastic
- Optional: adhesion promoter (helpful for very slick plastics)
- Fine sanding sponge or ultra-fine scuff pad (optional but useful)
For the faux metal look
- Hammered or metallic spray paint (silver, steel, gunmetal, bronze)
- Optional: acrylic craft paints (gray, black, white, brown) for faux galvanized layers
- Optional: clear topcoat (matte or satin) for extra durability
For the “upgraded hardware” look
- Label holders, small handles, or strap pulls (lightweight hardware works best)
- Machine screws + washers + nuts or heavy-duty adhesive strips (depending on bin thickness)
- Vinyl labels, chalk labels, or printable label cards
Step 1: Choose Your “Metal Personality”
Before you paint, decide the vibe. Here are three reliable finishes that read as “metal” from a few feet awayaka the distance most people view storage bins
unless they’re judging your pantry choices.
Option A: Hammered metal (fastest, most forgiving)
Hammered-finish spray paint creates texture and depth that hides minor imperfections. It’s ideal for bins with scratches, molded logos,
or slightly uneven plastic.
Option B: Faux galvanized steel (farmhouse/utility chic)
A layered gray-and-silver technique mimics the mottled, cloudy look of galvanized metal.
This is great if you want “vintage hardware store bin” energy without actual rust.
Option C: Industrial steel (dark, modern, dramatic)
A deep charcoal base plus metallic dry-brushing gives a “blackened steel” impression.
It looks especially sharp with white labels and matching black hardware.
Step 2: Prep Like a Pro (This Is Where Durability Is Born)
Wash and degrease
- Wash bins with warm water and dish soap. Rinse well.
- Let them dry completely.
- Wipe down with isopropyl alcohol to remove leftover oils and residue.
If the bins are older or came from a dusty stash, cleaning is non-negotiable.
Paint sticks to clean plastic; it slides off “mystery kitchen film.”
Scuff (optional, but helpful)
If the plastic is glossy-smooth, lightly scuff it. The goal is to dull the shine, not reshape the bin.
Use a fine sanding sponge or an ultra-fine scuff pad, then wipe away dust.
Prime or bond
You have two solid routes:
-
Route 1: Plastic primer + your chosen paint.
This is a classic system when you want maximum flexibility in topcoat choice. -
Route 2: A paint designed to bond to plastic.
These products are made to stick to difficult surfaces and can simplify the process.
If your bins are especially slick (or you’ve had peeling issues before), an adhesion promoter can add another layer of insurance.
Step 3: Paint the Faux Metal Finish
No matter which finish you choose, the golden rules of spray painting apply:
light coats, steady motion, and patience between layers.
Multiple thin coats reduce drips, improve curing, and give a smoother final look.
Method A: Hammered faux metal (spray-only, beginner-friendly)
- Set the bin upside down on cardboard so you can hit edges evenly.
- Spray a light “tack” coat first (a thin mist). Let it get slightly tacky.
- Apply 2–3 light coats, letting each coat set up before the next.
- Rotate the bin between coats so you don’t miss lip edges or recessed grips.
- Optional: seal with a clear topcoat once fully dry if the bin will be handled constantly.
Pro look: Use hammered “black” or “dark bronze” on the outside, then paint the inside a flat neutral (like matte charcoal)
so it feels intentional rather than “I ran out of paint.”
Method B: Faux galvanized finish (layered, realistic, surprisingly fun)
This method uses the visual trick that galvanized metal has cloudy variation, not a flat silver coat.
Work in thin layers and avoid perfect coverageimperfection is the feature.
- Base coat: Spray or brush on a medium gray. Let dry.
-
Mottle layer: Dab lighter gray in patches with a sea sponge or crumpled paper towel.
Keep it random and soft-edged. Let dry. -
Metal pop: Lightly dry-brush metallic silver over raised areas and edges.
This mimics wear and gives believable depth. - Optional “zinc blooms”: Add tiny, scattered white highlights in a few spots, then soften them with a barely damp sponge.
- Optional aging wash: A very thin black/brown glaze in corners can add shadow. Wipe back immediately so it stays subtle.
- Seal with a matte or satin clear coat for a more authentic metal look (high gloss tends to read “plastic”).
Where it shines: farmhouse pantries, laundry rooms, mudrooms, and anywhere you want “utility but make it cute.”
Method C: Industrial steel (modern, bold, and hides scuffs)
- Apply a dark base coat (charcoal or flat black). Let dry fully.
-
Using a stiff brush, dry-brush a small amount of silver metallic paint onto edges and high points.
Keep it lighttoo much turns into “silver craft day.” - For depth, add a second dry-brush layer with a slightly different metallic tone (like gunmetal) on corners.
- Seal with matte or satin clear coat if the bin will be moved a lot.
Style tip: Pair with crisp white labels, black screws, and a consistent font so it feels like a matched set instead of a DIY orphan.
Step 4: Add the “Real Metal” Details (Handles, Labels, and Faux Rivets)
Paint does most of the transformation, but hardware is what makes people squint and say,
“Wait… that’s plastic?”
Handle upgrades
- Lightweight pulls: Small cabinet pulls or strap handles work well for smaller bins.
- Placement: Center handles horizontally and keep them consistent across bins for a store-bought look.
-
Attachment: If the plastic is thin, use washers to distribute pressure.
If you don’t want to drill, heavy-duty adhesive strips can work for decorative-only handles.
Label systems that look intentional
- Metal label holders: Instant vintage vibeespecially on faux galvanized bins.
- Chalk labels: Great for pantries where categories change (“snacks” becomes “why are there only crumbs”).
- Printed cards: Best for a clean, uniform aestheticchoose one font and commit.
Faux rivets (optional, extra credit)
For an industrial look, add tiny “rivets” using paintable half-round beads or small domed embellishments.
Place them symmetrically near corners, then paint over everything so they look built-in.
Keep it minimalnobody needs a bin that looks like it’s auditioning for a steampunk convention.
Drying, Curing, and Not Ruining It on Day Two
Dry-to-touch is not the same as fully cured. Let your bins rest before heavy use, especially if they’ll be stacked or slid on shelves.
If you can, give them extra time so the finish becomes more chip-resistant.
- Handle gently at first: Avoid stacking for the first day if possible.
- Don’t store sticky items immediately: Some plastics and coatings can “bond” if pressed together too soon.
- Use shelf liners: They reduce scraping and keep bins looking fresh longer.
Where These Faux Metal Bins Look Amazing
Pantry and kitchen
Use matching bins for snacks, baking supplies, or drink pouches. Add big, readable labels.
Bonus points if you stop storing onions next to bread like a chaos scientist.
Entryway and mudroom
Assign bins to hats, dog gear, sunscreen, and “things I need but will forget.”
Faux metal finishes look especially natural in utilitarian spaces.
Bathroom
Go with galvanized or hammered silver for a clean, spa-like look. Keep finishes sealed if humidity is high.
Kids’ rooms
Use industrial steel (dark) with bold label icons for toys. It looks grown-up, but still functions like a toy vacuum for LEGO.
Garage and workshop
Hammered finishes hide wear well. Add sturdy labels for cords, gloves, and tools so you’re not buying the same screwdriver twice.
Troubleshooting: When Your “Metal” Tries to Betray You
Problem: Paint beads up or looks patchy
That usually means residue or oils are still on the surface. Clean again, wipe with alcohol, and restart with a bonding primer or plastic-specific paint.
Problem: Peeling or chipping near handles
Handles are high-friction zones. Add washers to reduce flexing, allow longer cure time, and consider a durable clear topcoat for extra protection.
Problem: Drips and runs
Too much paint, too fast. Sand the drip lightly once dry, then respray in thin coats. Light coats are your best friend.
Problem: Sticky finish days later
This can happen with heavy coats, cool temperatures, or high humidity. Move bins to a warmer, drier spot and give them more time.
Avoid stacking until the surface feels firm and no longer tacky.
Cost and Time: The Reality Check
One of the best parts of this project is the return on effort. A quick breakdown:
- Cost per bin: Often low, especially if you’re using one can of paint for multiple bins.
- Time: Prep + paint can be done in an afternoon, but curing time is the patience tax.
- Impact: Highthese instantly make shelves look coordinated and intentional.
Conclusion: Cheap Plastic, Expensive Energy
Turning dollar store plastic bins into faux metal storage is the kind of DIY that feels almost unfair:
you spend a little time, use a few smart materials, and suddenly your shelves look like they belong in a catalog.
The biggest “secret” is simply respecting the prepclean well, use the right bonding approach for plastic, and build light coats.
Add a handle and a label, and your bins stop looking like temporary storage and start looking like a system.
Real-World Experiences and Lessons Learned (Extra)
Makers who try this project often report the same surprising moment: once the first coat dries, the bin stops reading as “toy plastic” and starts reading as
“hardware store chic.” It’s a fast confidence boostuntil you pick it up too soon and leave a fingerprint that looks like you signed the piece in oil.
The lesson: your timeline is set by curing, not excitement. If you want the finish to survive daily grabbing, sliding, stacking, and general household chaos,
it’s worth waiting a bit longer before putting the bins into full-duty service.
Another common experience is discovering just how different plastics can be. Two bins that look identical on the shelf may behave differently under paint.
One takes paint beautifully, the other acts like it’s coated in invisible nonstick cooking spray. That’s why many DIYers adopt a “test patch” habit:
spray a hidden spot on the underside or inside rim first. If it wrinkles, beads, or scratches off too easily, you can pivot to a plastic primer,
a plastic-bonding paint line, or a quick adhesion promoter step. Think of it as relationship counseling for your paint and your binbetter to identify issues
early than to find them after you’ve done three gorgeous coats.
People also tend to underestimate how much “realism” comes from small details rather than fancy techniques. A simple hammered spray finish already looks metallic,
but add a label holder or a tidy label card and the whole piece levels up. The same goes for color discipline: a set of bins in one consistent metal tone
looks intentional, while five different “silvers” can look like you collected them during a scavenger hunt. Many DIYers end up doing a quick visual plan:
pick one finish for public-facing shelves (pantry, entryway), and save the “use whatever’s left” approach for hidden storage (closets, garage).
On the practical side, high-touch zones are where reality shows up. Cutout handles, rims, and corners take the most abuse.
Makers who want maximum durability often do two things: they keep paint coats thin (to reduce soft layers that dent),
and they add protection where hands landeither a tougher clear coat or simply a little extra cure time before use.
A sneaky trick that comes up a lot is adding shelf liner or felt pads where bins scrape against wire racks or wood shelves;
it reduces friction, prevents scuffs, and keeps the finish looking “new” longer.
Finally, the most relatable experience: you’ll do one bin “just to try it,” and then suddenly you’re looking around your home like,
“So… everything in here could be faux metal, huh?” That’s the fun of this project. It’s scalable. Start with two bins for a pantry shelf.
If you love the result, repeat the process in batchesprep all bins at once, spray in a rhythm, and keep your finish consistent.
The outcome isn’t just prettier storage; it’s a calmer visual field. And sometimes, that’s the difference between “my house is messy”
and “my house is lived-in but organized by someone who has their life together (at least in this one aisle).”