Table of Contents >> Show >> Hide
- Why Basements Are So Good at Being Damp
- Start With Diagnosis, Not a Shopping Cart
- Exterior Waterproofing: Keep Water Away Before It Knocks
- Interior Waterproofing: Manage Water That Gets In
- Mold vs. Mildew: Similar, Annoying, Not Identical
- How to Clean Mold and Mildew Safely
- Do Not Finish a Basement Before Solving Moisture
- A Practical Basement Waterproofing Plan
- Common Mistakes That Make Basement Mold Worse
- Long-Term Maintenance: The Boring Stuff That Works
- Real-World Experience: What Homeowners Learn the Damp Way
- Conclusion
A basement is supposed to be useful: storage, laundry, workshop, home gym, maybe even a cozy family room where the treadmill quietly becomes a clothes rack. But when water sneaks in and mold starts throwing a fuzzy little house party, the basement turns from “bonus space” into “why does it smell like a wet sock in here?” Waterproofing a basement and getting rid of mold and mildew is no easy feat because moisture is sneaky, persistent, and extremely rude.
The hard truth is this: mold is not the real villain. Moisture is. Mold and mildew are symptoms of a basement that has a water problem, a humidity problem, a ventilation problem, or all three wearing a trench coat. You can scrub the wall until your elbow files for workers’ compensation, but if water keeps entering, the mold will come back like a sequel nobody asked for.
This guide breaks down how basement waterproofing works, why mold and mildew grow, how to clean them safely, and what homeowners can do to keep the space dry for the long haul. The goal is not just a prettier basement. It is a healthier, safer, more durable home.
Why Basements Are So Good at Being Damp
Basements sit below grade, which means they are surrounded by soil. Soil holds water after rain, snowmelt, irrigation, and poor drainage. That water presses against foundation walls and looks for any possible way inside: cracks, pipe penetrations, window wells, porous concrete, cove joints, or gaps around old masonry. Water is patient. It does not need an engraved invitation.
There are three major moisture sources in most basement problems. First, liquid water can come from rain or groundwater. Second, moisture can be generated inside the home by humidifiers, unvented dryers, bathrooms, cooking, or wet stored items. Third, warm humid air can enter the basement and condense on cool walls, pipes, and floors. Many homeowners mistake condensation for a leak, especially in summer when basement surfaces stay cooler than the outdoor air.
Moisture also moves in different ways. It can flow as liquid water, wick through concrete by capillary action, travel as vapor through porous materials, or ride in with air leaks. That is why one basement may need grading and gutter repairs, another may need a sump pump, and another may simply need a properly sized dehumidifier and better air sealing.
Start With Diagnosis, Not a Shopping Cart
The fastest way to waste money on basement waterproofing is to buy products before understanding the cause. Waterproof paint may help with minor dampness, but it will not defeat serious hydrostatic pressure. A dehumidifier can control air moisture, but it cannot pump out groundwater. A sump pump is useful when water reaches the sump pit, but it cannot fix a downspout that dumps rainwater beside the foundation.
Walk the property during or immediately after a heavy rain. Watch where the water goes. Does it spill over clogged gutters? Does the soil slope toward the house? Are downspouts discharging too close to the foundation? Are window wells filling up? Inside the basement, look for water stains, efflorescence, peeling paint, damp corners, rusty metal, swollen trim, musty odors, or dark spotting behind furniture and stored boxes.
Use a hygrometer to measure relative humidity. A basement should generally stay below 60% relative humidity, and many homeowners aim for the 30% to 50% range to discourage mold growth and improve comfort. If the humidity jumps on warm days but there is no visible leak, condensation may be the main issue.
Exterior Waterproofing: Keep Water Away Before It Knocks
The best basement waterproofing strategy starts outside. Water that never reaches the foundation is water you do not have to fight later. This is the least glamorous part of the project, but it is often the most important. Nobody brags at dinner parties about “proper downspout extensions,” but they should. Those things are basement superheroes wearing plastic sleeves.
Improve Grading Around the Foundation
The soil around the home should slope away from the foundation so rainwater naturally drains outward. Low spots near the wall should be filled with compacted soil, not loose mulch that behaves like a wet sponge. Avoid piling landscaping materials against siding or masonry, because that can trap moisture and invite pests.
Clean Gutters and Extend Downspouts
Clogged gutters can dump roof water directly beside the foundation. Downspouts should discharge water far enough away that it does not simply soak back into the soil next to the basement wall. Splash blocks, extensions, underground drain lines, and properly maintained gutters can make a dramatic difference.
Fix Window Wells
Basement window wells should drain properly and sit high enough to keep surface water out. If a window well fills like a fishbowl during storms, water can leak through the window frame or seep into the wall. Covers, gravel, drain connections, and proper grading can help reduce the risk.
Consider Exterior Drainage and Membranes
For serious water intrusion, exterior waterproofing may involve excavation, foundation repairs, drainage boards, waterproof membranes, and footing drains. This is more expensive and disruptive than interior fixes, but it addresses water before it enters the basement. In older homes with chronic seepage, exterior work can be the difference between “we manage the dampness” and “we finally sleep when it rains.”
Interior Waterproofing: Manage Water That Gets In
Interior systems are often used when exterior excavation is impractical, too expensive, or unnecessary. They do not always stop water from reaching the foundation, but they can collect and control water before it damages the basement interior.
Seal Cracks and Gaps
Small foundation cracks may be repaired with hydraulic cement, epoxy injection, polyurethane injection, or masonry repair products depending on the type of crack and wall material. Structural cracks, widening cracks, bowing walls, or repeated leakage should be evaluated by a qualified professional. A crack is not just a crack when it brings its own weather system.
Install or Maintain a Sump Pump
A sump pump collects water in a basin and pumps it away from the home. It works best when connected to a drainage system that directs water toward the pit. Homeowners should test the pump regularly, keep the basin clean, check the float switch, confirm the discharge line is clear, and consider a battery backup if power outages happen during storms.
Use Interior Perimeter Drains
An interior perimeter drain, sometimes called an interior French drain, collects water along the inside edge of the basement floor and directs it to a sump pump. This can be effective for chronic seepage at the cove joint where the wall meets the floor. It is not a small weekend craft project, but it can be a practical solution when groundwater pressure is persistent.
Control Humidity With a Dehumidifier
A basement dehumidifier is not a magic wand, but it is one of the most useful tools for preventing mold and mildew. Choose a unit sized for the basement, use a drain hose if possible, and set it to maintain a healthy humidity range. Emptying a bucket every day gets old quickly, and nothing says “homeownership” like forgetting the bucket and wondering why the basement still feels tropical.
Mold vs. Mildew: Similar, Annoying, Not Identical
Mildew is often a surface-level growth that appears white, gray, or powdery. Mold can be darker, fuzzier, patchier, and more deeply embedded in porous materials. Both thrive where moisture is present. Both can create musty odors. Both should be taken seriously, especially when they spread across drywall, insulation, carpet, wood, or stored belongings.
The important point is that mold cleanup must include moisture control. Cleaning visible mold without fixing water intrusion is like mopping the floor while the bathtub is still overflowing. Technically, you are doing something. Practically, you are losing.
How to Clean Mold and Mildew Safely
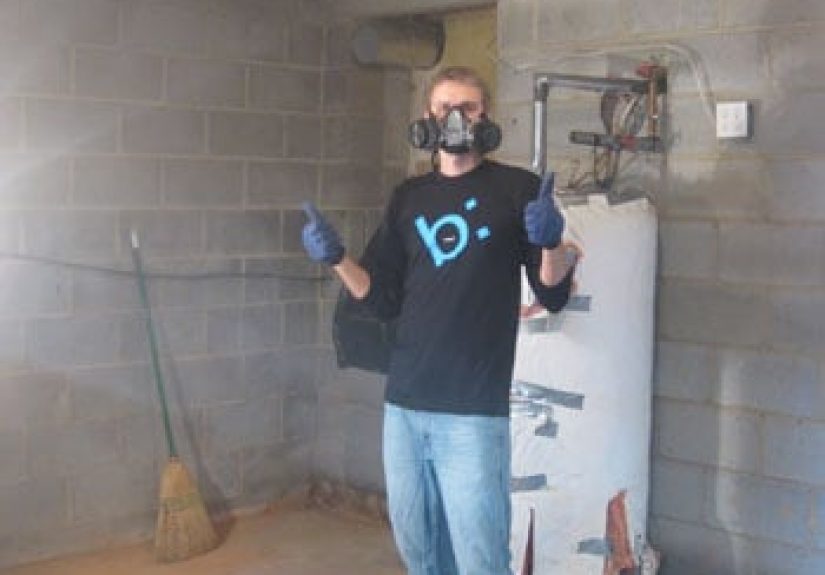
Small areas of mold on hard surfaces may be cleaned by many homeowners, but safety matters. Wear gloves, eye protection, and an appropriate mask or respirator. Ventilate the space when using cleaning products. Never mix bleach with ammonia or other cleaners. If bleach is used, dilute it properly and follow label directions. More is not better; more can be dangerous.
Nonporous surfaces such as tile, metal, glass, and sealed concrete can often be scrubbed clean. Porous materials are more complicated. Moldy carpet, padding, ceiling tiles, insulation, and heavily contaminated drywall may need to be removed and discarded because mold can grow into the material rather than just on the surface.
Professional mold remediation is the wiser choice when the affected area is large, when mold returns repeatedly, when sewage or floodwater is involved, when HVAC systems may be contaminated, or when residents have asthma, immune system concerns, COPD, severe allergies, or other health vulnerabilities. Basement mold is not a bravery contest. Calling a pro is not defeat; it is sometimes the smartest tool in the box.
Do Not Finish a Basement Before Solving Moisture
Finishing a damp basement is one of the most expensive ways to hide a problem until it becomes worse. Drywall, carpet, wood framing, and insulation can trap moisture and feed mold if waterproofing is incomplete. Before adding flooring, walls, cabinetry, or that dream media room, the basement should be tested through wet weather and humidity swings.
Choose basement-friendly materials when finishing the space. Consider rigid foam insulation where appropriate, moisture-resistant wall systems, tile or luxury vinyl flooring instead of carpet, removable baseboards, and access panels for plumbing or foundation inspection. The best finished basement is not the one that looks great on day one. It is the one that still smells normal after three thunderstorms and a humid August.
A Practical Basement Waterproofing Plan
Here is a realistic order of operations for homeowners who want to fix the problem instead of simply decorating it:
- Inspect outside first. Check gutters, downspouts, grading, window wells, patios, walkways, and soil settlement.
- Inspect inside during wet weather. Look for seepage, condensation, stains, efflorescence, and odor patterns.
- Measure humidity. Track readings in different areas of the basement.
- Remove wet materials. Dry water-damaged items quickly and discard materials that cannot be cleaned safely.
- Clean small mold areas correctly. Use protective gear, proper ventilation, and safe cleaning methods.
- Repair water entry points. Seal cracks, improve drainage, fix window wells, or install a sump system as needed.
- Run a dehumidifier. Keep humidity controlled, especially in warm months.
- Maintain the system. Test sump pumps, clean gutters, inspect walls, and watch for new warning signs.
Common Mistakes That Make Basement Mold Worse
One common mistake is painting over mold. Paint is not a time machine. It does not erase contamination, and it may peel when moisture returns. Another mistake is storing cardboard boxes directly on the floor. Cardboard absorbs moisture beautifully, which is excellent if you are trying to cultivate a tiny basement swamp. Use plastic bins and shelving instead.
Running fans in a moldy basement can also spread spores if contaminated materials are disturbed. Fans are helpful for drying clean wet areas, but mold cleanup should be controlled and careful. Opening basement windows on humid summer days can backfire, too. Warm outdoor air may condense on cool surfaces and make the basement damper, not fresher.
Finally, do not ignore musty odors just because no mold is visible. Mold often grows behind walls, under flooring, inside stored items, or around hidden leaks. Your nose may find the problem before your eyes do.
Long-Term Maintenance: The Boring Stuff That Works
Once the basement is dry, maintenance keeps it that way. Clean gutters at least twice a year. Check downspout extensions after storms. Test the sump pump every few months by pouring water into the pit. Inspect the foundation after freeze-thaw cycles. Keep humidity under control. Avoid clutter against exterior walls so air can circulate and inspections are easier.
Basement waterproofing is not a one-and-done trophy. It is more like dental care for your house: regular attention prevents expensive pain later. The good news is that a dry basement is possible when water is managed from the outside, humidity is controlled inside, and mold is removed instead of politely ignored.
Real-World Experience: What Homeowners Learn the Damp Way
Ask anyone who has battled a wet basement, and they will usually tell you the same thing: the first clue was small. Maybe it was a faint musty smell near the stairs. Maybe a cardboard box felt soft on the bottom. Maybe there was a little white powder on the concrete wall that looked harmless enough. Then the next rain came, and suddenly the basement had a personality. Unfortunately, that personality was “moist goblin.”
The most useful experience is learning to follow the water. In one typical case, a homeowner notices mold behind a storage shelf and assumes the wall itself is failing. After moving everything away, they find dampness near the floor but no obvious crack. Outside, the real culprit is a downspout elbow that popped loose months earlier. Every storm had been dumping roof water into the same corner of the foundation. The mold cleanup mattered, but the downspout repair was the hero of the story.
Another common lesson is that smell travels. A basement may smell musty even when the visible mold patch is small because porous materials hold odor. Old rugs, paper files, cardboard, upholstered furniture, and forgotten holiday decorations can absorb moisture and keep releasing that damp basement smell. Removing clutter is not just cosmetic. It helps air move, makes leaks easier to spot, and removes mold-friendly materials from the space.
Homeowners also learn that cheap fixes are not always cheap. A gallon of waterproofing paint may look like a bargain, but if the wall is wet from outside pressure, the coating can blister, peel, or trap moisture. The smarter first step is often exterior drainage: clean gutters, longer downspouts, proper grading, and window well repairs. These jobs may not look dramatic in before-and-after photos, but they prevent the basement from becoming an indoor pond with electrical outlets.
Another experience worth remembering: dehumidifiers need a plan. A unit that is too small, placed in the wrong area, or left with a full bucket will not solve much. The best setup usually includes a drain hose, a clear path for air circulation, and a humidity target that is checked with a hygrometer. Guessing by “how the air feels” is unreliable because basements are naturally cooler. Cool, damp air can feel normal until mold starts writing its signature on the wall.
The biggest lesson is patience. After repairs, the basement needs time to prove itself. Watch it through heavy rain, humid weather, and seasonal changes before finishing walls or installing carpet. A dry week is encouraging; a dry season is evidence. Waterproofing a basement and getting rid of mold and mildew is no easy feat, but the work pays off. A clean, dry basement protects stored belongings, improves indoor air quality, supports the structure, and gives the home back a space that no longer smells like it has been keeping secrets.
Conclusion
Waterproofing a basement and getting rid of mold and mildew requires more than surface cleaning. It takes diagnosis, drainage, humidity control, safe cleanup, and ongoing maintenance. The best approach is simple in theory but serious in practice: keep water away from the foundation, collect and remove water that gets inside, dry the air, remove contaminated materials when needed, and never let small moisture clues become big repair bills.
A dry basement is not just a home improvement win. It is a health, comfort, storage, and property-value win. And yes, it may involve gutters, sump pumps, gravel, gloves, and a few unglamorous afternoons. But compared with moldy carpet and mystery smells, boring maintenance looks pretty heroic.