
Table of Contents >> Show >> Hide
- Why Starlings Are Hard to Remove
- 11 Ways to Get Rid of Starlings
- 1. Identify the Problem Before You Act
- 2. Remove Easy Food Sources
- 3. Starling-Proof Your Bird Feeders
- 4. Seal Holes, Gaps, and Openings Larger Than an Inch
- 5. Use Bird Netting Correctly
- 6. Make Ledges and Rafters Uncomfortable
- 7. Protect Vents, Chimneys, and Dryer Exhausts
- 8. Adjust Nest Boxes to Favor Native Birds
- 9. Use Visual and Sound Deterrents Strategically
- 10. Reduce Roosting Habitat Around Buildings
- 11. Call a Professional for Large Flocks or Indoor Infestations
- What Not to Do When Removing Starlings
- Seasonal Starling Control Tips
- Experience-Based Notes: What Actually Works in Real Life
- Conclusion
Starlings are the tiny opera singers of the bird world: glossy, loud, dramatic, and very comfortable treating your roofline like a free hotel. One or two European starlings may not seem like a big deal. But when a flock discovers your lawn, feeder, barn, attic vent, fruit tree, or porch, the problem can go from “nature is beautiful” to “why is my house chirping?” surprisingly fast.
The good news is that you can get rid of starlings without turning your property into a fortress or declaring war on every feathered visitor. The smartest approach is integrated bird control: remove what attracts them, block where they nest, make roosting uncomfortable, and use humane deterrents consistently. Starlings are clever, social, and persistent, so one shiny scare tape usually won’t do the whole job. A layered plan works best.
This guide explains 11 practical ways to get rid of starlings around homes, gardens, barns, porches, garages, and bird feeders. It focuses on safe, humane, non-toxic methods that reduce starling problems while protecting native birds and keeping your property cleaner, quieter, and less “bird nightclub at 5 a.m.”
Why Starlings Are Hard to Remove
European starlings are an introduced species in North America and are now common across cities, suburbs, farms, lawns, parks, and fields. They gather in flocks, probe lawns for insects, raid fruit, squeeze into cavities, and nest in openings around buildings. Their adaptability is impressiveannoying, yes, but impressive.
Starlings often become a problem because they are cavity nesters. That means they look for holes, gaps, vents, loose siding, barn rafters, traffic-light openings, old woodpecker cavities, and nest boxes. Once they find a cozy spot, they may return repeatedly unless the access point is sealed or modified. They can also compete with native cavity-nesting birds such as bluebirds, flickers, woodpeckers, and purple martins.
Another reason they are difficult to discourage is flock behavior. A single bird may discover a food source, but a whole group may show up later like they were invited to brunch. That is why the best starling control plan targets food, shelter, nesting access, and roosting habits at the same time.
11 Ways to Get Rid of Starlings
1. Identify the Problem Before You Act
Before you start blocking vents or changing bird feeders, make sure the birds are actually starlings. European starlings are chunky, short-tailed birds with pointed yellowish bills during breeding season and darker bills in winter. Their feathers often look black from a distance but shimmer with purple, green, and speckled highlights up close. They move quickly across lawns, poking their bills into grass as if they lost their car keys in the soil.
Correct identification matters because many native birds are protected by law. European starlings are not federally protected under the Migratory Bird Treaty Act, but state and local rules can still affect what property owners may do. If you are not sure what species you have, take a photo and compare it with a reputable bird identification guide or ask a local extension office, wildlife rehabilitator, or bird-control professional.
Do not remove nests, eggs, or birds unless you are certain of the species and understand local regulations. A careful first step prevents accidental harm to protected birds and saves you from creating a bigger problem than the one you started with.
2. Remove Easy Food Sources
If starlings keep coming back, there is usually a buffet somewhere. Common attractants include spilled birdseed, pet food, livestock feed, suet, fruit, open trash, compost scraps, and insects in short lawns. Starlings are opportunistic feeders, which is a polite way of saying they have zero shame around free snacks.
Start by cleaning up spilled grain, seed, and feed every day. Store pet food indoors and avoid leaving dog or cat bowls outside. If you keep chickens, horses, goats, or cattle, use covered feed bins and sweep up loose feed around storage areas. On farms and hobby properties, starlings often gather where high-protein livestock feed is easy to access.
In the yard, pick up fallen fruit quickly. Harvest berries, cherries, grapes, and soft fruit as soon as they ripen. Cover vulnerable crops with properly installed netting before birds discover them. Food control is not glamorous, but it is one of the most reliable ways to make your property less exciting to starlings.
3. Starling-Proof Your Bird Feeders
Many homeowners want to discourage starlings without losing cardinals, finches, chickadees, woodpeckers, and other welcome birds. The trick is to adjust the menu and feeder design.
Starlings love easy-access suet, cracked corn, mealworms, soft scraps, and mixed seed blends with large amounts of filler. Try switching to feeders that favor smaller birds, such as caged tube feeders or weight-sensitive feeders. Nyjer seed feeders can attract finches while being less appealing to starlings. Safflower may also reduce interest from some nuisance birds, though results vary by location.
If you feed suet, choose an upside-down suet feeder. Woodpeckers and nuthatches can cling underneath, but starlings have a harder time using that style. Avoid platform feeders if starlings are a serious problem, because platforms are basically open dining rooms with wings.
Clean under feeders daily. Even the best feeder setup fails if the ground below it becomes a snack carpet.
4. Seal Holes, Gaps, and Openings Larger Than an Inch
Exclusion is one of the strongest long-term methods for starling control. If starlings are nesting or roosting in your attic, soffit, barn, garage, warehouse, porch ceiling, or wall cavity, they found an opening. Your job is to close the real estate office.
Inspect your home or building for gaps around vents, roof edges, eaves, loose siding, broken louvers, missing screens, chimney openings, and damaged fascia boards. Starlings can use surprisingly small spaces, so look carefully. Install sturdy vent covers, hardware cloth, metal flashing, or appropriate screening where needed.
Important: never seal an opening if birds or young are trapped inside. Watch the area first. If you see birds entering with nesting material or food, wait until the nesting cycle is finished or call a humane wildlife-control professional. Once the area is empty, clean it safely and seal it permanently.
A one-time repair can prevent years of noise, droppings, odor, and repeat nesting. That is the kind of home improvement project that deserves a tiny victory dance.
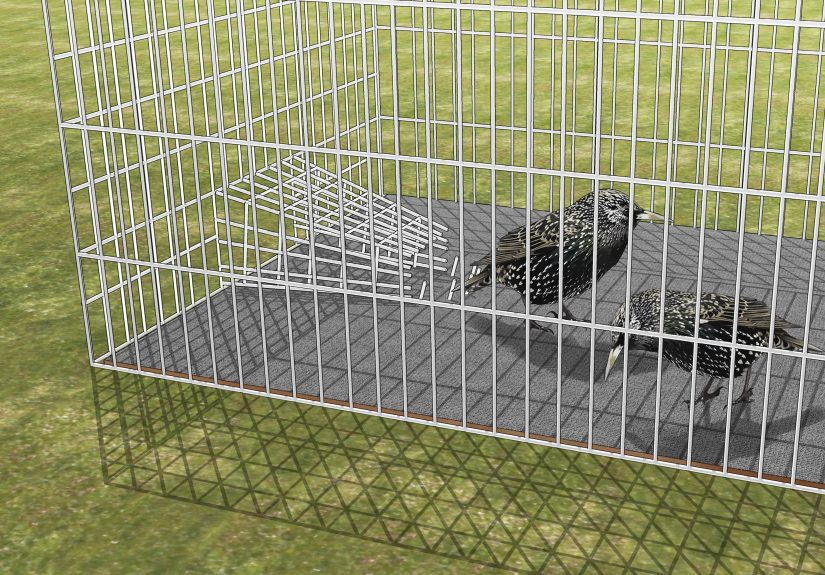
5. Use Bird Netting Correctly
Bird netting can be very effective for keeping starlings out of fruit trees, garden beds, rafters, balconies, warehouse beams, and other high-value areas. The key phrase is “correctly installed.” Loose, torn, sagging, or lightweight netting can trap birds and create a welfare problem.
Use durable netting with the right mesh size for the job, pull it tight, secure all edges, and inspect it often for holes. For fruit trees and vines, install netting before fruit ripens. For building interiors, netting can block access to rafters and beams where starlings gather to roost.
If you are covering a tree or crop, avoid leaving gaps at the bottom where birds can walk in and panic. If you are using netting near a porch, balcony, or commercial structure, consider professional installation. Good netting is a barrier. Bad netting is a bird hammock with consequences.
6. Make Ledges and Rafters Uncomfortable
Starlings like flat ledges, beams, signs, gutters, roof edges, and rafters because these places give them safe spots to rest and watch the world judge your landscaping. Changing the surface can make those areas less appealing.
One proven method is to increase the angle of ledges to about 45 degrees using metal, wood, or plexiglass. A sloped surface prevents birds from settling comfortably. Bird spikes or “porcupine wire” devices can also discourage roosting when installed properly on ledges and beams.
Use humane perch deterrents designed to prevent landing, not injure birds. Avoid sticky gels or homemade materials that can trap feathers, harm wildlife, or create cleanup problems. The goal is simple: make the favorite perch inconvenient enough that the flock chooses somewhere else.
7. Protect Vents, Chimneys, and Dryer Exhausts
Starlings are notorious for nesting in vents and cavities. Dryer vents, bathroom vents, attic vents, stove vents, and chimneys can look like luxury apartments to a bird looking for a nesting site. Unfortunately, nests in vents can block airflow, create odor, increase moisture problems, and become a fire or sanitation concern depending on the location.
Install proper vent guards and caps that allow airflow while blocking birds. Use products made for the specific vent type. Do not cover a dryer vent with fine mesh that collects lint, and do not block ventilation your home needs. When in doubt, ask a qualified contractor.
If birds are already nesting in a vent, do not poke around blindly. You may push debris deeper or trap birds inside. Wait until the nest is inactive or call a professional who can remove nesting material safely and then install a prevention cover. The best time to bird-proof vents is before nesting season, not after your bathroom fan starts chirping.
8. Adjust Nest Boxes to Favor Native Birds
If you love backyard birds, you do not have to remove every nest box. You may only need to manage them better. Starlings are larger than many native cavity-nesting birds, so entrance-hole size matters.
For bluebird boxes, using the correct entrance size can help smaller native birds enter while keeping starlings out. Placement also matters. Starlings are more common near homes, farms, open lawns, and areas with grain or easy food. Moving nest boxes away from dense human activity and away from starling-heavy areas can reduce unwanted occupation.
Monitor nest boxes regularly during nesting season. Learn the difference between native bird nests and starling nests before taking action. If you are managing boxes for bluebirds, purple martins, or kestrels, follow guidance from a reputable bird-conservation organization or local extension service.
A good nest box strategy does two things at once: it discourages starlings and gives native birds a fair shot.
9. Use Visual and Sound Deterrents Strategically
Reflective tape, predator kites, scare balloons, flashing objects, distress sounds, and motion devices can sometimes help discourage starlings, especially when birds have not yet settled into a routine. However, starlings are smart. If a fake owl sits in the same spot for two weeks, the birds may start treating it like patio furniture.
For best results, move visual deterrents frequently. Change their position, combine them with exclusion, and use them before starlings become attached to a roost or food source. Sound deterrents may help in certain settings, but they can bother neighbors and may lose effectiveness if overused.
Think of scare devices as supporting actors, not the main character. They work best when paired with food removal, sealing entry points, netting, and perch modification.
10. Reduce Roosting Habitat Around Buildings
Large starling flocks often roost in dense trees, thick shrubs, vines, and protected building edges. If your property has a nightly starling gathering, look for shelter as well as food.
Trim dense vegetation near buildings where flocks gather. Remove vines from walls if they provide cover. Thin overcrowded windbreaks or dense tree clusters where appropriate. You do not need to remove every tree; the goal is to reduce cozy, protected roosting pockets close to your house, barn, patio, or parking area.
Also pay attention to artificial roosts. Open barns, rafters, signs, beams, and covered walkways can become favorite resting spots. Combine habitat changes with netting, ledge angles, spikes, or screening to make the area less inviting.
When you remove the “safe sleeping spots,” starlings are more likely to move along.
11. Call a Professional for Large Flocks or Indoor Infestations
If you are dealing with a few starlings around a feeder, you can usually solve the problem yourself. If you have a large roost, birds inside walls, droppings piling up, blocked vents, a barn full of birds, or a commercial property issue, call a licensed wildlife-control or bird-management professional.
Professionals can identify the species, check regulations, find entry points, remove inactive nesting material, clean contaminated areas safely, and install durable exclusion systems. They can also help prevent non-target harm to native birds.
Avoid poisons, homemade chemical repellents, glue-like substances, or risky removal methods. These can harm birds, pets, people, and other wildlife. In some cases, they may also violate local rules. Safe starling control is not about doing the harshest thing; it is about doing the smartest thing consistently.
What Not to Do When Removing Starlings
Some starling-control mistakes make the problem worse. The first is relying on one deterrent. A single plastic owl, one strip of reflective tape, or one afternoon of shouting “go away” at the roofline is unlikely to solve a serious starling problem. Starlings adapt quickly.
The second mistake is sealing openings too soon. If birds are actively nesting inside, sealing the entrance can trap them and create odor, noise, and animal welfare problems. Always confirm the space is empty before permanent repairs.
The third mistake is feeding birds while trying to deter starlings. If the feeder is overflowing with cracked corn and suet, starlings will absolutely notice. You cannot run a free buffet and a no-starling policy at the same time. Birds may be small, but they are not reading your terms and conditions.
Finally, do not ignore droppings. Large accumulations can create slippery surfaces, odor, corrosion, and health concerns. Wear appropriate protection when cleaning, avoid stirring up dust, and consider professional cleanup for large roosting sites.
Seasonal Starling Control Tips
Spring
Spring is prime nesting season, so inspect vents, soffits, nest boxes, gutters, and wall openings early. Install covers before birds start building nests. Adjust bird feeders and remove easy food sources. Monitor nest boxes weekly if you maintain them for native birds.
Summer
Summer is a good time to protect ripening fruit, berries, and garden crops. Use properly secured netting before damage begins. Keep outdoor eating areas clean and store trash in lidded containers. If starlings are gathering at sunset, identify roosting sites and modify them before flock size grows.
Fall
Fall flocks may become more visible as birds gather in groups. Continue sanitation, trim dense roosting vegetation, and repair building gaps before cold weather. This is also a smart season for larger exclusion projects because nesting activity is lower.
Winter
Winter starlings often gather around feedlots, barns, warm structures, and reliable food. Keep livestock feed secured, remove spilled grain, and use barriers around storage areas. Check attic vents and rooflines after storms, since wind can loosen covers or flashing.
Experience-Based Notes: What Actually Works in Real Life
In real-world starling control, the most successful results usually come from boring consistency. That may not sound exciting, but it is true. People often want a magic device that makes starlings vanish overnight. A shiny spinner! A scary owl! A mysterious ultrasonic gadget from the internet! Sometimes these help for a short period, but the long-term winners are food control, exclusion, and routine maintenance.
One common experience homeowners report is that feeders are the center of the problem. They may blame the roof, the porch, or the tree, but the flock is really showing up for spilled seed. Once they switch to caged feeders, remove platform feeders, change the seed mix, and clean the ground daily, the starling traffic often drops. Not always instantly, but noticeably. Birds are practical. When the restaurant closes, they search for another restaurant.
Another practical lesson is that small gaps matter. A homeowner may seal one obvious hole near the soffit and celebrate, only to find birds entering a second gap behind a loose board. Starlings are excellent inspectors of bad construction. Walk around the property slowly in the morning and evening when birds are active. Watch where they land, where they disappear, and where they carry nesting material. Their flight path usually reveals the access point.
For porches and patios, ledge modification tends to be more effective than scare tactics alone. If starlings are sitting on the same beam every evening, making that beam physically unsuitable is better than hoping they stay afraid of a plastic hawk. Sloped covers, humane spikes, and netting can change behavior because they change the structure. The birds are not making a moral decision; they are looking for a comfortable landing spot. Remove the comfort, and you remove the habit.
Gardeners often learn that timing matters. Netting fruit after starlings have already discovered it is like locking the door after the guests are in the kitchen. Install crop protection before fruit colors up. Secure the edges. Check for trapped wildlife. A neat, tight installation protects plants better and prevents accidental harm.
People with barns, sheds, and chicken coops usually have the biggest challenge because these spaces offer food, water, rafters, and shelter all in one convenient bird resort. The best approach is layered: store feed in sealed containers, sweep spills, hang plastic strip barriers where appropriate, cover rafters with netting, close unused openings, and keep water sources from becoming starling hangouts. No single step is perfect, but together they change the whole environment.
Finally, patience is part of the process. Starlings may test the area for several days after changes are made. Do not remove deterrents too quickly. Keep food cleaned up. Keep openings sealed. Keep visual devices moving if you use them. The goal is to teach the flock that your property is no longer easy, safe, or rewarding. Once that message gets through, they usually spend their energy somewhere elsepreferably not at your neighbor’s house, but that is between them and the birds.
Conclusion
Getting rid of starlings is not about one dramatic trick. It is about making your property less useful to them. Remove food, seal nesting sites, protect vents, adjust feeders, block roosting spots, use netting properly, and call a professional when the problem is large or inside a structure.
Starlings are persistent, but they are also predictable. They want food, shelter, nesting cavities, and safe roosts. Take those away with humane, practical methods, and your porch, barn, garden, or roofline becomes much less attractive. The best starling control plan is quiet, steady, and a little boringwhich is exactly why it works.


