
Table of Contents >> Show >> Hide
- What Is a Cantenna?
- Safety and Legal Notes Before You Build
- Tools and Materials You Need
- Choosing the Right Can
- How to Make a Cantenna: 10 Steps
- Step 1: Pick Your Target Frequency
- Step 2: Measure the Can Diameter
- Step 3: Confirm the Can Length
- Step 4: Calculate the Probe Position
- Step 5: Cut the Copper Probe
- Step 6: Drill the Connector Hole
- Step 7: Solder the Probe to the Connector
- Step 8: Mount the Connector on the Can
- Step 9: Connect the Cantenna to Your Wi-Fi Device
- Step 10: Aim, Test, and Tune
- Troubleshooting a Weak Cantenna Signal
- Best Uses for a Homemade Cantenna
- Weatherproofing and Mounting Tips
- Common Mistakes to Avoid
- Real-World Experience: What Building a Cantenna Teaches You
- Conclusion
A cantenna sounds like something a raccoon inventor would build after raiding the recycling bin, but it is actually a clever DIY directional antenna made from a metal can. When built correctly, a cantenna can focus a 2.4 GHz Wi-Fi signal in one direction instead of letting it wander around the room like a confused houseguest. The result is a homemade waveguide antenna that may improve signal strength between two points, help with educational radio experiments, or make a fun weekend project for anyone who enjoys turning soup cans into science.
Before we start drilling holes into innocent pantry items, a quick reality check: a cantenna is not magic, and it should only be used with networks and equipment you own or are authorized to test. It will not fix a bad internet plan, a broken router, or a neighbor who names their Wi-Fi “FBI Surveillance Van.” It can, however, teach you a lot about antennas, waveguides, polarization, signal loss, and why measuring twice is still cheaper than buying another can of beans.
This guide explains how to make a cantenna in 10 practical steps, including materials, measurements, assembly, tuning, mounting, and testing. The instructions are written for common 2.4 GHz Wi-Fi use, but the same principles apply to other frequencies when calculated correctly.
What Is a Cantenna?
A cantenna is a homemade directional antenna built from a cylindrical metal container. The can acts as a waveguide, while a small wire probe inside the can connects to a Wi-Fi adapter or radio device through a coaxial connector. Instead of radiating energy equally in every direction, the can helps guide the signal outward through the open end.
The name combines “can” and “antenna,” which is refreshingly honest. No branding agency was harmed in the creation of this term.
How a Cantenna Works
At 2.4 GHz, Wi-Fi signals behave like radio waves with a wavelength of roughly 12.5 centimeters, or about 4.9 inches. A properly sized metal cylinder can support those waves and direct them forward. The probe inside the can functions like a small radiator. The closed back of the can reflects energy, and the open end sends the focused signal outward.
The most important design details are the can diameter, can length, probe length, and probe placement. A can that is too narrow will not guide the signal efficiently. A probe that is too long, too short, or installed in the wrong place may perform like a tiny metal disappointment.
Safety and Legal Notes Before You Build
Use a cantenna only with your own Wi-Fi network, lab setup, or authorized equipment. Directional antennas can extend range, but that does not give anyone permission to connect to private networks, bypass security, or perform unauthorized scanning. Keep your project educational, legal, and neighbor-friendly.
You should also follow the rules for unlicensed radio equipment in your country. In the United States, Wi-Fi devices operate under FCC rules for unlicensed devices. Adding a high-gain antenna can affect total radiated power, so do not pair a cantenna with illegal amplifiers or modified transmitters. For most hobbyists, the safest approach is to use low-power, consumer-grade Wi-Fi equipment and keep experiments short, local, and responsible.
Tools and Materials You Need
Gather your parts before you begin. Nothing kills DIY momentum faster than discovering halfway through the project that your “precision drill bit” is actually a rusty screwdriver.
- A clean metal can with a smooth cylindrical shape
- An N-female panel-mount connector, preferably with a flange
- A short piece of solid copper wire, around 12 AWG works well
- A compatible pigtail cable, such as N-male to RP-SMA or N-male to SMA
- A Wi-Fi adapter or router with a removable external antenna port
- Drill and drill bits
- Ruler or digital caliper
- Marker
- Soldering iron and solder
- Small screws, nuts, or bolts for the connector flange
- File, sandpaper, or deburring tool
- Electrical tape, heat-shrink tubing, or silicone sealant for finishing
Choosing the Right Can
The can is not just a container; it is the antenna body. For a 2.4 GHz Wi-Fi cantenna, many builders use a metal can around 3 to 4 inches in diameter and at least 5 to 6 inches long. Coffee cans, large juice cans, and similar food tins are common choices. A Pringles-style tube is famous in cantenna folklore, but many versions are too narrow for strong 2.4 GHz waveguide performance. It may look iconic, but radio waves are not impressed by snack branding.
Look for a can with straight sides, a closed metal bottom, and no deep ridges near the area where you plan to mount the connector. Remove the label, wash the can thoroughly, and make sure there are no sharp edges. If your can still smells like chili, keep washing unless you want your antenna to double as a lunch memory.
How to Make a Cantenna: 10 Steps
Step 1: Pick Your Target Frequency
Most DIY cantennas are built for 2.4 GHz Wi-Fi, which covers common Wi-Fi channels used by older 802.11b/g/n equipment and many smart home devices. The center of the 2.4 GHz Wi-Fi band is around 2.437 GHz. Designing around the middle of the band gives reasonable performance across nearby channels.
If you are building for 5 GHz Wi-Fi or another radio band, do not reuse 2.4 GHz measurements. Higher frequencies require different dimensions. Antennas are picky like that.
Step 2: Measure the Can Diameter
Measure the inside diameter of the can, not the outside diameter. The radio waves care about the interior space. For 2.4 GHz, a practical can diameter is often around 76 to 100 millimeters, or roughly 3 to 4 inches. If the can is much smaller, the lower cutoff frequency may be too high. If the can is too large, performance may become unpredictable because other waveguide modes can appear.
A digital caliper is ideal, but a ruler can work if you are careful. Measure across the opening in several places to confirm the can is truly round. Dented cans are fine for tomato sauce, less fine for antenna work.
Step 3: Confirm the Can Length
The can should be long enough to act as a useful waveguide. For many 2.4 GHz designs, a length of at least 5 inches is a good starting point. Longer cans may increase directionality up to a point, but an extremely long can becomes awkward to aim and mount.
A good beginner rule is to choose a can that is at least 1.5 times as long as its diameter. For example, if the can is 3.5 inches wide, a length of 5.25 inches or more is practical. The open end should be clean and unobstructed.
Step 4: Calculate the Probe Position
The probe is the small copper wire that sticks into the can from the connector. Its position matters because it determines how efficiently energy couples into the can. For many 2.4 GHz cantennas, the connector hole is placed roughly 1.5 to 2 inches from the closed back of the can, depending on can diameter. More precise designs calculate this based on the guided wavelength inside the can.
Use an online cantenna calculator if you want better accuracy. Enter your can diameter and target frequency, then note the recommended distance from the back of the can to the probe. Mark that spot carefully on the side of the can.
Step 5: Cut the Copper Probe
The exposed probe length for 2.4 GHz Wi-Fi is usually close to a quarter wavelength in free space, about 30 to 31 millimeters, or around 1.2 inches. This wire will be soldered to the center pin of the N-female connector and extend into the can.
Cut the wire slightly long at first, then trim it to final length after soldering. The probe should be straight, clean, and not touching the can wall. If it touches the can, you may create a short circuit, which is a very efficient way to make the antenna not work.
Step 6: Drill the Connector Hole
Place the can on a stable surface. Drill a center hole at the mark you made for the connector. The hole should fit the center body of the N-female connector. If your connector has a square or round flange, mark and drill the smaller mounting holes as well.
Go slowly. Thin metal can tear if you force the drill. After drilling, remove burrs with a file or sandpaper. Sharp metal edges can damage cables, cut fingers, and generally act like tiny villains.
Step 7: Solder the Probe to the Connector
Solder the copper wire to the center pin of the N-female connector. Keep the joint neat and solid. A cold solder joint can cause weak performance or intermittent signal problems that are deeply annoying to troubleshoot.
Once the solder cools, measure the exposed wire from the connector base to the tip. Trim it to about 30 to 31 millimeters for a typical 2.4 GHz design. Make sure the probe is perpendicular to the connector and extends straight into the can.
Step 8: Mount the Connector on the Can
Insert the connector through the drilled hole from the outside of the can so the probe extends inward. Secure the flange with small screws, nuts, and washers. The connector should make good electrical contact with the metal can body.
If the can surface is painted or coated where the connector touches, lightly scrape the coating away around the mounting area. Good metal-to-metal contact helps the can act as the antenna ground and waveguide body.
Step 9: Connect the Cantenna to Your Wi-Fi Device
Attach a short coaxial pigtail from the cantenna connector to your Wi-Fi adapter or router antenna port. Keep the cable as short as practical because coaxial cable loss at 2.4 GHz can eat your signal faster than teenagers eat pizza.
Many modern laptops and routers do not have easily accessible external antenna ports. A USB Wi-Fi adapter with a removable antenna is often the easiest option. Make sure you use the correct connector type. RP-SMA and SMA look similar but are not the same, and forcing the wrong one is a bad life choice.
Step 10: Aim, Test, and Tune
A cantenna is directional, so aiming matters. Point the open end toward your own router, access point, or test device. Move it slowly left, right, up, and down while watching signal strength. You can use your operating system’s Wi-Fi indicator, router diagnostics, or a Wi-Fi analyzer app.
Also test polarization. Many Wi-Fi antennas are vertically polarized, so start with the probe vertical. If the signal is poor, rotate the can 90 degrees and test again. Small adjustments can make a surprising difference. This is the part where you may look like you are trying to contact Mars with a bean can. Accept it. Science has a dress code, and sometimes it is weird.
Troubleshooting a Weak Cantenna Signal
The Signal Gets Worse Instead of Better
Check the basics first. Make sure the connector is secure, the probe is not touching the can, and the coaxial cable is connected to the correct antenna port. Confirm your Wi-Fi adapter supports external antennas and is not still using an internal antenna.
The Can Is the Wrong Size
If the diameter is too small, the can may not support the desired 2.4 GHz waveguide mode. In plain English, the signal does not fit well inside the can. Try a wider can and recalculate the probe position.
The Cable Is Too Long
Long, thin coaxial cables can cause significant signal loss. Use a shorter pigtail or higher-quality low-loss cable. In many builds, placing the Wi-Fi adapter close to the cantenna and running USB cable back to the computer works better than running a long antenna cable.
The Antenna Is Pointed the Wrong Way
A cantenna has a narrow beam compared with a standard router antenna. If it is aimed even a little off target, performance can drop. Move slowly and test patiently. Antenna tuning rewards calm people and mildly punishes everyone else.
Best Uses for a Homemade Cantenna
A cantenna is best for point-to-point experiments, learning antenna principles, improving signal in a specific direction, or testing wireless coverage on your own property. It can be useful in a garage, workshop, backyard lab, detached shed, or classroom demonstration.
It is not ideal for covering an entire house because the signal is focused in one direction. If you want whole-home coverage, a mesh Wi-Fi system, better router placement, or a properly installed access point is usually more practical. The cantenna is a specialist tool, not a universal Wi-Fi superhero.
Weatherproofing and Mounting Tips
If you mount the cantenna outdoors, protect the connector and cable connection from moisture. Use silicone sealant, self-fusing tape, or a weatherproof enclosure. Angle the can slightly downward so rain does not collect inside. You can also place a thin plastic cover over the open end, but avoid metal mesh or foil because those will interfere with the signal.
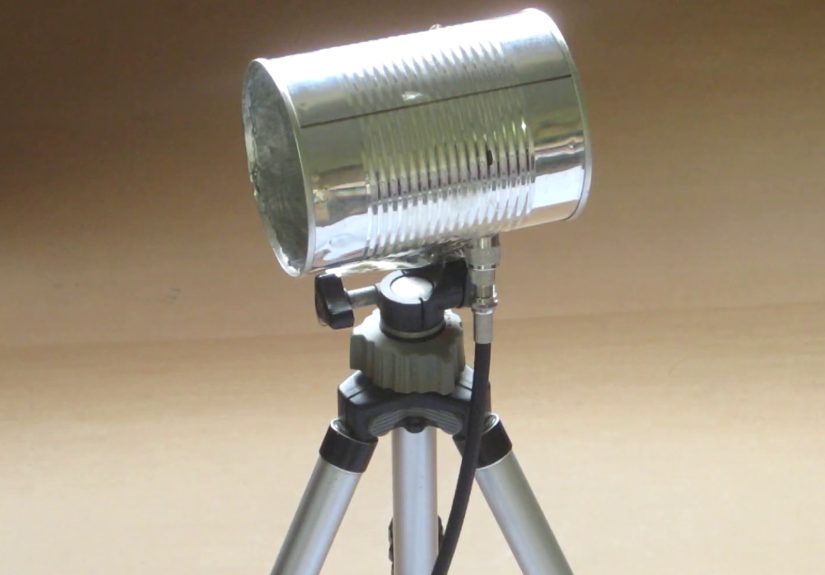
For mounting, use a camera tripod, PVC pipe, small bracket, or clamp. The mount should allow precise aiming. A floppy mount turns a directional antenna into a directional guessing game.
Common Mistakes to Avoid
- Using a can that is too narrow for 2.4 GHz Wi-Fi
- Making the probe much longer than a quarter wavelength
- Letting the probe touch the can wall
- Using a long, lossy coaxial cable
- Forgetting that directional antennas must be aimed carefully
- Trying to use the cantenna on networks without permission
- Ignoring antenna connector types and damaging equipment
Real-World Experience: What Building a Cantenna Teaches You
The first thing you learn when building a cantenna is that Wi-Fi is not as invisible as it feels. We usually think of internet access as something that simply exists in the air, like oxygen or the smell of burnt toast. But when you build a directional antenna, you start to see Wi-Fi as a physical radio signal that can be reflected, blocked, focused, weakened, and improved.
One practical experience many builders notice is how much small changes matter. Move the cantenna a few inches, and the signal may jump. Rotate it slightly, and the signal may drop. Point it through a wall with metal studs, and your results may look terrible. Point it through a window toward a router in a detached building, and suddenly the connection becomes much more stable. This hands-on feedback is one of the best reasons to build a cantenna, even if you never use it permanently.
You also learn that measurements are not optional decoration. The probe length, the distance from the back of the can, and the can diameter all affect performance. A beginner might assume any metal can will work because the internet has a long tradition of saying, “Just use whatever is lying around.” In reality, a carefully measured coffee can usually beats a random snack tube. Antennas are forgiving enough to experiment with, but not so forgiving that they ignore geometry.
Another useful lesson is cable loss. Many first-time builders make a decent antenna, then connect it with a long, cheap cable and wonder why performance is underwhelming. At Wi-Fi frequencies, poor coaxial cable can waste a noticeable amount of signal. Keeping the cable short, using a better pigtail, or placing the USB Wi-Fi adapter close to the cantenna often improves results more than endlessly tweaking the can.
Testing a cantenna also teaches patience. Wi-Fi signal readings jump around because of reflections, interference, router behavior, device drivers, and nearby objects. Your body can even affect the signal when you stand near the antenna. For accurate testing, take multiple readings, change one thing at a time, and compare results from the same location. Do not declare victory or failure after one dramatic signal bar. Signal bars are emotional creatures.
In a classroom or workshop setting, a cantenna is a surprisingly effective teaching tool. It turns abstract ideas like wavelength, gain, polarization, and waveguide cutoff into something people can hold in their hands. Students can see that the open end must face the target, that rotating the can changes performance, and that metal objects nearby can alter results. The project is inexpensive, memorable, and just strange enough to keep people engaged.
For home users, the experience can be equally useful even if the final answer is “I should buy a proper access point.” A cantenna can help diagnose whether a weak connection is caused by distance, obstruction, interference, or router placement. If pointing the cantenna toward the router improves the connection, you have learned that signal direction and obstacles matter. If nothing improves, the problem may be congestion, hardware limits, or internet service rather than antenna gain.
The biggest takeaway is that a cantenna is both a tool and a lesson. It may improve a specific wireless link, but its real value is showing how radio communication behaves in the real world. Plus, there is a special kind of joy in turning a food can into a functioning antenna. It is practical, nerdy, and just ridiculous enough to be delightful.
Conclusion
Learning how to make a cantenna is a rewarding DIY project for anyone interested in Wi-Fi, radio waves, or low-cost electronics. With the right can, accurate measurements, a properly installed connector, and careful aiming, you can build a directional antenna that demonstrates real antenna principles in a hands-on way.
The key is to treat the project as a measured build, not a random craft project with extra drilling. Choose a suitable can, calculate the probe placement, keep the coaxial cable short, test patiently, and use the antenna responsibly. A homemade cantenna will not solve every wireless problem, but it can teach you more about Wi-Fi than staring angrily at your router ever will.
Note: This guide is intended for lawful educational use, personal Wi-Fi experiments, and authorized network testing only. Always follow local radio regulations and use directional antennas responsibly.


