Table of Contents >> Show >> Hide
- What Does It Mean to Upload a Video to Twitch?
- Before You Upload: Requirements and Best Practices
- How to Upload a Video to Twitch in 10 Simple Steps
- Step 1: Log In to Your Twitch Account
- Step 2: Open the Creator Dashboard
- Step 3: Go to Content and Select Video Producer
- Step 4: Click the Upload Button
- Step 5: Choose the Right Video File
- Step 6: Wait for the Upload and Processing to Finish
- Step 7: Add a Strong, Search-Friendly Title
- Step 8: Write a Helpful Description
- Step 9: Choose Category, Tags, Thumbnail, and Visibility
- Step 10: Publish, Review, and Promote Your Video
- Common Problems When Uploading Videos to Twitch
- SEO Tips for Twitch Video Uploads
- Best Types of Videos to Upload to Twitch
- Experience Notes: What Creators Learn After Uploading Videos to Twitch
- Conclusion
- SEO Tags
Uploading a video to Twitch sounds like it should be as easy as tossing a file into the internet and waiting for applause. In reality, Twitch has a few rules, a few buttons hidden behind creator menus, and at least one moment where you may stare at your screen and wonder whether your upload is processing or simply judging your life choices.
The good news: once you understand how Twitch Video Producer works, uploading pre-recorded content is straightforward. Whether you want to share a polished gameplay highlight, a tutorial, a music performance, a stream recap, or a carefully edited “best moments” video, this guide walks you through the process in 10 simple steps.
Before you begin, there is one important detail: Twitch video uploads are generally available to Twitch Affiliates and Partners. If you do not see the upload option in your Creator Dashboard, your account may not yet have access. You can still create Clips and Highlights from streams, but uploading a pre-made video file requires eligible channel status.
What Does It Mean to Upload a Video to Twitch?
Uploading a video to Twitch means adding a pre-recorded video file to your channel through Twitch Video Producer. This is different from going live, and it is also different from saving a VOD automatically after a stream. A live stream happens in real time. A VOD is a recording of a past broadcast. An uploaded video is content you prepared outside Twitch and manually added to your channel.
For creators, uploads can be useful because they allow you to publish content even when you are not streaming. A gaming creator might upload a tournament recap. A cooking streamer might post a recipe walkthrough. A musician might share a studio session. A tutorial creator might upload a clean, edited lesson without chat interruptions, background chaos, or that one viewer asking the same question 14 times.
Before You Upload: Requirements and Best Practices
Before jumping into the steps, prepare your video properly. Twitch supports uploads using H.264 video compression, so export your file in a common web-friendly format such as MP4 when possible. MP4 with H.264 video and AAC audio is usually the safest choice for smooth playback and fewer upload headaches.
You should also check your content before uploading. Twitch rules apply to uploaded videos, not just live streams. Avoid copyrighted music you do not have permission to use, misleading titles, harmful content, or anything that violates Twitch’s Community Guidelines. Your video may be pre-recorded, but Twitch still treats it as channel content.
Finally, keep storage in mind. Twitch has a storage limit for Highlights and Uploads, so older or unnecessary uploaded videos may need to be deleted if your channel reaches the limit. Think of your Twitch video library like a closet: if you keep every old hoodie, eventually the good jacket gets buried.
How to Upload a Video to Twitch in 10 Simple Steps
Step 1: Log In to Your Twitch Account
Go to Twitch and sign in using the account connected to your creator channel. Make sure you are logging into the correct account, especially if you manage multiple channels. Nothing creates panic quite like uploading a polished video to the wrong profile and realizing your “pro esports breakdown” is now sitting beside your casual alt account’s cat-themed username.
If you use two-factor authentication, complete the login process. This extra layer of security is worth keeping enabled, especially for creators who monetize their channels or manage an active community.
Step 2: Open the Creator Dashboard
After logging in, click your profile icon in the top-right corner and open the Creator Dashboard. This is the control room for your Twitch channel. From here, you can manage stream settings, analytics, content, community tools, and video publishing features.
The Creator Dashboard may look slightly different depending on Twitch updates, but the general path remains similar. If Twitch moves a button, do not panic. Platforms love rearranging furniture while you are still sitting on it.
Step 3: Go to Content and Select Video Producer
Inside the Creator Dashboard, look for the Content section, then choose Video Producer. This is where Twitch stores and manages videos connected to your channel, including past broadcasts, Highlights, and uploaded videos.
Video Producer is also where you can edit metadata, change visibility, manage thumbnails, review processing status, and delete older content when needed. If you plan to use Twitch as part of a long-term content strategy, get comfortable with this section. It is not glamorous, but neither is organizing your sock drawer, and both make life easier.
Step 4: Click the Upload Button
If your channel is eligible, you should see an Upload button in Video Producer. Click it to open your computer’s file browser. Select the video file you want to upload.
If you do not see the Upload button, your account may not be an Affiliate or Partner, or Twitch may have temporarily changed access or dashboard options. In that case, focus on growing your channel toward Affiliate status, creating Highlights from your streams, or repurposing content on other platforms while you build your Twitch presence.
Step 5: Choose the Right Video File
Select a polished, final version of your video. Ideally, your file should be exported in a widely supported format such as MP4, with H.264 video compression. Give the file a clear name before uploading, such as twitch-upload-boss-fight-guide.mp4 instead of final_final_REAL_final2.mp4. We have all been there. We do not need to live there.
Before uploading, play the file on your computer from beginning to end. Check the audio levels, video quality, transitions, intro, outro, captions, and any on-screen text. It is much better to catch a silent microphone or awkward cut before uploading than after viewers start commenting, “Is the audio supposed to be a mystery?”
Step 6: Wait for the Upload and Processing to Finish
After selecting your file, Twitch will begin uploading it. Upload time depends on your internet speed, file size, and Twitch’s current service performance. A short highlight may upload quickly. A long, high-resolution video can take much longer.
Once the upload is complete, Twitch may need time to process the video. Processing prepares the file for playback on the platform. During this stage, avoid closing your browser too early if the upload is still active. If the upload seems stuck, check your internet connection, refresh carefully, or visit Twitch’s status page to see whether the platform is experiencing issues.
Step 7: Add a Strong, Search-Friendly Title
Your title matters. It helps viewers understand the video and gives search engines context. A weak title like “My Video” does not tell anyone why they should click. A stronger title is specific and benefit-focused, such as “How to Beat the Final Boss Without Taking Damage” or “Beginner Valorant Crosshair Guide for Better Aim.”
For SEO, include your main topic naturally. Do not cram in every possible keyword like a suitcase before a budget airline flight. A good Twitch video title should be clear, honest, and appealing. If the video is a tutorial, say what viewers will learn. If it is a highlight, mention the game, event, challenge, or memorable moment.
Step 8: Write a Helpful Description
The description is your chance to add context. Explain what the video covers, who it is for, and why viewers should watch. You can include timestamps, game names, episode details, social links, sponsor disclosures, or related channel information when appropriate.
A useful description might say: “In this Twitch upload, I break down three simple ways to improve your early-game rotation in Fortnite, using examples from my latest stream. Watch for positioning tips, common mistakes, and a quick checklist you can use before your next match.”
Descriptions help both viewers and search engines. They also make your channel look more professional. A blank description is not a crime, but it does feel like inviting guests to dinner and forgetting plates.
Step 9: Choose Category, Tags, Thumbnail, and Visibility
Next, fill in the details that help Twitch organize your video. Choose the correct category or game when available. Add relevant tags that describe the content, such as beginner-friendly, tutorial, speedrun, reaction, review, or competitive gameplay. Use tags honestly. Misleading tags can frustrate viewers and weaken trust.
If Twitch allows you to add or select a thumbnail, choose an image that is clear, readable, and directly related to the video. A good thumbnail usually includes a strong visual, simple text, and a recognizable subject. Avoid clutter. If viewers need a detective board and red string to understand your thumbnail, simplify it.
You may also be able to publish the video immediately, keep it unpublished, or schedule it. Scheduling is useful if you want a video to go live at a time when your audience is active. For example, if your viewers usually watch after school or work, publishing at 6 p.m. may perform better than dropping the video at 3:17 a.m. because you were editing with cold pizza and questionable confidence.
Step 10: Publish, Review, and Promote Your Video
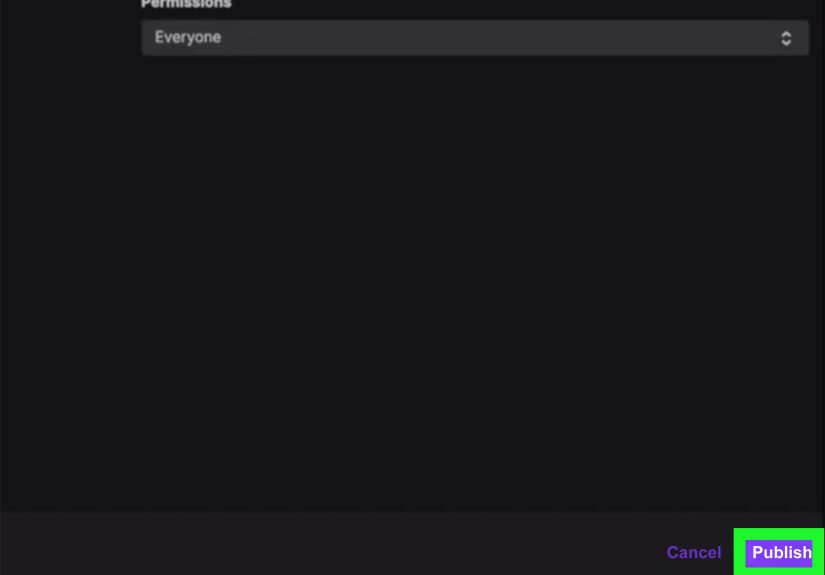
Once everything looks good, publish the video. Then open it as a viewer would. Check the title, thumbnail, description, audio, playback quality, and video length. If something looks wrong, return to Video Producer and edit the details if possible.
After publishing, promote the video thoughtfully. Share it with your Twitch community, post a short teaser on social media, mention it during your next stream, or link it in your channel panels. If the upload answers a common viewer question, turn it into a resource. For example, when someone asks, “How did you set up your stream lighting?” you can point them to your uploaded tutorial instead of explaining it from scratch every time.
Common Problems When Uploading Videos to Twitch
The Upload Button Is Missing
The most common reason is account eligibility. Twitch uploads are generally limited to Affiliates and Partners. If your account is not eligible, you may not see the upload option. You can still build your channel through streaming, Clips, Highlights, and consistent community engagement.
The Video Will Not Upload
If the upload fails, check the file format, internet connection, browser, and file size. Try exporting the video again using H.264 compression in an MP4 container. Also try a different browser or clear your cache. If Twitch is having service issues, waiting may be the only practical option, which is annoying but still better than yelling at your router like it owes you rent.
The Video Processes Slowly
Processing can take time, especially for longer videos. High-resolution files, large file sizes, and platform traffic can slow things down. Compressing your video properly before upload can help. Do not over-compress, though. A blurry video may upload faster, but viewers did not click to watch a potato reenact your gameplay.
The Audio Sounds Too Quiet or Too Loud
Audio issues usually start before the upload. Review your edit with headphones and speakers. Balance voice, game sound, music, and effects. If your voice is buried under background music, viewers may leave quickly. Clear audio is often more important than ultra-crisp visuals.
SEO Tips for Twitch Video Uploads
Twitch is a streaming platform, but uploaded videos can still benefit from basic SEO. Search-friendly titles, accurate descriptions, relevant tags, and clear thumbnails can improve discoverability. Think like a viewer: what would someone type if they needed this video?
Use natural phrases such as “how to upload a video to Twitch,” “Twitch Video Producer,” “Twitch upload tutorial,” “upload pre-recorded video to Twitch,” and “Twitch video settings” where they fit. The goal is not to stuff keywords into every sentence. The goal is to make your content easy to understand.
You can also create consistency across platforms. For example, if you upload a Twitch tutorial, use similar wording in your blog post, YouTube description, Discord announcement, and social media caption. This helps your audience recognize the topic quickly and gives search engines a clearer idea of what your content covers.
Best Types of Videos to Upload to Twitch
Not every video belongs on Twitch, but several formats work especially well. Tutorials are useful because they solve specific problems. Stream highlights can attract viewers who missed the live broadcast. Event recaps help fans catch up quickly. Channel trailers introduce new visitors to your personality and content style. Behind-the-scenes videos can deepen community connection.
The best Twitch uploads usually support your live content rather than replace it. Twitch is built around community and real-time interaction, so uploaded videos should give viewers another reason to follow, return, or join the next stream.
Experience Notes: What Creators Learn After Uploading Videos to Twitch
After working with Twitch-style content, one lesson becomes obvious very quickly: the upload itself is the easy part. The real work happens before and after the file reaches Video Producer. A video that is edited cleanly, titled clearly, and promoted with a purpose almost always feels more professional than a random upload dropped onto a channel with no context.
Many creators discover that Twitch viewers respond best when uploaded videos feel connected to the live experience. For example, a streamer who uploads a “best moments” video after a Friday night stream can bring the community back into the joke. Viewers who were there enjoy reliving it, while new viewers get a quick sample of the channel’s energy. It becomes more than a video; it becomes a highlight reel for the community’s personality.
Another practical experience is that shorter uploads often perform better than long, unedited footage. A two-hour recording may contain great moments, but most viewers do not want to dig for them with a shovel and a dream. Editing the strongest moments into a 10-minute recap can make the content easier to watch and share. If the full stream matters, keep it as a VOD or organize it carefully with timestamps.
Creators also learn the value of preparing metadata before uploading. Writing the title, description, tags, and thumbnail concept in advance saves time. It also prevents lazy publishing. When you finish editing at midnight, your brain may suggest a title like “cool thing happened.” Do not trust Midnight Brain. Midnight Brain thinks chips count as dinner and every title is “Episode 7.”
Audio is another big lesson. Viewers may forgive a slightly imperfect camera angle, but bad audio is brutal. If your voice is too quiet, music is too loud, or game sound drowns out commentary, people leave quickly. Before uploading, listen to the video like a first-time viewer. If you have to adjust the volume every 30 seconds, fix the mix before publishing.
One underrated habit is reviewing the published video from a viewer’s perspective. Open it on desktop and mobile if possible. Check the thumbnail, title, description, and playback. Sometimes a thumbnail that looked great in your editing software becomes unreadable when displayed small. Sometimes a description needs a clearer first sentence. Small improvements can make your upload look much more polished.
Finally, successful Twitch uploads usually have a job. They answer a question, entertain a specific audience, summarize a stream, promote an event, or introduce the channel. Before uploading, ask: “What should this video do?” If the answer is clear, the title, edit, description, and promotion become easier. If the answer is “I just need to post something,” the video may not help much. Twitch rewards connection, personality, and consistency. Uploads work best when they support all three.
Conclusion
Learning how to upload a video to Twitch is simple once you know where to go and what to prepare. Start in the Creator Dashboard, open Video Producer, choose your file, wait for upload and processing, then optimize your title, description, category, tags, thumbnail, and publishing settings. The process is technical, but the strategy is creative: upload videos that help your audience, strengthen your channel, and make viewers excited for your next live stream.
Remember to check eligibility, use a Twitch-friendly video format, follow platform rules, and keep your content organized. A clean upload is good. A clean upload with a strong title, useful description, sharp thumbnail, and smart promotion is much better. That is how a simple Twitch video becomes a real asset for your channel instead of just another file floating in the purple void.
SEO Tags
Note: This article is written for web publishing in standard American English and reflects current Twitch upload practices, including the use of Video Producer, account eligibility considerations, content rules, upload preparation, and practical creator experience.