Table of Contents >> Show >> Hide
- Why Turn a Cluttered Closet into a Pantry?
- Step 1: Choose the Right Closet for Your DIY Pantry Makeover
- Step 2: Empty the Closet Completely
- Step 3: Clean, Patch, Paint, and Prep
- Step 4: Plan Pantry Shelving Like a Pro
- Step 5: Install Shelves Safely
- Step 6: Create Pantry Zones
- Step 7: Choose Bins, Baskets, and Containers That Actually Help
- Step 8: Label Everything Without Going Overboard
- Step 9: Use the Pantry Door
- Step 10: Arrange Food for Safety and Freshness
- Step 11: Add Lighting for a Finished Pantry Look
- Step 12: Stock the Pantry with Intention
- Budget-Friendly DIY Pantry Makeover Ideas
- Common Mistakes to Avoid
- How to Maintain Your Organized Pantry
- Real-Life Experience: What a Closet Pantry Makeover Teaches You
- Conclusion
Every home has one mysterious closet that seems to collect everything except useful storage. Maybe yours is stuffed with reusable grocery bags, mystery extension cords, holiday napkins from 2017, and one lonely tennis racket no one admits owning. The good news? That chaotic little cave can become one of the most useful spaces in your home: an organized pantry.
A cluttered closet makeover into organized pantry DIY project is one of the smartest small-home upgrades you can tackle without a full kitchen remodel. Instead of wishing for a walk-in pantry worthy of a cooking show, you can transform an underused hall closet, coat closet, linen closet, or utility nook into a practical food storage zone with shelves, bins, labels, lighting, and a system that actually survives real life.
This guide walks you through the full process: planning, clearing, cleaning, choosing shelves, organizing food categories, adding labels, using door storage, and keeping everything tidy after the “after” photos are taken. No mansion required. No professional organizer hovering nearby with a clipboard. Just a realistic DIY pantry makeover that helps you find the pasta before dinner becomes cereal night.
Why Turn a Cluttered Closet into a Pantry?
Kitchens work better when everyday ingredients are easy to see and reach. A converted closet pantry can free up cabinet space, reduce duplicate purchases, make meal planning faster, and keep dry goods away from heat, moisture, and kitchen chaos. If your cabinets are overflowing with cereal boxes, baking supplies, canned beans, snack bags, and spice jars, a closet pantry gives everything a proper home.
The biggest benefit is visibility. When food is stacked three layers deep in a cabinet, you forget what you own. That is how one household ends up with six jars of peanut butter and zero rice. A pantry closet lets you create zones so breakfast items, snacks, canned goods, baking ingredients, pasta, grains, and backup supplies each have a dedicated area.
Step 1: Choose the Right Closet for Your DIY Pantry Makeover
Not every closet is pantry material, but many are better candidates than you might think. A hallway closet near the kitchen is ideal, but a dining room closet, mudroom closet, laundry-adjacent closet, or even a deep cabinet-style nook can work. The best pantry closet is dry, clean, easy to access, and not exposed to extreme heat.
What to Check Before You Start
Before buying shelves or pretty bins, inspect the closet carefully. Look for signs of moisture, musty smells, pests, peeling paint, or weak walls. Food storage needs a cool, dry, clean environment, so do not use a closet with plumbing leaks, damp floors, or heavy humidity. If the closet shares space with cleaning chemicals, paint, or strong-smelling products, move those items elsewhere before food goes in.
Measure the closet’s width, depth, height, door swing, and any trim or baseboards that affect shelf placement. Write the numbers down. Then measure again, because closets enjoy lying by half an inch when you are at the hardware store.
Step 2: Empty the Closet Completely
A proper closet pantry makeover starts with a full reset. Remove everything from the closet and sort items into four groups: keep, relocate, donate, and toss. This step may feel dramatic, but it is the only way to see the real storage potential.
If the closet currently holds coats, bags, linens, tools, seasonal décor, or random household supplies, give those items new homes before pantry food moves in. The goal is not to create a pantry that also secretly stores a vacuum, three umbrellas, and a box of tangled chargers. Mixed-purpose storage becomes clutter again very quickly.
Decluttering Tip
Ask one simple question for every item: “Would I look for this in a pantry?” If the answer is no, it does not belong in the new pantry closet. This sounds obvious, but it prevents the classic mistake of creating a beautiful food pantry that slowly becomes a junk drawer with shelves.
Step 3: Clean, Patch, Paint, and Prep
Once the closet is empty, vacuum the floor, wipe down walls, clean the baseboards, and remove old hooks or damaged hardware. Patch holes, sand rough spots, and paint the walls if needed. A light-colored paint can make a small closet feel cleaner and brighter. Semi-gloss or satin finishes are practical because they are easier to wipe than flat paint.
If the floor is unfinished or stained, consider peel-and-stick vinyl tiles, a washable mat, or a simple sealed surface. A pantry floor should be easy to clean because flour spills, cereal crumbs, and runaway lentils are part of the pantry lifestyle.
Step 4: Plan Pantry Shelving Like a Pro
Shelving is the backbone of an organized pantry. The right shelf layout depends on your closet size, food habits, and budget. Wire shelves are affordable and allow airflow. Wood shelves look custom and hold small items more steadily. Adjustable track shelving offers flexibility if your pantry needs change over time.
Recommended Shelf Spacing
For most pantry closets, a mix of shelf heights works better than identical spacing. Short shelves are great for canned goods, jars, and spices. Taller shelves are useful for cereal boxes, paper towels, bulk snacks, and small appliances. A practical layout may include:
- 6 to 8 inches of height for cans, jars, and spices
- 10 to 12 inches for pasta, rice, baking supplies, and snack bins
- 14 to 18 inches for cereal boxes, large containers, and appliances
- A lower zone for heavy items like drinks, pet food, or bulk goods
Keep heavy items lower so the pantry is safer and easier to use. Nobody wants to wrestle a giant bag of rice from the top shelf like it is a fitness challenge.
Depth Matters
Deep shelves can hold more, but they also hide more. If your closet is very deep, use pull-out bins, baskets, or labeled containers so items in the back do not disappear into the pantry wilderness. For narrow closets, shallower shelves may actually work better because everything stays visible.
Step 5: Install Shelves Safely
When installing pantry shelves, follow the manufacturer’s instructions and use wall studs or appropriate anchors. Pantry items can get heavy fast, especially canned goods, jars, flour, sugar, and bulk staples. A shelf that looks fine on day one may sag later if it is overloaded or poorly supported.
Use a level, mark shelf heights before drilling, and double-check door clearance. If you are not comfortable installing shelves, ask an experienced adult or hire help. A DIY pantry should make life easier, not create a dramatic avalanche of tomato cans at midnight.
Step 6: Create Pantry Zones
Pantry zones are the secret to long-term organization. Instead of arranging items only by container size, group them by how you use them. This makes cooking, grocery shopping, and restocking much faster.
Useful Pantry Zones
- Breakfast: cereal, oats, granola, pancake mix, nut butters
- Baking: flour, sugar, chocolate chips, baking powder, extracts
- Dinner staples: pasta, rice, grains, sauces, canned tomatoes
- Snacks: crackers, bars, chips, dried fruit, lunchbox items
- Canned goods: beans, soups, vegetables, tuna, broth
- Spices and seasonings: jars, packets, rubs, blends
- Backstock: duplicate items, bulk extras, unopened packages
Put daily-use items at eye level. Store occasional items higher or lower. Kid-friendly snacks can go in a lower bin if your household wants easy access, but keep treats from becoming a pantry free-for-all by using clear boundaries.
Step 7: Choose Bins, Baskets, and Containers That Actually Help
Pantry organizers should solve problems, not just look cute online. Clear bins are excellent for snacks, packets, pasta, and breakfast items because you can see what is running low. Baskets can hide visual clutter, but they work best with labels. Airtight containers are useful for flour, sugar, rice, oats, cereal, and other dry goods that benefit from protection against air, moisture, and pests.
Best Organizers for a Closet Pantry
- Clear bins: great for snacks, packets, and grouped categories
- Lazy Susans: useful for oils, vinegars, sauces, and condiments
- Tiered risers: ideal for cans and spices
- Stackable containers: helpful for dry goods and baking staples
- Door racks: perfect for spices, foil, wraps, drink mixes, and small jars
- Pull-out baskets: smart for deep shelves and hard-to-reach corners
You do not need to buy everything at once. Start with the problem areas: deep shelves, messy snacks, loose packets, and duplicate ingredients. Repurpose containers you already own before investing in matching bins. A functional pantry beats an expensive pantry that only looks good for eleven minutes.
Step 8: Label Everything Without Going Overboard
Labels are not just decorative; they are instructions for the whole household. A labeled bin that says “Lunch Snacks” is easier to maintain than a mysterious basket full of granola bars, raisins, and one rogue pudding cup.
Use labels on bins, baskets, airtight containers, and shelf zones. For decanted ingredients, include the item name and date opened or expiration date when helpful. This is especially useful for flour, grains, nuts, seeds, and specialty baking ingredients that may not be used every week.
Simple Label Ideas
- Breakfast
- Baking
- Pasta & Grains
- Canned Goods
- Snacks
- Backstock
- Spices
Keep label wording broad enough that the system can adapt. If a label is too specific, it becomes annoying. “Pasta & Grains” works better than “Rigatoni, Penne, Brown Rice, Jasmine Rice, Quinoa, and That Couscous We Bought Once.”
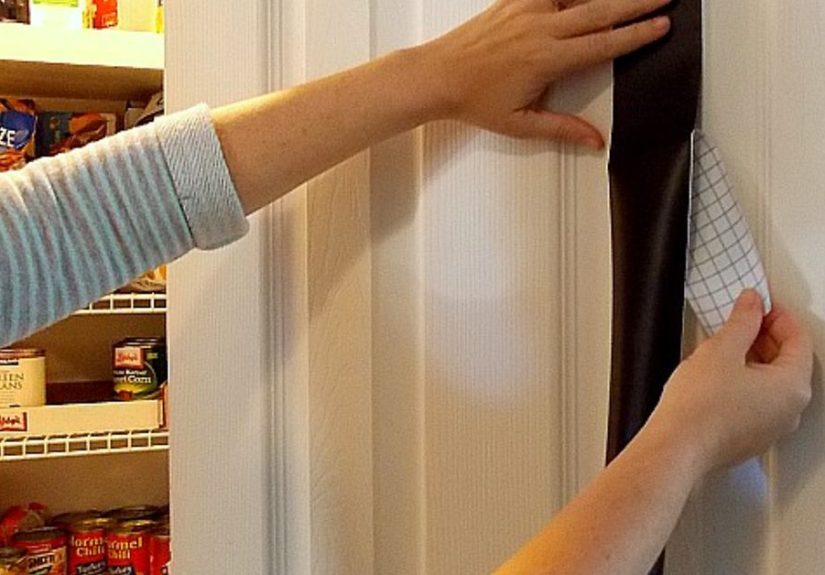
Step 9: Use the Pantry Door
The inside of the door is prime storage real estate. A sturdy over-the-door rack or mounted organizer can hold spices, wraps, oils, snacks, tea, drink packets, or small baking items. This is especially helpful in narrow pantry closets where shelf space is limited.
Before installing door storage, measure the space between the shelves and the door. Make sure containers will not hit the shelves when the door closes. Also check that the added weight does not strain the hinges. Door storage is wonderful, but only if the door still behaves like a door.
Step 10: Arrange Food for Safety and Freshness
A beautiful pantry still needs safe food storage habits. Store shelf-stable foods in a cool, dry place away from direct sunlight and heat. Keep food off the floor when possible, use sealed containers after opening dry goods, and avoid storing food near cleaning products or strong chemical odors.
Use the “first in, first out” method: put newer items behind older ones so the older food gets used first. This reduces waste and helps prevent expired products from hiding in the back. Check cans for rust, swelling, serious dents, or leaks before storing or using them.
Smart Pantry Placement
- Heavy bulk items: lower shelves
- Everyday cooking staples: eye-level shelves
- Snacks: accessible bins
- Backstock: upper or lower zones
- Spices and small bottles: door rack or tiered riser
- Opened dry goods: airtight containers
Step 11: Add Lighting for a Finished Pantry Look
Closet pantries often suffer from “dark cave syndrome.” If your pantry has no built-in light, add battery-powered motion-sensor lights, rechargeable LED strips, or a plug-in light if an outlet is available. Good lighting makes the pantry feel cleaner and helps you spot what you have.
Lighting is one of the easiest upgrades with the biggest payoff. Suddenly the back shelf is not a shadowy place where crackers go to retire.
Step 12: Stock the Pantry with Intention
After shelves and organizers are ready, do not dump everything back in. Sort food by category, check dates, wipe sticky jars, combine duplicates when safe, and toss anything stale or questionable. Then load the pantry one zone at a time.
Leave some empty space if possible. A pantry packed to 100 percent capacity becomes hard to maintain. Aim for breathing room so groceries have somewhere to go after shopping day.
Budget-Friendly DIY Pantry Makeover Ideas
A closet-to-pantry conversion does not have to be expensive. Paint, basic shelves, bins, labels, and door storage can make a huge difference. Shop your home first. Shoebox-size bins, mason jars, unused baskets, magazine holders, and old trays can become pantry organizers.
Low-Cost Upgrades That Make a Big Impact
- Paint the closet a clean white or soft neutral color
- Add peel-and-stick wallpaper to the back wall
- Use shelf liner for easier cleanup
- Install inexpensive wire shelves
- Add a door rack for spices and small items
- Print simple labels at home
- Use clear bins only where visibility matters most
Spend money where it improves function: sturdy shelves, durable containers for frequently used staples, and storage solutions that fit the exact closet measurements. Skip trendy organizers that do not match your real grocery habits.
Common Mistakes to Avoid
The most common pantry makeover mistake is buying organizers before measuring. The second is copying someone else’s pantry without considering your own food habits. A household that cooks from scratch needs a different layout than one that relies on snacks, quick breakfasts, and school lunches.
Watch Out for These Pantry Problems
- Using shelves that are too deep without pull-out bins
- Putting heavy cans on weak upper shelves
- Skipping labels and expecting everyone to “just know”
- Decanting everything but forgetting expiration dates
- Buying too many matching containers before planning zones
- Letting backstock mix with daily-use items
- Failing to schedule quick pantry resets
A good pantry system should feel easy on a busy Tuesday night. If it only works when everything is perfectly arranged, it is too complicated.
How to Maintain Your Organized Pantry
Maintenance is where the pantry makeover either succeeds or slowly returns to chaos. The key is a simple reset routine. Once a week, straighten bins, move older items forward, toss empty boxes, and add low-stock items to your grocery list. Once a month, check dates, wipe shelves, and review whether zones still make sense.
Keep a small “use soon” bin for items close to their best quality date. This can reduce food waste and inspire quick meals. Pasta, canned tomatoes, beans, rice, and broth can become dinner quickly when they are easy to see.
Real-Life Experience: What a Closet Pantry Makeover Teaches You
The biggest lesson from a cluttered closet makeover into organized pantry DIY is that storage is not really about containers. It is about habits. A pantry can have matching bins, custom labels, and lighting worthy of a boutique grocery store, but if the layout does not match daily routines, clutter will return wearing a tiny villain cape.
One practical experience many homeowners discover is that the “before” clutter often reveals the real problem. A closet may look messy because the family owns too much, but sometimes it is messy because the space has no rules. When every shelf is just “miscellaneous,” people put items wherever they fit. After converting the closet into a pantry, every category needs a destination. Snacks go in one bin. Pasta and grains share a shelf. Baking supplies stay together. Backstock has its own zone. This simple structure removes daily decision-making.
Another experience is that deep shelves can be both a blessing and a trap. At first, deep storage feels exciting because it holds more. Then you realize the back row is where food goes to be forgotten. Pull-out baskets, clear bins, and risers solve this problem better than simply stacking more items. The goal is not to cram the closet full; the goal is to make every item retrievable without unloading half the pantry.
Labels also become more important than expected. In many homes, one person creates the pantry system, but several people use it. Without labels, the system depends on memory. With labels, the pantry quietly explains itself. This is especially helpful after grocery shopping, when bags are being unpacked quickly and nobody wants a lecture about where the chickpeas live.
A DIY pantry makeover also teaches you to respect vertical space. The top shelf is useful, but not for daily essentials. It is better for backup paper goods, party supplies, extra cereal, or unopened bulk items. Eye-level shelves should hold the ingredients used most often. Lower shelves should carry heavy products. Door racks should hold small items that otherwise create shelf clutter.
The final experience is surprisingly emotional: an organized pantry makes cooking feel calmer. When ingredients are visible, dinner feels less like a scavenger hunt. You waste less, shop smarter, and stop buying duplicates because you can actually see what you own. It is a small home project, but it changes the rhythm of the kitchen. And yes, opening a tidy pantry door does provide a tiny burst of joy. It is not dramatic enough for a movie trailer, but it is very satisfying on a Monday.
Conclusion
Turning a cluttered closet into an organized pantry is one of the most practical DIY upgrades for a busy home. With smart planning, sturdy shelves, clear zones, useful containers, labels, lighting, and a simple maintenance routine, an ordinary closet can become a hardworking pantry that saves time, space, and grocery money.
The best pantry is not the fanciest one. It is the one that helps your household find breakfast, pack lunches, cook dinner, and put groceries away without turning every shelf into a puzzle. Start with what you have, build around your habits, and let the system evolve. Your future self will thank you every time you find the pasta on the first try.