
Table of Contents >> Show >> Hide
- Start By Figuring Out What You Actually Have
- Tools And Supplies You May Need
- How To Clean Old Wood Furniture Without Damaging It
- How To Restore Common Problems
- When A Full Refinish Is The Right Move
- How To Refinish Old Wood Furniture Step By Step
- Best Finishes For Restored Wood Furniture
- Mistakes To Avoid
- How To Keep Restored Wood Furniture Looking Good
- What I Learned From Cleaning And Restoring Old Wood Furniture
- Final Thoughts
Old wood furniture has range. One day it looks like a treasured heirloom. The next day it looks like it lost a cage match with dust, sunlight, and a leaky houseplant. The good news is that most old wood furniture can be cleaned and restored beautifully without turning your dining room into a chemistry experiment gone wrong.
If you have a thrift-store dresser, a family coffee table, a flea-market sideboard, or that mysterious chair everyone refuses to throw away because “it has character,” this guide will walk you through how to clean and restore it the smart way. That means starting gently, protecting whatever original finish is still worth saving, and only moving to heavier restoration methods when the piece truly needs it.
The goal is not always to make old wood furniture look brand new. Sometimes the best result is a piece that still shows its age, but in a charming, polished, very-intentional way. Think “beautiful patina” instead of “forgotten in a basement beside a holiday wreath from 1998.”
Start By Figuring Out What You Actually Have
Before you clean anything, take a slow look at the piece. This step is not glamorous, but it can save you from accidentally ruining a finish that only looked dirty when it was really delicate.
Check the construction
Look for solid wood, veneer, loose joints, missing hardware, deep gouges, water rings, flaky finish, mold spots, or signs of woodworm or rot. Solid wood can usually take more restoration work. Veneer needs a lighter touch because it is thin and easy to sand through. If veneer is lifting, do not attack it with aggressive sanding like you are auditioning for a home-renovation reality show.
Look at the surface finish
Many old pieces still have a finish, even if they look dull. Wax, shellac, varnish, lacquer, stain, paint, and oil finishes can all behave differently. A piece that seems dry and bare may simply be hiding under years of grime. That matters because cleaning a tired finish is very different from stripping a failed one.
Decide whether to preserve or fully refinish
If the furniture is a valuable antique, a signed piece, a true family heirloom, or something with historic value, be careful. In many cases, preserving the original finish is better than stripping it. Full refinishing can reduce value on certain older pieces. If you suspect you have something special, consult a conservator or antique expert before you start peeling off history with sandpaper.
Watch for old paint
If the piece is painted and old enough that lead could be a concern, do not sand or scrape casually. That is a hard stop. Test first or bring in a professional. Lead dust is not a fun surprise, and unlike quirky drawer liners, it is not vintage-cute.
Tools And Supplies You May Need
You probably will not need every item on this list, but having the basics makes the process smoother:
- Soft microfiber cloths
- Vacuum with brush attachment
- Mild dish soap
- Bucket of warm water
- Soft-bristle brush or old toothbrush
- Cotton swabs for crevices
- Mineral spirits for stubborn waxy buildup or stripper residue
- Paste wax or a quality furniture wax
- Wood filler or stainable putty
- Clamps and wood glue for loose joints
- Sandpaper in 120, 150, 180, and 220 grits
- Sanding block or random orbital sander
- Tack cloth or clean damp cloth
- Paint or finish stripper if refinishing
- Stain, topcoat, or paint for the final finish
- Gloves, eye protection, and a respirator for sanding or stripping
How To Clean Old Wood Furniture Without Damaging It
The smartest restoration projects begin with cleaning, not stripping. A surprising number of pieces look dramatically better after a careful wash and wax. Translation: do the easy thing before the dramatic thing.
1. Dust it thoroughly
Use a dry microfiber cloth or a vacuum with a soft brush attachment to remove loose dust, cobwebs, and debris. Dust may seem harmless, but grinding it into the surface while cleaning can create tiny scratches. If your piece has carved details, turn to a soft brush, cotton swabs, or a vacuum brush attachment to get into those ornate grooves where dust goes to build a retirement community.
2. Test in a hidden area
Always test your cleaner on the back, underside, or inside of a drawer first. Old finishes can be fussy. A product that works beautifully on one table may make another look offended and permanently cloudy.
3. Wash gently with a damp, not wet, cloth
Mix a few drops of mild dish soap into warm water. Dip a microfiber cloth into the solution, then wring it out well so it is just damp. Wipe with the grain, working section by section. Do not soak the wood. Water that sits on the surface can damage finishes, raise the grain, or seep into joints.
Immediately follow with a dry cloth. This step matters more than people think. Wood and standing moisture are not best friends. They are barely friendly acquaintances.
4. Tackle sticky grime carefully
If the piece has greasy buildup, old wax residue, or that mysterious tacky feeling that says, “someone loved lemon polish a little too much,” you may need a stronger approach. A small amount of mineral spirits on a clean cloth can help cut through residue on many finished surfaces. Work gently, keep the area ventilated, and test first. This is especially helpful before deciding whether a piece needs full refinishing, because built-up grime can disguise a finish that is still salvageable.
5. Clean hardware separately
Remove knobs, pulls, hinges, and decorative hardware if possible. Label everything as you go so you are not left holding a tiny screw and wondering what life choices brought you here. Clean hardware separately with an appropriate metal-safe method. Never soak wooden parts or let metal cleaner smear onto the wood finish.
6. Handle surface mold with care
If you see light surface mold, start by vacuuming loose spores with a HEPA-equipped vacuum if you have one. Then lightly treat the area with a small amount of a suitable mold-cleaning method for wood, using minimal moisture and making sure the piece dries completely in a well-ventilated space. If mold is widespread, deeply embedded, or keeps returning, the bigger issue is moisture. Fix that first, or the mold will be back like an uninvited sequel.
How To Restore Common Problems
Once the piece is clean, you can tell what is dirt and what is actual damage. That is when restoration becomes less guesswork and more strategy.
Dull finish
If the finish is intact but lifeless, a quality paste wax or restoration product may be enough. Apply lightly, work with the grain, then buff with a clean cloth. This can revive sheen, improve color depth, and make the surface feel smooth again. For some pieces, that is the whole miracle. No sanding. No stripping. No existential crisis.
Minor scratches
Light scratches often become less visible after waxing or using a touch-up marker or colored wax stick that matches the wood tone. Work gradually. You are trying to blend the flaw, not create an entirely new one.
Water rings and dark stains
White rings often sit in the finish rather than the wood itself, so sometimes gentle restoration is enough. Dark stains are more serious and usually mean moisture penetrated deeper. If a stain remains after cleaning and surface treatment, the area may need sanding and refinishing. For black water marks or rust-related stains on bare wood, some restorers use oxalic acid, but this is a serious product that requires proper protective gear, ventilation, and careful label-following. If that sounds like a lot, that is because it is.
Loose joints
Wobbly chairs and tables are usually asking for glue, not denial. Disassemble only as much as needed, remove failed glue if possible, apply fresh wood glue, clamp the joint securely, and allow full cure time. Do not sit in the chair “just to test it” after 12 minutes. Wood glue does not care about your optimism.
Dents, chips, and gouges
Use a stainable wood filler or putty for deeper damage if you plan to refinish. Once dry, sand it flush. For tiny nicks, a wax filler stick can be enough. The goal is to repair the surface so the final finish looks intentional, not like a cover-up operation.
Dry-looking wood
Do not assume every thirsty-looking piece needs oil. Sometimes the finish is just dirty. Clean first. If the wood still looks faded and the finish is compatible, a wax-based conditioner or carefully selected restorative product can help. Be cautious with trendy miracle oils and internet shortcuts. Wood furniture deserves better than random pantry chemistry.
When A Full Refinish Is The Right Move
Sometimes cleaning and touch-up work are not enough. If the finish is flaking, deeply scratched, sticky beyond repair, water-damaged, or patched so many times it looks like a history of bad decisions, full refinishing may be the best route.
A full refinish also makes sense when:
- The existing finish is mostly gone
- You want to change the stain color or paint the piece
- Repairs need to be blended into a new finish
- Water or sun damage has left the surface uneven
- The piece is sturdy and worth the effort
What you should not do is refinish every old piece on autopilot. Patina can be beautiful. Wear can be honest. A hundred-year-old table does not need to look like it was born yesterday. It just needs to stop looking abandoned.
How To Refinish Old Wood Furniture Step By Step
1. Remove hardware and label parts
Take off knobs, handles, hinges, removable shelves, and drawers. Store small parts in labeled bags. Future-you will be deeply grateful.
2. Clean before sanding or stripping
Never skip this. Dirt, wax, and grease interfere with sanding and stain absorption. They also make you work harder for worse results, which is a rude combination.
3. Strip or sand off the old finish
You can remove finish with a chemical stripper, sanding, or a combination of both. Stripper can be useful for ornate pieces where sandpaper cannot easily reach. Sanding is often enough for simpler surfaces. If you use a stripper, scrape gently with the grain and remove residue as directed before moving on. Work in a ventilated area and wear gloves and a respirator where appropriate.
4. Make repairs
Fill holes, glue loose joints, reattach veneer if necessary, and let everything cure fully before sanding. This is the structural phase. Cosmetics can wait.
5. Sand progressively
For many projects, start around 120 or 150 grit, then move to 180 and finish at 220 grit for a smooth surface. Sand with the grain. Use a block on flat areas and hand-sand edges and profiles. Be extra careful with veneer, since over-sanding can go from “nearly perfect” to “well, that is unfortunate” in one minute flat.
6. Remove all dust
Vacuum the surface, then wipe it with a tack cloth or a barely damp lint-free cloth. Any leftover dust will show up in the new finish like glitter at a formal event. Persistent and impossible to ignore.
7. Apply stain, paint, or clear finish
If you love the wood grain, stain and topcoat are usually the move. If the wood is mismatched, heavily patched, or you are going for a fresh design look, paint may make more sense. Always test your color first. Wood species, old stain, and sanding patterns can all change the final look.
For a natural wood finish, apply stain evenly, wipe away excess, let it dry fully, then protect it with an appropriate topcoat such as polyurethane, wiping varnish, lacquer, or wax, depending on the piece and the look you want. For painted furniture, prime when needed, sand lightly between coats, and seal if the product or use case calls for it.
8. Let it cure before heavy use
Dry is not the same as cured. A table that feels dry to the touch may still be soft enough to pick up rings, dents, or texture from a decorative bowl. Give the finish the cure time it deserves.
Best Finishes For Restored Wood Furniture
Wax
Best for low-use pieces, antiques, and soft sheen. Wax looks warm and elegant, but it is not the toughest option for surfaces that take daily abuse.
Oil-based or wiping finishes
Great for bringing out grain and color. These can look rich and classic, though they may require more drying time and a bit more patience.
Polyurethane
Good for dining tables, desks, and heavily used surfaces. It offers strong protection, though the look can range from beautiful to plasticky if applied too heavily.
Paint
Perfect when the wood is not especially pretty, repairs are obvious, or your style says “moody black sideboard” instead of “museum restoration.” Use good prep, good primer, and don’t rush.
Mistakes To Avoid
- Using too much water
- Skipping the test spot
- Sanding veneer too aggressively
- Refinishing a valuable antique without research
- Ignoring possible lead paint
- Applying finish over dust or grease
- Choosing a dark stain to hide every problem
- Not waiting long enough between coats
- Assuming every scratch needs a total refinish
How To Keep Restored Wood Furniture Looking Good
Once your piece is restored, maintenance gets much easier. Dust regularly with a soft cloth. Clean spills quickly. Avoid direct sunlight when possible, since UV exposure can fade wood and finishes over time. Use coasters, felt pads, and common sense, which remains the least expensive furniture-protection tool on the market.
Keep humidity reasonably stable if you can. Extreme dryness can cause cracking, while excessive moisture invites swelling, mold, and finish problems. Also, resist the temptation to coat everything in spray polish every weekend. More product does not always mean more beauty. Sometimes it just means more buildup.
What I Learned From Cleaning And Restoring Old Wood Furniture
The first time I tried to restore an old wood side table, I was wildly confident for someone whose entire plan was basically “wipe it and hope.” The table had been living in a garage long enough to develop a personality. It was dull, sticky, and covered in a film that suggested at least three decades of furniture polish, dust, and bad storage decisions. I was sure it needed a dramatic refinish. In reality, it needed a careful cleaning, a little patience, and for me to stop acting like every project required a power sander.
What surprised me most was how much better the piece looked after the first proper wash. Once I used a barely damp cloth, worked in small sections, and dried it immediately, the wood grain started to show again. The top still had scratches, but the table suddenly looked like a tired old piece with potential instead of something one step away from the curb. That experience changed the way I approach wood furniture. Now I always clean first and make major decisions later.
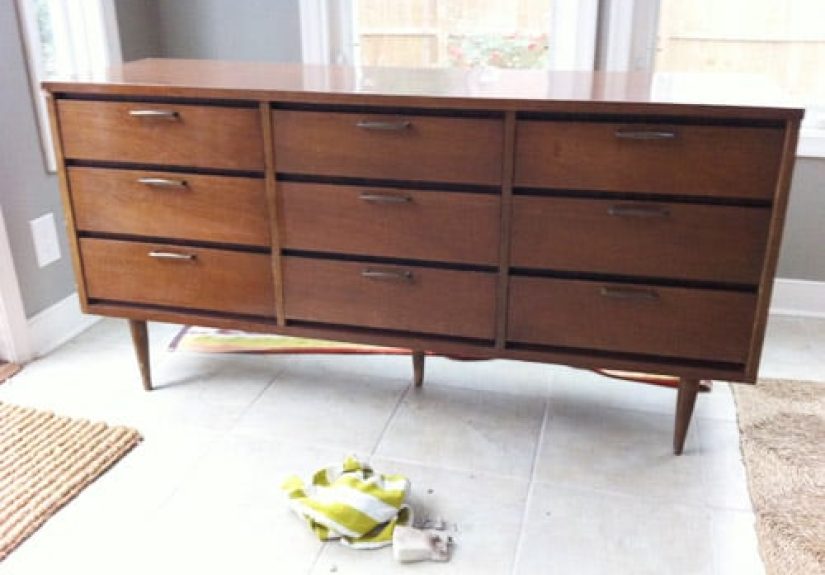
Another lesson came from a vintage dresser with loose drawer pulls and one drawer that refused to close unless you sweet-talked it. I thought the finish was ruined, but after removing the hardware, cleaning out the grime, and waxing the surface, it turned out the dresser was mostly just neglected. The biggest improvement came from tightening joints, cleaning the tracks, and replacing missing screws. That project taught me that restoration is not only about surface beauty. Function matters. A gorgeous dresser that cannot open is basically a wooden sculpture with storage-related trust issues.
I also learned that sanding has a way of humbling people. On one chair, I got too aggressive around an edge and nearly burned through the veneer. That moment lives rent-free in my memory. Since then, I treat edges, corners, and thin surfaces like delicate areas instead of battle zones. Slow, steady sanding with the grain is not exciting, but it beats trying to explain why your “careful restoration” now includes an accidental bald patch.
The most rewarding projects are usually the ones where you leave some history intact. A few softened dings, a little color variation, and the occasional tiny mark can make a piece feel real. Not every old table needs to look factory-fresh. Sometimes the charm is in the evidence that the furniture has been used, moved, loved, and survived at least one era of questionable decorating trends.
If there is one takeaway I keep coming back to, it is this: old wood furniture usually responds better to patience than force. Clean gently. Repair thoughtfully. Refinish only when the piece truly asks for it. And if you ever find yourself halfway through a project, covered in sanding dust, staring at six identical screws and one mystery bracket, know this: you are not failing. You are simply having the authentic furniture-restoration experience.
Final Thoughts
Cleaning and restoring old wood furniture is part maintenance, part detective work, and part restraint. The best results usually come from starting with the least aggressive method, learning what the piece needs, and only escalating when necessary. A gentle clean might be enough. A wax and a few repairs might transform it. Or the piece may truly need stripping, sanding, staining, and sealing to earn a second life.
Either way, old wood furniture rewards thoughtful effort. It brings warmth, craftsmanship, and soul into a space in a way fast furniture rarely can. So the next time you spot a tired table or sad dresser, do not assume it is done for. It may just be one careful restoration away from becoming the best-looking thing in the room.


