Table of Contents >> Show >> Hide
- What Is a Light Sensor?
- Before You Start: Safety and Planning
- Simple Ways to Wire a Light Sensor: 15 Steps
- Step 1: Choose the Right Type of Light Sensor
- Step 2: Read the Wiring Diagram Twice
- Step 3: Confirm the Power Rating
- Step 4: Turn Off Power at the Breaker
- Step 5: Verify the Circuit Is Dead
- Step 6: Remove the Old Fixture or Switch
- Step 7: Identify Line, Load, Neutral, and Ground
- Step 8: Prepare the Box and Mounting Hardware
- Step 9: Connect the Ground Wire
- Step 10: Connect the Neutral Wire
- Step 11: Connect the Line Wire
- Step 12: Connect the Load Wire
- Step 13: Handle Travelers in Three-Way Circuits Carefully
- Step 14: Tuck Wires Neatly and Mount the Sensor
- Step 15: Restore Power and Test the Sensor
- Common Wiring Examples
- Where to Install a Light Sensor for Best Results
- Troubleshooting After Wiring a Light Sensor
- When to Call an Electrician
- Extra Experience Notes: What Homeowners Learn After Wiring a Light Sensor
- Conclusion
Wiring a light sensor sounds like the kind of project that belongs in a secret electrician handbook guarded by a dragon wearing a tool belt. The good news? Many basic light sensor installations are surprisingly straightforward when you understand what each wire does, follow the manufacturer’s diagram, and treat electricity with the respect it deserves. The not-so-fun news? Guessing is not a wiring strategy. It is how breakers trip, lights flicker, and perfectly innocent Saturday afternoons become emergency phone calls.
This guide explains simple ways to wire a light sensor in 15 practical steps. Whether you are installing a dusk-to-dawn photocell on an outdoor light, replacing a regular wall switch with an occupancy sensor, or connecting a motion sensor security fixture, the core idea is the same: the sensor sits between the power source and the light, then decides when the light should turn on or off.
Before you grab a screwdriver, remember this article is for educational home-improvement guidance. Electrical rules vary by location, and some jobs require a permit or licensed electrician. If your wiring looks old, damaged, aluminum, ungrounded, overcrowded, or confusing, stop and call a professional. Bravery is great. Bravery with a voltage tester is better.
What Is a Light Sensor?
A light sensor is a device that automatically controls lighting based on motion, occupancy, or ambient light. In everyday home projects, “light sensor” usually means one of three things:
1. Photocell or Dusk-to-Dawn Sensor
A photocell detects daylight. When the area gets dark, the sensor turns the light on. When morning arrives, it turns the light off. These are common on porch lights, barn lights, parking lights, landscape lighting, and outdoor security fixtures.
2. Motion Sensor
A motion sensor turns lights on when it detects movement. Many outdoor security lights use passive infrared technology, often called PIR, to sense changes in heat and movement. Motion sensors are popular for garages, driveways, side yards, sheds, and “what was that noise?” zones.
3. Occupancy or Vacancy Sensor Switch
An occupancy sensor replaces or works with a wall switch. It turns lights on or off based on room activity. A vacancy sensor usually requires you to turn the light on manually, then turns it off automatically when the room is empty. These are handy in bathrooms, laundry rooms, closets, basements, and kids’ rooms where lights apparently become invisible after use.
Before You Start: Safety and Planning
Light sensor wiring is not difficult, but it must be done carefully. Most residential lighting circuits in the United States use black or red wires for hot conductors, white for neutral, and green or bare copper for ground. However, wire colors are not a promise. Previous repairs, old wiring, switch loops, three-way circuits, and creative “my cousin knew a guy” installations can change what you see in the box.
You will usually need a non-contact voltage tester, screwdriver, wire stripper, approved wire connectors, electrical tape, ladder, flashlight, and the installation manual that came with the sensor. For outdoor projects, use weather-rated fixtures, gaskets, covers, and junction boxes. A sensor mounted outdoors should be rated for damp or wet locations depending on where it is installed.
Also check the sensor rating. A tiny photocell or motion sensor cannot control unlimited lights. Compare the sensor’s voltage and maximum wattage or amperage rating with the fixture or fixtures it will control. LED fixtures draw less power than older incandescent bulbs, but compatibility still matters. Some sensor switches require a neutral wire; others may require a ground to function correctly. Read the label before wiring anything.
Simple Ways to Wire a Light Sensor: 15 Steps
Step 1: Choose the Right Type of Light Sensor
Start by matching the sensor to the job. Use a photocell for dusk-to-dawn lighting, a motion sensor for security lighting, and an occupancy sensor switch for indoor automatic control. For example, a porch light that should turn on every evening needs a photocell. A driveway floodlight that should activate only when someone walks by needs a motion sensor. A laundry room light that everyone forgets to turn off needs an occupancy sensor switch.
Step 2: Read the Wiring Diagram Twice
The sensor’s wiring diagram is not decorative packaging filler. It is the map. Look for labels such as line, load, neutral, ground, traveler, red, black, white, blue, or yellow. Different brands use different lead colors. On many basic photocells, black connects to incoming hot power, white connects to neutral, and red connects to the light load. On many motion fixtures, black is line, white is neutral, and green or bare copper is ground. On wall sensor switches, the colors and terminals can vary more, especially for three-way wiring.
Step 3: Confirm the Power Rating
Check the sensor’s voltage rating. Most standard residential lighting projects are 120 volts, but outdoor, commercial, or specialty lights may differ. Also confirm the load rating. If one sensor controls multiple fixtures, add up the total wattage or amperage. Do not exceed the sensor’s rating. A sensor is a control device, not a superhero cape for overloaded wiring.
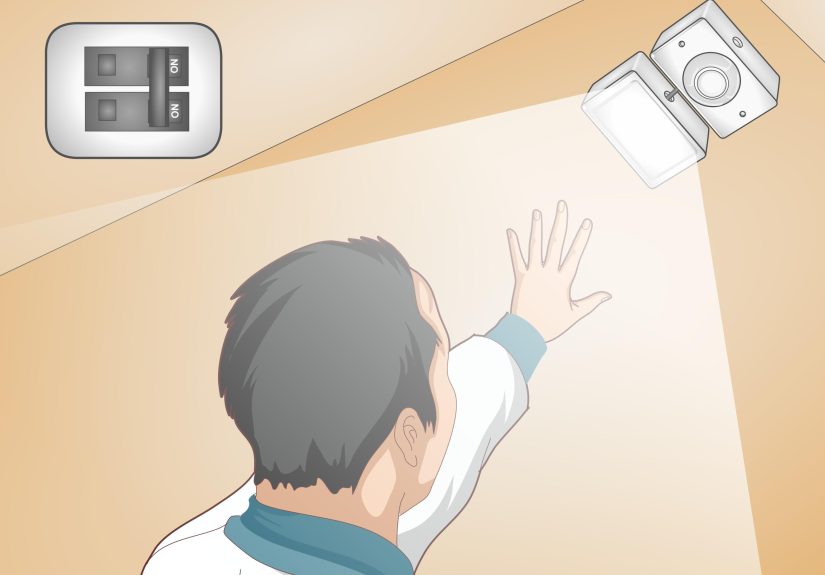
Step 4: Turn Off Power at the Breaker
Find the circuit breaker that controls the light or switch and turn it off. Do not rely only on the wall switch. A wall switch may interrupt one conductor while power is still present in the box. Tape a note over the breaker if someone else is home: “Do not turn on. Human attached to wires.” That usually gets the point across.
Step 5: Verify the Circuit Is Dead
Use a voltage tester before touching any wire. Test the tool on a known live source first, then test the wires in the box, then test the tool again. This “test before and after” habit helps confirm the tester is working. If the tester shows voltage after the breaker is off, stop and identify the correct circuit. If you cannot, call an electrician.
Step 6: Remove the Old Fixture or Switch
For an outdoor fixture, remove the old light from its mounting bracket while supporting it so it does not hang by the wires. For an indoor switch, remove the wall plate and carefully pull the switch from the box. Take a photo before disconnecting anything. Your future self will look at that photo like it is a treasure map.
Step 7: Identify Line, Load, Neutral, and Ground
The line wire brings power from the panel. The load wire carries switched power to the light. The neutral completes the circuit. The ground provides a safety path. In a simple switch box, the white neutral wires may be tucked in the back and not connected to the old switch. In older switch loops, there may be no neutral in the switch box at all. If your sensor requires a neutral and there is none available, do not fake it by using the ground. Choose a different compatible sensor or hire an electrician to run proper wiring.
Step 8: Prepare the Box and Mounting Hardware
Inspect the electrical box. It should be secure, large enough for the wires and device, and appropriate for the location. Outdoor boxes and covers should be weatherproof. Replace cracked gaskets, missing screws, and loose mounting straps. A light sensor mounted outside should not leave gaps where rain can sneak in like an uninvited raccoon.
Step 9: Connect the Ground Wire
Connect the green or bare copper ground from the sensor or fixture to the circuit ground using an approved wire connector or grounding screw, depending on the design. If the box is metal, it may also need to be bonded to ground. Grounding is not optional decoration. It is a safety feature.
Step 10: Connect the Neutral Wire
For sensors that require a neutral, connect the sensor’s neutral lead to the circuit neutral. This is commonly white to white, but always confirm with the product manual. For many outdoor fixtures and photocells, the fixture neutral, photocell neutral, and supply neutral may all connect together. Make sure the wire connector is properly sized and secure.
Step 11: Connect the Line Wire
Connect incoming hot power to the sensor’s line lead or terminal. This is often black, but not always. On a photocell, the black sensor wire commonly receives incoming hot power. On a wall occupancy sensor, the line terminal may be labeled “line,” “hot,” or sometimes marked by a dark screw or specific lead color.
Step 12: Connect the Load Wire
Connect the sensor’s load output to the light fixture. On many photocells, the red wire sends switched power to the light. On many motion lights, this connection is already made inside the fixture. On a wall sensor switch, the load wire goes to the terminal or lead marked “load.” This is the wire that lets the sensor say, “Yes, lamp, now is your moment.”
Step 13: Handle Travelers in Three-Way Circuits Carefully
If the light is controlled from two locations, you are dealing with a three-way circuit. Three-way sensor switches are more complex than single-pole switches. You may see traveler wires, a common terminal, and different wiring methods depending on where power enters the circuit. Use a sensor specifically rated for three-way use and follow the diagram exactly. If the instructions do not clearly match your wiring, do not improvise. Three-way circuits are where confidence goes to get humbled.
Step 14: Tuck Wires Neatly and Mount the Sensor
After all connections are tight, gently fold the wires into the box. Do not crush, sharply bend, or pinch them. Mount the sensor, switch, or fixture according to the instructions. For motion lights, aim the sensor toward the detection zone, not directly at moving tree branches, HVAC vents, reflective glass, or busy streets. For photocells, avoid pointing the sensor toward artificial light sources that could trick it into thinking the sun came back from vacation.
Step 15: Restore Power and Test the Sensor
Turn the breaker back on and test the light. For a photocell, cover the sensor with your hand or dark tape to simulate night. Some photocells have a short delay, so give it a moment. For a motion sensor, walk through the detection area and adjust sensitivity, range, and timer settings. For an occupancy sensor, test both automatic and manual functions. If the light does not work, turn the breaker off before checking wiring.
Common Wiring Examples
Basic Photocell Wiring
A common 120-volt photocell has three wires. The black wire connects to incoming hot power. The red wire connects to the light’s hot lead. The white wire connects to neutral along with the light’s neutral. When it gets dark, the photocell allows power to flow from line to load, turning the light on. When daylight returns, it opens the circuit and turns the light off.
Outdoor Motion Sensor Fixture Wiring
Many motion security lights come prewired internally. You usually connect black fixture wire to supply hot, white fixture wire to supply neutral, and green or bare copper to ground. Some fixtures include an extra red lead for controlling an additional remote fixture. If you are not using the extra lead, cap it according to the instructions.
Wall Occupancy Sensor Switch Wiring
A single-pole occupancy sensor switch typically connects to line, load, ground, and sometimes neutral. Some models can work without a neutral, but they may require a ground or have bulb compatibility limits. Neutral-required models often perform better with LED lighting, but only if your switch box actually contains neutral conductors.
Where to Install a Light Sensor for Best Results
Good wiring makes the sensor safe. Good placement makes it useful. For photocells, choose a location that sees natural daylight but not direct artificial light from the fixture it controls. If the sensor “sees” its own light, it may cycle on and off like it cannot make up its mind at a restaurant.
For motion sensors, mount the device so people move across the detection zone rather than straight toward it. Many PIR sensors detect side-to-side motion more reliably than direct approach. Keep the sensor away from heat sources, dryer vents, air conditioners, reflective surfaces, and swinging branches.
For indoor occupancy sensors, install them where they have a clear view of the room. A sensor hidden behind a door, cabinet, coat rack, or tall laundry pile will perform about as well as a guard dog wearing noise-canceling headphones. In bathrooms or closets, make sure the sensor can detect small movements, not just dramatic entrances.
Troubleshooting After Wiring a Light Sensor
The Light Will Not Turn On
Turn the breaker off and check the basics: loose wire connectors, reversed line and load, missing neutral, incorrect bulb type, tripped breaker, or a sensor timer delay. If it is a photocell, cover the sensor and wait. If it is a motion sensor, check whether it is in test mode, manual mode, or daylight-only mode.
The Light Stays On All the Time
A motion sensor may be aimed at constant movement, heat, or traffic. Reduce sensitivity or redirect the sensor. A photocell may be mounted in a place that stays dark during the day. It may also be wired incorrectly so power bypasses the sensor. Always shut off power before inspecting wiring.
The Light Flickers or Cycles
Flickering can come from loose connections, incompatible LED bulbs, an overloaded sensor, or a photocell that sees the light it controls. Try repositioning the sensor or using compatible bulbs. If flickering continues, stop using the fixture until the wiring is checked.
The Breaker Trips
A tripping breaker may indicate a short circuit, ground fault, overloaded circuit, damaged wire, moisture intrusion, or incorrect connections. Do not keep resetting the breaker. Turn it off and call a qualified electrician.
When to Call an Electrician
Call a licensed electrician if you find aluminum wiring, brittle insulation, no ground, no neutral where one is required, water inside the box, melted connectors, buzzing, burning smells, or wiring that does not match the sensor diagram. Also call a pro for new circuits, panel work, buried outdoor wiring, high-mounted fixtures, and multi-location switching that is not clearly explained in the manual.
There is no shame in hiring help. In fact, the most experienced DIYers are often the quickest to say, “This one needs a pro.” That sentence is cheaper than replacing a wall, a fixture, or your eyebrows.
Extra Experience Notes: What Homeowners Learn After Wiring a Light Sensor
After working with light sensors, most homeowners discover that the wiring is only half the story. The other half is behavior. Sensors are tiny decision-makers, and they make decisions based on what they can see, sense, and interpret. A perfectly wired motion light can still behave badly if it is aimed at a maple tree that dances every time the wind sneezes. A perfectly wired photocell can still fail the vibe check if it faces a porch bulb, streetlight, or reflective white wall.
One of the most useful lessons is to test before final tightening. Temporarily restore power only after all wires are safely connected and enclosed enough for testing, then check the sensor’s function before sealing everything permanently. If the light turns on during the day, do not panic. Many sensors have a test mode or delay. Read the small print on the adjustment knobs. Those tiny dials labeled “time,” “sens,” “lux,” or “range” control how long the light stays on, how sensitive it is, and whether it operates in daylight or darkness.
Another real-world tip: do not aim outdoor motion sensors too high. Many people point them toward the horizon like they are scanning for UFOs. That often creates false triggers from cars, pedestrians, branches, animals, or heat shimmer. A slightly downward angle usually works better for driveways, entryways, and side yards. Walk-test the area at night if possible. Daytime testing helps, but nighttime testing shows glare, shadows, and blind spots more honestly.
For photocells, patience matters. Some models do not switch instantly when covered. They may take several seconds or longer to react so they are not fooled by passing clouds, headlights, or quick shadows. If you cover the sensor and nothing happens in two seconds, resist the urge to declare it broken. Give it time, then check the manual’s expected delay.
Indoor occupancy sensors bring their own personality. In a laundry room, they are wonderful. In a bathroom, choose a model that can detect small motion or has a sensible timeout. Nobody wants to wave dramatically from the shower like they are trying to land a helicopter. In a closet, a short timer may be perfect. In a home office, a vacancy sensor can be better than full automatic operation because you control when the light turns on, and the sensor simply handles shutoff.
The biggest experience-based rule is simple: label everything. If you identify line, load, traveler, neutral, and ground, tag them with painter’s tape before disconnecting the old switch or fixture. A photo helps, but a photo plus labels is even better. Future troubleshooting becomes much easier when you are not staring at four black wires wondering which one is the boss.
Finally, use the right materials. Outdoor wire connectors, weatherproof covers, proper gaskets, and compatible bulbs are not upsells; they are what keep the project working after rain, heat, cold, and bugs have had their turn. A light sensor is a small upgrade, but when installed correctly, it makes a home feel smarter, safer, and less dependent on someone remembering to flip a switch.
Conclusion
Wiring a light sensor becomes much less mysterious once you understand the basics: turn off power, verify with a tester, identify the wires, connect line and load correctly, ground the device, use neutral when required, mount the sensor in the right location, and test before calling the job finished. The exact wiring depends on whether you are installing a photocell, motion sensor fixture, or occupancy sensor switch, so the product manual always gets the final vote.
Done correctly, a light sensor can save energy, improve security, and add everyday convenience. It turns porch lights into automatic greeters, garage lights into helpful assistants, and forgotten closet lights into a thing of the past. Just remember: electricity rewards careful work and punishes guessing. When in doubt, bring in a licensed electrician and let your weekend stay peaceful.