Table of Contents >> Show >> Hide
- What Beach Waves Actually Look Like
- What You Need Before You Start
- Step One: Set Up Your Hair for Success
- Method 1: Heatless Beach Waves for Low-Effort Days
- Method 2: Beach Waves with a Curling Iron
- Method 3: Beach Waves with a Flat Iron
- Method 4: The Blow-Dryer Twist Hack
- How to Get Beach Waves by Hair Type
- Common Mistakes That Ruin Beach Waves
- How to Make Beach Waves Last Longer
- Beach Waves for Real Life, Not Just Photos
- Conclusion
- Experiences: What People Learn After Chasing the Perfect Beach Waves
Beach waves are the hair equivalent of saying, “Oh, this old thing?” while secretly knowing you look fantastic. They are soft, a little messy, a little polished, and somehow manage to make a plain T-shirt feel intentional. Best of all, beach waves work on almost every hair length and texture when you use the right method. You do not need an actual beach, a yacht, or a playlist full of ukulele covers. You just need a smart routine, a few simple tools, and the willingness to stop fighting your hair like it personally offended you.
If your goal is hair that looks undone in the best possible way, this guide walks you through exactly how to get easy breezy effortless beach waves with or without heat. You will also learn how to tweak the look for fine hair, thick hair, short hair, and naturally wavy or curly hair. In other words, this is not a one-size-fits-all tutorial. It is a real-world guide for people who want movement, texture, and volume without ending up with crunchy strands or pageant curls.
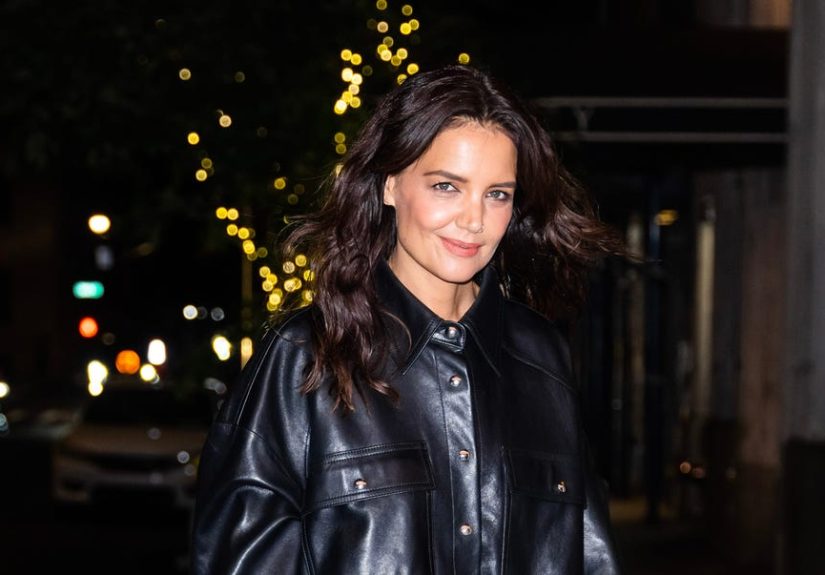
What Beach Waves Actually Look Like
Before you pick up a curling iron or start braiding damp hair, it helps to know what you are aiming for. Beach waves are not perfect ringlets. They are looser than formal curls, less uniform than salon blowout bends, and more relaxed than mermaid waves. The finished look should have movement through the mid-lengths, softly textured ends, and enough imperfection to feel natural.
That means two things. First, the waves should not all curl in the exact same direction. Second, the ends should usually stay a bit straighter. That little detail makes a huge difference. It keeps the style modern and gives you that “I woke up cute” energy instead of “I spent 90 minutes wrestling a barrel iron.”
What You Need Before You Start
You do not need a vanity the size of a dressing room, but a few basics make the process much easier:
- A heat protectant if you are using hot tools
- A lightweight mousse, texturizing spray, or sea salt spray
- Hair clips for sectioning
- A microfiber towel or soft cotton T-shirt
- A curling iron, flat iron, diffuser, or no-heat styling accessory depending on your method
- A light hair oil or smoothing cream for the ends
- A flexible-hold hairspray if your hair drops faster than your weekend plans
The best beach waves usually start with hair that is not soaking wet and not bone dry either. Damp hair is ideal for heatless styling and twist methods. For hot tools, hair should be fully dry first. Styling wet hair with heat is a great way to invite frizz, damage, and regret.
Step One: Set Up Your Hair for Success
Start with the right wash day mindset
If your hair is freshly washed, avoid using heavy masks, thick creams, or too much conditioner near the roots. Beach waves need some grip. Super-slick hair often refuses to hold texture and then acts innocent about it later. Apply conditioner mainly from the mid-lengths down, then rinse well.
Dry gently, not aggressively
Rough towel-drying can puff up the cuticle and create frizz before your style even begins. Instead, squeeze out excess water with a microfiber towel or cotton T-shirt. Press and blot. Do not rub like you are polishing a car.
Use product with restraint
For fine or thin hair, less is more. A small amount of mousse or texturizing spray gives lift without turning the hair limp. For thicker hair, you can use a little more product to help hold shape. Sea salt spray can be great for texture, but too much can leave hair dry, stiff, or weirdly crunchy. Think “beachy,” not “accidentally preserved by the ocean.”
Method 1: Heatless Beach Waves for Low-Effort Days
If you want effortless beach waves with minimal damage, this is your lane. Heatless methods work especially well when you plan ahead and style damp hair before bed or a few hours before heading out.
Option A: Loose Braids Overnight
This classic method is simple for a reason: it works. Start with slightly damp hair. Add a bit of wave-enhancing mousse or a texturizing spray through the mid-lengths and ends. Split the hair into two or four sections depending on thickness, then braid each section loosely. Secure the ends with soft ties and leave them in overnight or until fully dry.
In the morning, undo the braids and rake through the waves with your fingers. If the pattern looks too uniform, shake out the roots and spritz a little dry texture spray. This method is best for medium to long hair and creates a soft, casual wave that looks best on day two.
Option B: Twist-and-Clip Waves
For an even looser bend, divide damp hair into two large sections, twist each section away from the face, then clip or pin them in place. Let the twists dry completely. When you take them down, the result is more relaxed than braid waves and often looks more natural, especially if you prefer that airy “just came back from a boardwalk stroll” finish.
Option C: Heatless Curl Rod or Robe Tie Method
This method became wildly popular because it gives soft, polished waves without heat. Wrap sections of slightly damp hair around a soft rod, robe tie, or heatless curler headband, then secure the ends. Sleep on it or leave it in for several hours. Once released, finger-comb the waves and separate any pieces that look too perfect. A drop of lightweight oil on the ends helps keep the look soft and touchable.
Method 2: Beach Waves with a Curling Iron
If you want more control, a curling iron or wand is the quickest way to create beach waves. The trick is using it like a tool, not like a magic wand from a princess movie. Technique matters.
How to do it
- Make sure your hair is fully dry and protected with a heat protectant.
- Section hair into layers, clipping the top up.
- Take one- to two-inch pieces, depending on your density.
- Wrap the hair around the barrel, but leave the last inch or so out.
- Alternate directions with each section for a natural finish.
- Keep the iron vertical for looser, more beachy movement.
- Let the waves cool before touching them.
- Break them up with your fingers, then add a texture spray.
A one-inch barrel works well for shorter hair or finer hair that needs more definition. A larger barrel creates looser bends that suit medium to long hair. If your hair tends to fall flat, clip each warm wave up for a minute to cool and set before releasing it.
Method 3: Beach Waves with a Flat Iron
Yes, a flat iron can make beach waves. No, it is not witchcraft. It just takes a little wrist action.
Clamp a small section near the top, twist the iron away from your face, then glide it down a bit. Reverse the direction slightly as you continue moving down the strand to create an “S” pattern. Keep the motion fluid. If you stop too long in one spot, you may create a bend sharp enough to qualify as geometry.
This method is especially good for short to medium lengths and for people who want waves that feel slightly cooler and more undone. Finish by separating the sections with your fingers and adding a texturizing mist through the mid-lengths.
Method 4: The Blow-Dryer Twist Hack
Need beach waves fast? Start with damp hair and divide it into sections. Twist each section tightly, then blow-dry it on a medium heat setting until fully dry. Let the twists cool, then unravel. This method is handy when you want a low-tool look but do not have time to sleep in braids or spend forever with an iron.
If your hair frizzes easily, point the dryer nozzle downward and avoid touching the twists while they cool. Once released, fluff the roots lightly and smooth a tiny amount of oil onto the ends.
How to Get Beach Waves by Hair Type
Fine Hair
Fine hair needs body without too much product. Use lightweight mousse, texture spray, or a volumizing mist. Avoid heavy creams and too much oil. A smaller barrel or tighter braid helps the wave last longer. Flip your part or gently tease the roots if you want a little more lift.
Thick Hair
Thicker hair usually needs sectioning, patience, and a little more hold. Work in clear layers so the style reaches the hidden sections underneath. Use a larger barrel or a twist method for a looser effect, and finish with a flexible hairspray to keep the waves from falling into one giant puff of volume.
Short Hair
Short hair can absolutely do beach waves. In fact, a tousled bob is one of the chicest versions of this style. Use a smaller iron, a mini flat iron, or a compact waver. Work with smaller sections and be careful not to curl all the way to the ends. Short hair looks best when the wave is more bend than spiral.
Naturally Wavy Hair
If your hair already has some bend, congratulations, you are halfway there. Apply a wave-enhancing product to damp hair, scrunch gently, and either air-dry or diffuse on low. Twist a few random front pieces away from the face while they dry to create a more intentional pattern. This method gives the most authentic effortless beach waves because you are enhancing what is already there.
Curly or Coily Hair
For curlier textures, “beach waves” often means stretching curls into a looser pattern rather than forcing them into a completely different texture. Try a twist-out, banding method, or larger heatless sections on damp hair. If using heat, apply strong protection first and use a lower setting. The goal is soft definition and movement, not flattening your natural texture into submission.
Common Mistakes That Ruin Beach Waves
- Using too much product: Hair gets sticky, heavy, and sad.
- Curling every piece the same way: The result looks formal, not effortless.
- Touching hair before it cools or dries: This creates frizz and weakens the wave pattern.
- Skipping heat protectant: Your future ends would like a word.
- Making the ends too curly: Beach waves look better when the ends stay a bit straighter.
- Brushing everything out: Use fingers or a wide-tooth comb instead.
How to Make Beach Waves Last Longer
Longevity depends on prep more than people realize. Start with clean hair that has a little texture, not slippery softness. Use a modest amount of styling product before the wave is formed, then a finishing spray after it cools. Sleeping on a silk or satin pillowcase helps reduce frizz and flattening overnight.
On the next day, refresh with dry shampoo at the roots and a quick mist of texturizing spray through the lengths. Twist a few face-framing pieces around your fingers or touch them up with a single pass of a hot tool if needed. Often, beach waves actually look better on day two, when they relax and stop trying so hard. Relatable.
Beach Waves for Real Life, Not Just Photos
The reason this hairstyle keeps winning is simple: it fits real life. It works for school mornings, work meetings, vacations, brunch, and those random moments when you want to look put together without looking like you tried too hard. It can be polished enough for a dinner out or loose enough for a baseball cap and sunglasses.
The smartest approach is to choose the method that matches your hair and your schedule. If you love low maintenance, lean into heatless braids, twists, and air-drying. If you want quick results before heading out, use a curling iron or flat iron with a light hand. If your natural texture already has some wave, enhance it instead of fighting it. Effortless style rarely comes from doing more. It usually comes from doing the right few things well.
Conclusion
Learning how to get easy breezy effortless beach waves is mostly about understanding what creates that laid-back finish: texture, movement, softness, and a little inconsistency. The best beach waves are not overworked. They are lightly shaped, gently separated, and tailored to your hair type rather than copied from someone else’s tutorial frame by frame.
So whether you braid your hair before bed, twist it with a blow-dryer, or fake it beautifully with a curling iron, the formula stays the same. Protect your hair, use less product than you think you need, keep the ends relaxed, and let the final look stay slightly imperfect. That tiny bit of mess is the magic. Beach waves are supposed to look like you had fun, not like you submitted a formal styling application and waited for approval.
Experiences: What People Learn After Chasing the Perfect Beach Waves
One of the funniest things about beach waves is that the “effortless” version usually comes after a series of very non-effortless experiments. Almost everyone has a beach-wave learning curve. At first, people tend to overdo it. They use too much salt spray, too much heat, too many sections, and then wonder why their hair feels like a decorative broom. The breakthrough usually happens when they realize beach waves are less about forcing shape and more about encouraging it.
A lot of people with fine hair discover that volume and texture are not the same thing. They may spray half a bottle of texture mist onto their hair hoping for lift, only to end up with limp strands that feel oddly sticky. What often works better is a tiny bit of mousse, a quick root lift, and a smaller wave pattern that loosens over time. By midday, the style settles into that soft, airy bend they wanted all along. In other words, patience sometimes does more than product.
People with thick hair often have the opposite experience. They start with big, loose waves that look beautiful for about twenty minutes before dropping into an undefined mass. Then they learn that sectioning the hair properly changes everything. Curling or twisting in layers, letting the shape cool completely, and finishing with a light hold spray gives the style actual staying power. The lesson there is simple: thick hair is generous, but it does demand strategy.
Short-haired people often assume beach waves are reserved for long hair commercial moments where someone dramatically flips waist-length hair in slow motion. Then they try a tousled bob or textured lob and realize the style may actually look even cooler on shorter lengths. The key experience most of them report is that smaller sections and less curling make the look more modern. Once they stop trying to create full curls and start creating bends, everything clicks.
Then there are the naturally wavy and curly-haired folks who spend years trying to “achieve” a texture they already basically own. Their biggest shift often comes from learning to work with their natural pattern instead of flattening it and rebuilding it from scratch. A diffuser, a good scrunch, a few twists around the face, and a lightweight finishing product can create the easiest version of beach waves because the hair already wants to move. The result feels more authentic and usually lasts longer too.
Another common experience is realizing that day-two hair is often superior. Freshly styled beach waves can look a little eager, like they are trying to impress someone. The next morning, after the style relaxes and settles, the waves feel softer, cooler, and somehow more expensive. Many people end up preferring that lived-in texture and build their routines around it.
In the end, most beach-wave success stories sound similar. The winning routine is rarely the most complicated one. It is the one that respects the hair’s natural tendencies, uses just enough product, keeps heat in check, and allows a little imperfection to stay. That is what makes the look believable. And honestly, believable hair is often the prettiest hair in the room.


